As we know, WordPress is the most popular CMS (Content Management System) and is empowering more than 35% of the websites in the world. Most beginners would like to try WordPress on their local PC rather than buying special web hosting to install it. Let’s just assume you just want to install WordPress on a local PC, whatever the purpose may be.
I assume that you’ve already installed XAMPP on your PC, Mac or Linux. If not, kindly install it first by visiting this link.
Installing XAMPP is very easy, and here I’ve embedded a video that can guide you for XAMPP Installation.
Benefits of Installing WordPress Locally on XAMPP
A lot of people will say why install WordPress Locally on XAMPP when nobody else on the Internet can see it. Well, it has got several benefits, which are listed below.
- You can test a new theme, plugin, or anything else on a local copy of your site to make sure everything goes well.
- Beginners can learn new things on a local machine rather than affording costly web hosting services.
- To simply increase your technical knowledge of, how WordPress works!
Steps to Install WordPress on XAMPP
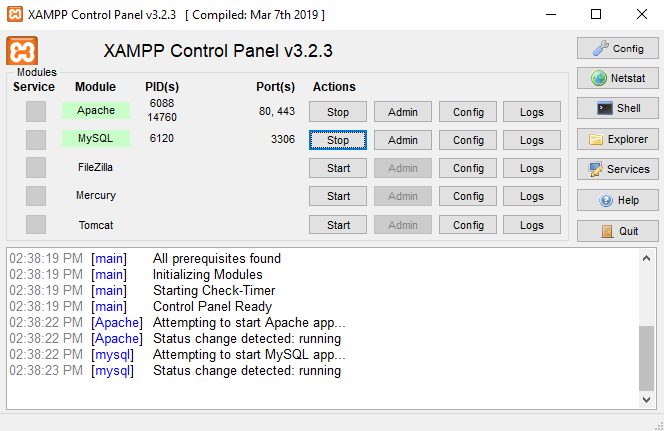
The very first step is to turn on the Apache and MySQL servers with the XAMPP Control Panel and make sure both of them are running as shown in the following screenshot.
Once both the services are started, up and running, go to the official WordPress.org website and download the latest version Zip file. You can also simply click on this link to download the latest version of WordPress.

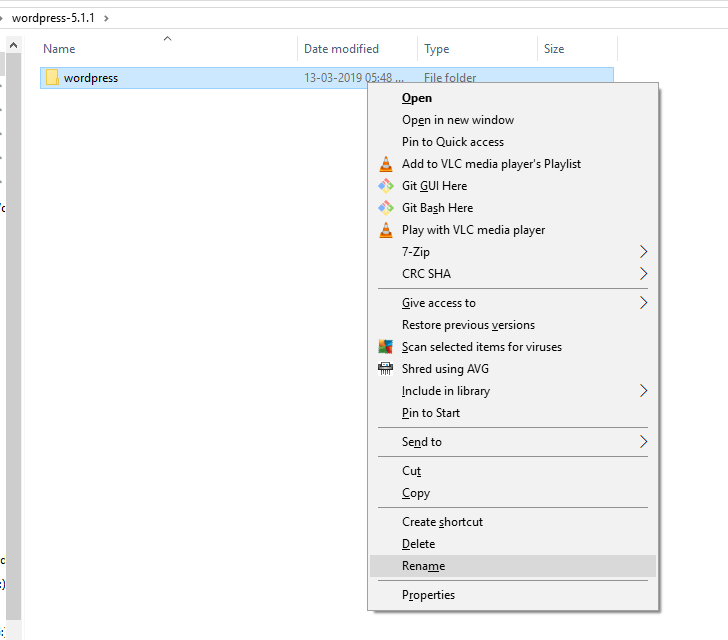
Extract the downloaded zip file and you’ll see one more sub-folder named WordPress in the extracted file folder. Rename this folder to whatever name you want. Just make sure to keep it short and sweet enough to be typed again and again. This name will be going to the URL part of your local WordPress website. For example, in this tutorial, I renamed this folder to abc.
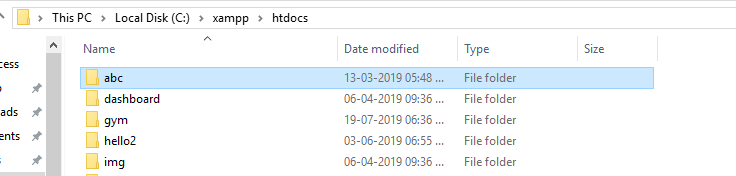
Now go to your XAMPP Installation folder and then go to a folder named as htdocs in it. In my case, the path is, C:\xampp\htdocs
Simply paste the renamed folder here. In my case, I’ve pasted my WordPress folder which I had renamed to abc.
Now that you have successfully pasted the WordPress files to the htdocs folder, you can access it with your Browser.
Simply, go to this URL, http://localhost/{your-folder-name}
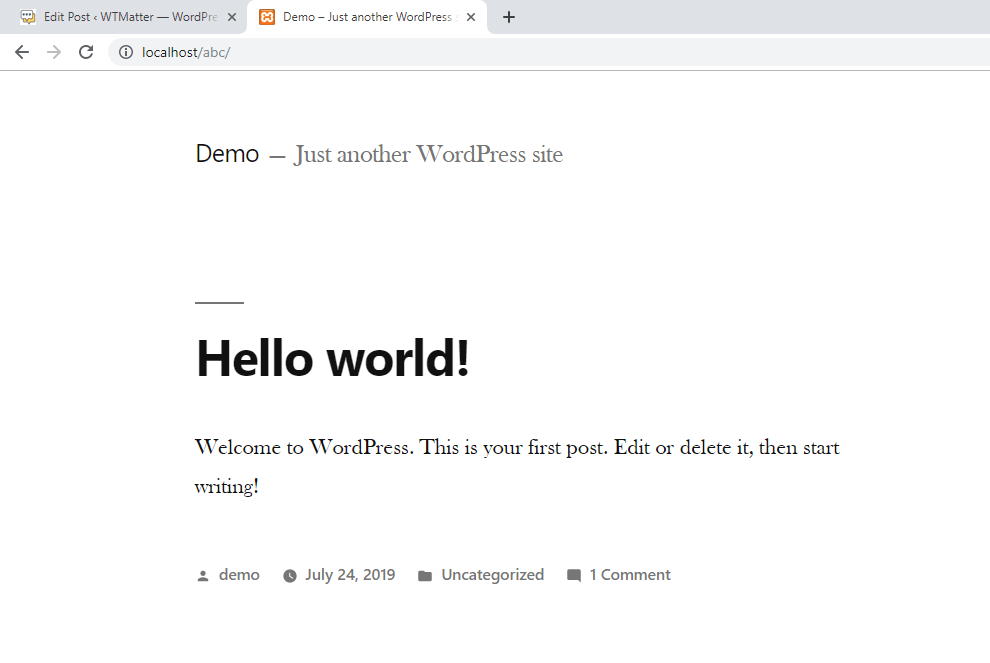
In my case, the URL is http://localhost/abc
It’ll automatically redirect you to the installation URL of the new WordPress site.
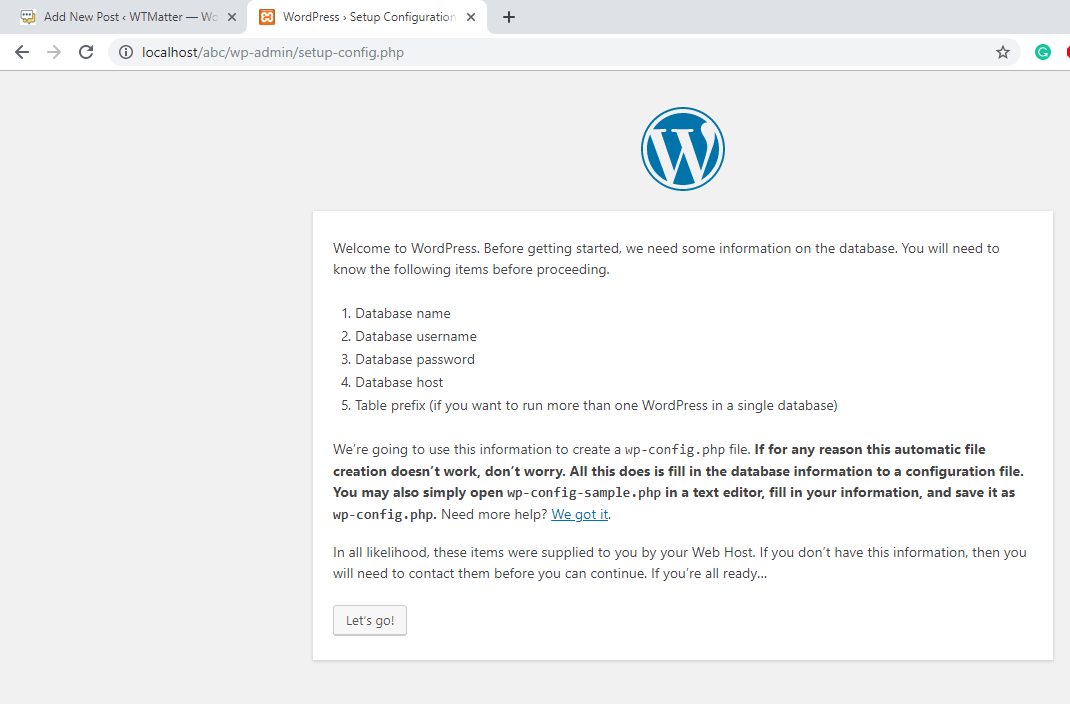
It guides you to know the 5 things before you get started.
- Database name – The name of the database where WordPress will store data items.
- Database username – The username to access that database.
- Database password – The password to authorize it to access the database.
- Database host – it could be localhost for the local PC or another IP of some other host if the machine is connected to a network.
- Table prefix – In case you want to install more than one WordPress Website in a single database, use a prefix to judge the tables associated with your different sites.
In default, XAMPP installation, MySQL root username is root & password is empty, which means simply leaving the password field blank.
Before beginning, further, let’s create the database as it is the first requirement of this process.
Go to http://localhost/phpmyadmin. This will open the PHPMyAdmin Graphical User Interface to manage the MySQL databases.

Simply click on the new link in the left pane under the logo of phpMyAdmin. This will open the New Database page. Enter the database name, keep it short & sweet. Leave the other option as it is and click on the create button. In our case, I named the database to abc as well.
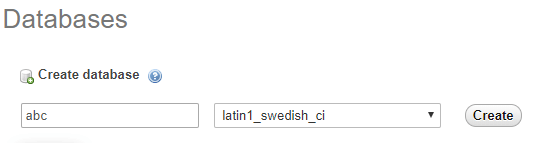
That’s it, we’ve successfully created the MySQL Database.
Simply, click on the Let’s go button to start the installation process of the WordPress site on your local machine.
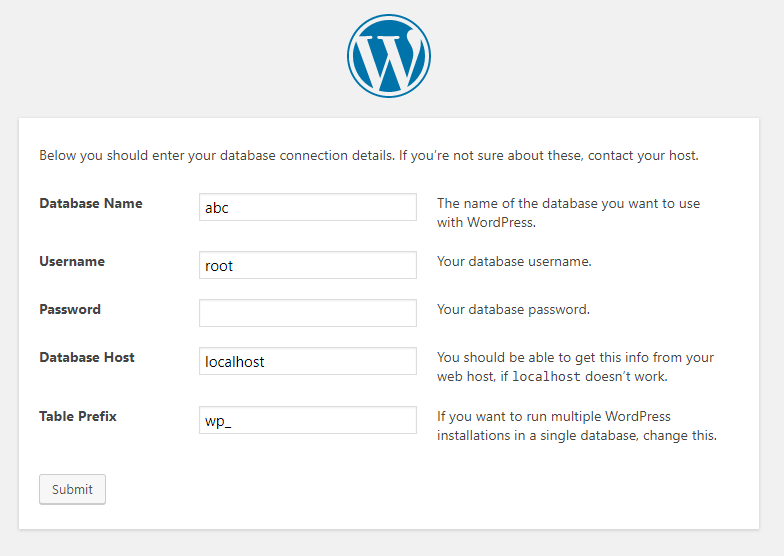
You can see in the above screenshot, we’ve entered the details. You can fill in the details as you created the database. Make sure that you use the right information here because any mistake here, will not allow you to proceed to the next step. This will basically check if the details are correct or not by establishing a connection with the database.
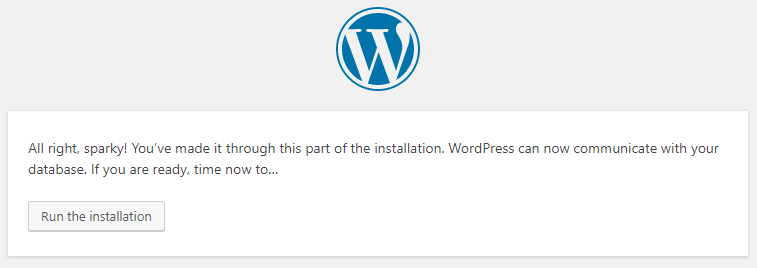
So, we’ve got the right details and it can now communicate with the Database. Simply click on the Run the Installation button to proceed. In the next step, you need to enter the most basic site details.
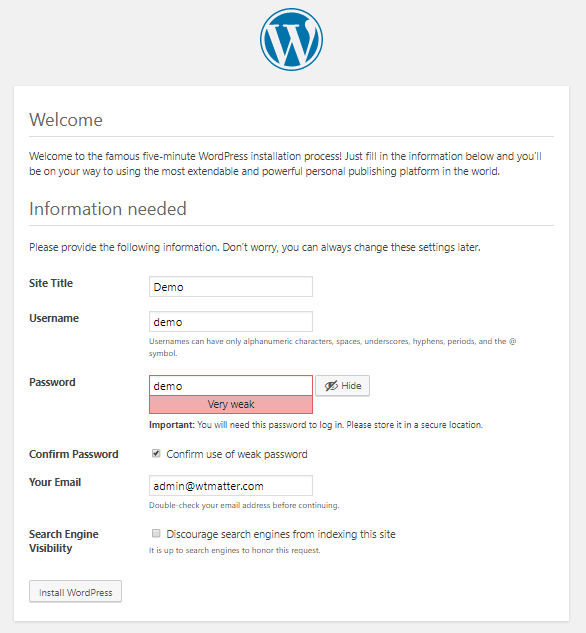
Just fill in this information quickly. As I am installing just for the tutorial, I just entered the demo everywhere. If you’ve entered a weak password, it’ll ask you to check the next option to confirm proceeding with the weak password. The search Engine Visibility option has no significance in localhost. Checking this option asks search engines not to index this site & its pages on the search engine but as localhost is not connected to the internet, the site is obviously not going to index the other way. Therefore, this option has no significance in local PC WordPress Installation.
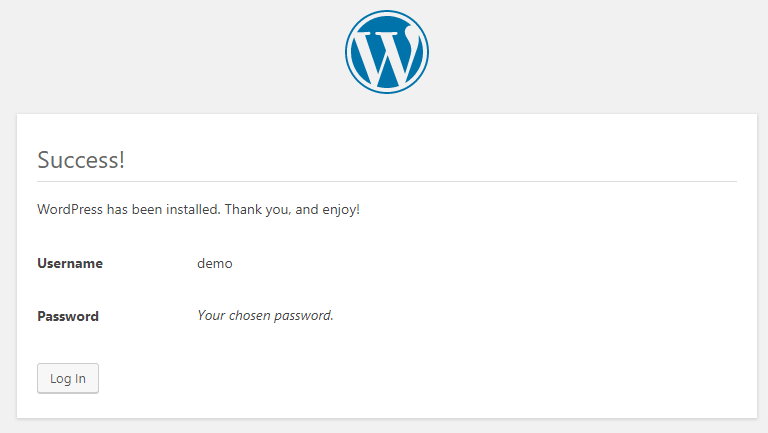
Simply click on Install WordPress and Congratulations, you’ll find WordPress installed in a few seconds.
Now that you’ve installed WordPress on XAMPP successfully, you can log into the WordPress Dashboard by clicking on the Login button or by visiting the following URL.
http://localhost/{your-site-name}/wp-login.php
In my case, it is http://localhost/abc/wp-login.php
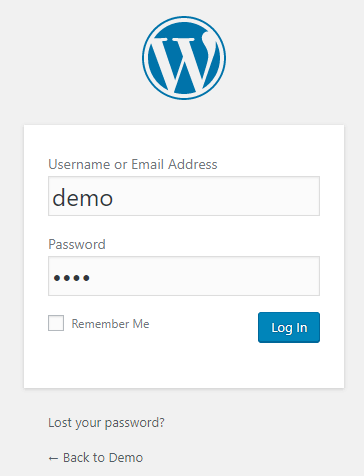
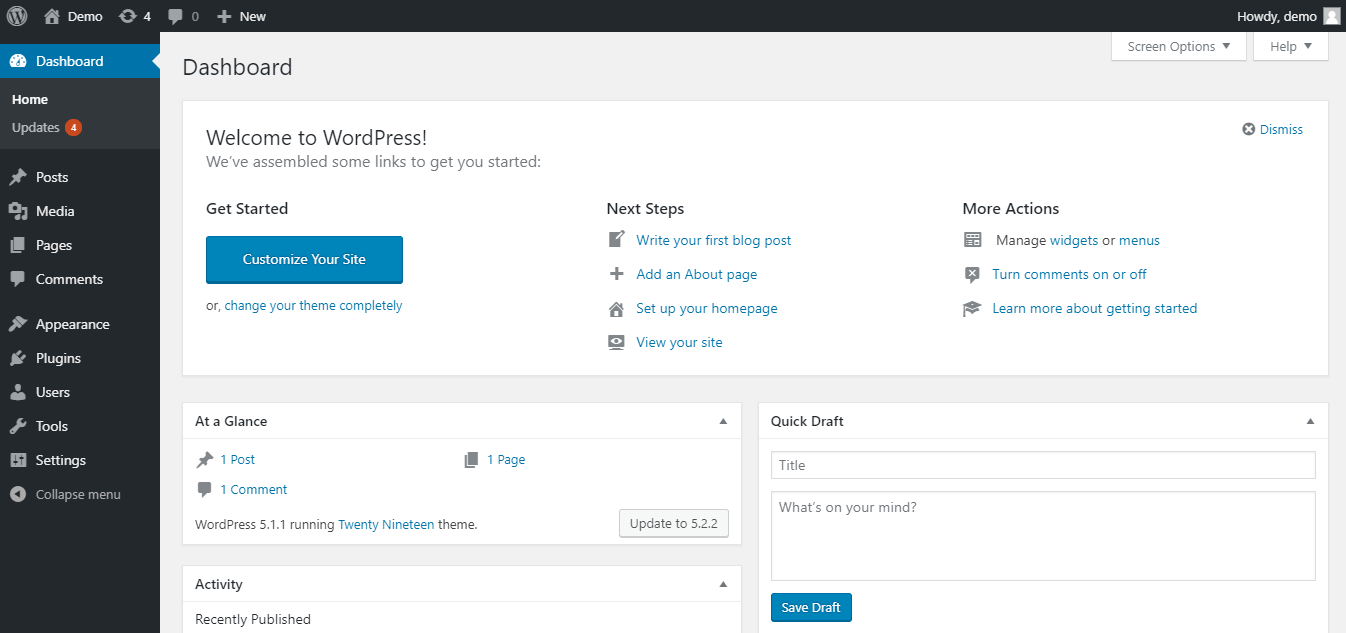
After entering the details, click on the Login button, and you’ll be logged into the WordPress Dashboard.
And you can anytime access the website homepage with the following URL:
http://localhost/{your-site-name}
In my case, it is http://localhost/abc
Now, you can do whatever you want to do with your locally installed WordPress site on XAMPP. The process remains the same for all operating systems, Windows, Mac, or Linux using XAMPP.
I Hope, you liked this guide on How to Install WordPress on XAMPP, if so do share it with others who might find it useful as well. Also, feel free to ask your queries in the comments section below.


