Python is a powerful, high-level programming language that is widely used for web development, scientific computing, data analysis, artificial intelligence, and more. This article will guide you through the process of installing Python on your computer so that you can get started with learning the language and building your own applications.
Checking if Python is Already Installed
Before you start installing Python, it is a good idea to check if it is already installed on your computer. To check this, you can open the terminal or command prompt on your computer and type the following command:
python --version
If Python is already installed, you will see the version number of Python displayed on the screen. If not, you will need to download and install Python.
Installing Python
There are two main versions of Python available: Python 2 and Python 3. While both versions are still in use, it is recommended to use Python 3 for new projects, as Python 2 eventually reached its end-of-life in 2020. This article will guide you through the process of installing Python 3.
Installing Python on Windows/macOS
To install Python on Windows, follow these steps:
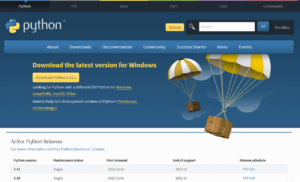
- Go to the Python downloads page and download the latest version of Python 3 for Windows or macOS.
- Run the installer and follow the instructions to complete the installation process.
- Once the installation is complete, you can open the terminal or command prompt and type the following command to check that Python is installed and to see the version number:
python --version
Installing Python on Linux
To install Python on Linux, follow these steps:
- Open the terminal and type the following command to update the package index:
sudo apt-get update
- Type the following command to install Python 3:
sudo apt-get install python3
- Once the installation is complete, you can type the following command to check that Python is installed and to see the version number:
python3 --version
Setting up a Development Environment
Now that you have successfully installed Python, you will need to set up a development environment. A development environment is a place where you can write, run, and test your Python code. There are several options available for setting up a Python development environment, including:
- Integrated Development Environments (IDEs): IDEs are powerful tools that provide a comprehensive development environment for Python, including a code editor, debugging tools, and more. Some popular IDEs for Python include PyCharm, Visual Studio Code, and Eclipse.
- Text Editors: Text editors are simpler than IDEs and are a good choice if you are just starting out with Python. Some popular text editors for Python include Sublime Text, Atom, and Notepad++.
- The Python Shell: The Python shell is a simple, interactive environment for running Python code. You can use the Python shell to write and run your Python code, and it is included with the Python installation. To start the Python shell, simply open the terminal or command prompt and type the following command:
python
If you have installed Python 3, you can start the Python 3 shell by typing the following command:
python3
Now that you have set up a development environment, you are ready to start writing and running your own Python code!
Conclusion
In this article, you learned how to install Python on your computer and set up a development environment. You should now be able to start writing and running your own Python code. Whether you are just starting out with programming or you are a seasoned developer, Python is a great language to learn and is sure to provide you with many opportunities for growth and development.


