
The CSS z-index property is one of the most powerful yet misunderstood features in web development. It controls the stacking order of positioned elements, determining which elements appear in front of or behind others. Understanding z-index is crucial for creating sophisticated layouts, modal dialogs, dropdown menus, and interactive user interfaces.
What is CSS Z-Index?
The z-index property specifies the stack order of an element along the z-axis (depth). Elements with higher z-index values appear in front of elements with lower values. Think of it as controlling the layering of elements in a 3D space, where the z-axis extends toward and away from the viewer.
Key Points About Z-Index:
- Only works on positioned elements (position: relative, absolute, fixed, or sticky)
- Higher values stack in front of lower values
- Creates stacking contexts that affect child elements
- Default value is ‘auto’ (equivalent to 0)
Basic Z-Index Syntax and Values
The z-index property accepts several types of values:
/* Integer values */
z-index: 1;
z-index: 100;
z-index: -1;

/* Keyword values */
z-index: auto;
z-index: inherit;
z-index: initial;
z-index: unset;
Understanding Z-Index Values
- Positive integers: Stack above elements with lower or no z-index
- Negative integers: Stack below elements with higher or no z-index
- auto: Stack according to document order (default behavior)
- 0: Same stacking level as ‘auto’ but creates a stacking context
Positioning Requirements
A critical aspect of z-index is that it only works on positioned elements. An element must have a position value other than ‘static’ (the default) for z-index to have any effect.
Interactive Example: Z-Index with Positioning
.box1 {
  position: absolute;
  top: 50px;
  left: 50px;
  z-index: 1;
  background: #ff6b6b;
}

.box2 {
  position: absolute;
  top: 100px;
  left: 100px;
  z-index: 2;
  background: #4ecdc4;
}

.box3 {
  position: absolute;
  top: 150px;
  left: 150px;
  z-index: 3;
  background: #45b7d1;
}
Understanding Stacking Contexts
Stacking contexts are fundamental to understanding how z-index works. A stacking context is a three-dimensional conceptualization of HTML elements along an imaginary z-axis. Elements within the same stacking context are stacked according to their z-index values.
What Creates a Stacking Context?
Several CSS properties create new stacking contexts:
- Root element (html)
- Positioned elements with z-index other than ‘auto’
- Elements with opacity less than 1
- Elements with transform other than ‘none’
- Elements with filter other than ‘none’
- Elements with isolation: isolate
- Flex items with z-index other than ‘auto’
- Grid items with z-index other than ‘auto’
Stacking Context Example
Parent-Child Stacking Context Demo
/* Parent creates stacking context with opacity */
.parent {
  position: absolute;
  z-index: 1;
  opacity: 0.9; /* Creates stacking context */
}

/* Child cannot escape parent's stacking context */
.child {
  position: absolute;
  z-index: 999; /* High value, but still behind independent element */
}

/* Independent element */
.independent {
  position: absolute;
  z-index: 2; /* Lower than child, but appears in front */
}
Common Z-Index Pitfalls and Solutions
1. Z-Index Not Working
The most common issue is applying z-index to non-positioned elements. Remember that z-index only works on positioned elements.
.element {
  z-index: 10; /* Won't work without positioning */
}.element {
position: relative;
z-index: 10; /* Now it works */
}2. Unexpected Stacking Context Creation
Properties like opacity, transform, and filter create new stacking contexts, which can lead to unexpected behavior.
3. Z-Index Wars
Using extremely high z-index values (like 99999) can lead to maintenance nightmares. Use a systematic approach instead.
Best Practices for Z-Index Management
1. Use a Z-Index Scale
Establish a consistent z-index scale for your project:
/* Z-Index Scale */
:root {
  --z-dropdown: 100;
  --z-modal: 200;
  --z-toast: 300;
  --z-tooltip: 400;
}

.dropdown {
  z-index: var(--z-dropdown);
}

.modal {
  z-index: var(--z-modal);
}

.toast {
  z-index: var(--z-toast);
}

.tooltip {
  z-index: var(--z-tooltip);
}
2. Minimize Stacking Context Creation
Be aware of properties that create stacking contexts and use them judiciously:
/* Avoid unnecessary stacking contexts */
.element {
  /* Instead of opacity: 0.99 */
  opacity: 1;

  /* Instead of transform: translateZ(0) */
  /* Use transform only when needed */
}
3. Use Semantic Z-Index Values
Choose z-index values that make sense for your layout hierarchy:
/* Semantic naming */
$z-base: 1;
$z-content: 10;
$z-navigation: 20;
$z-modal-backdrop: 30;
$z-modal: 40;
$z-notification: 50;
Practical Examples and Use Cases
1. Modal Dialog Implementation
Interactive Modal Example
/* Modal CSS */
.modal-backdrop {
  position: fixed;
  top: 0;
  left: 0;
  width: 100%;
  height: 100%;
  background: rgba(0, 0, 0, 0.5);
  z-index: 1000;
  display: flex;
  align-items: center;
  justify-content: center;
}

.modal-content {
  background: white;
  padding: 30px;
  border-radius: 8px;
  max-width: 400px;
  width: 90%;
  position: relative;
  z-index: 1001;
}
2. Dropdown Menu
Interactive Dropdown
/* Dropdown CSS */
.dropdown-container {
  position: relative;
  display: inline-block;
}

.dropdown-menu {
  position: absolute;
  top: 100%;
  left: 0;
  background: white;
  border: 1px solid #ddd;
  border-radius: 4px;
  box-shadow: 0 2px 10px rgba(0, 0, 0, 0.1);
  z-index: 100;
  min-width: 160px;
}
3. Sticky Navigation
/* Sticky Navigation */
.sticky-nav {
  position: sticky;
  top: 0;
  background: white;
  border-bottom: 1px solid #eee;
  z-index: 50;
  padding: 1rem 0;
}
Advanced Z-Index Techniques
1. CSS Custom Properties for Z-Index
Use CSS custom properties to create a maintainable z-index system:
:root {
  --z-negative: -1;
  --z-base: 0;
  --z-content: 1;
  --z-navigation: 10;
  --z-dropdown: 20;
  --z-modal-backdrop: 30;
  --z-modal: 40;
  --z-toast: 50;
  --z-tooltip: 60;
}

.navigation {
  z-index: var(--z-navigation);
}

.modal {
  z-index: var(--z-modal);
}
2. Isolation Property
The isolation property creates a new stacking context without side effects:
.isolate {
  isolation: isolate; /* Creates stacking context */
}

.no-isolate {
  isolation: auto; /* Default behavior */
}
Debugging Z-Index Issues
Browser DevTools
Modern browsers provide excellent tools for debugging z-index issues:
- Chrome DevTools: Use the “Layers” panel to visualize stacking contexts
- Firefox DevTools: 3D View shows element layering
- Safari DevTools: Layers timeline shows stacking order
Common Debugging Steps
- Check if the element is positioned
- Verify stacking context creation
- Trace parent-child relationships
- Look for conflicting CSS properties
- Test with simplified HTML structure
Performance Considerations
While z-index itself doesn’t significantly impact performance, the properties that create stacking contexts can:
- Opacity: Can trigger compositing layers
- Transform: Creates new layers and affects repainting
- Filter: Computationally expensive
- Will-change: Use sparingly to avoid memory issues
Browser Compatibility
Z-index has excellent browser support across all modern browsers. However, be aware of some historical quirks:
- Internet Explorer 6-7 had auto z-index bugs (mostly irrelevant today)
- Some mobile browsers handle fixed positioning differently
- Always test on target browsers and devices
Conclusion
Mastering CSS z-index is essential for creating sophisticated web layouts. Remember these key principles:
Key Takeaways:
- Z-index only works on positioned elements
- Stacking contexts contain their children’s z-index values
- Use a systematic approach to z-index management
- Be mindful of properties that create stacking contexts
- Test thoroughly and use browser DevTools for debugging
By following these guidelines and understanding the underlying concepts, you’ll avoid common z-index pitfalls and create more maintainable, predictable layouts. The key is to think hierarchically about your interface layers and establish clear conventions for your team or project.
Remember that good z-index management is about more than just making elements appear in the right order—it’s about creating a logical, maintainable system that scales with your project’s complexity.
Related Posts
CSS Style zIndex Property: CSS Z-Index
CSS z-index Property: Controlling Element Stacking The z-index property in CSS controls the vertical stacking order of elements that overlap....
CSS Style top Property: CSS Top
Understanding the CSS top Property: A Comprehensive Guide The top property in CSS is used to specify the vertical position...
CSS Relative Positioning: Master Element Offset and Layout Control
Understanding CSS Relative Positioning CSS relative positioning is a fundamental layout technique that allows you to move elements from their...
CSS Transform-Style: Complete Guide to Flat vs Preserve-3d for 3D Transformations
The CSS transform-style property is a powerful tool that controls how child elements are rendered in 3D space when their...
CSS position Property: Mastering Layouts in CSS
Understanding the CSS position Property: A Comprehensive Guide The position property in CSS is a fundamental tool for controlling the...
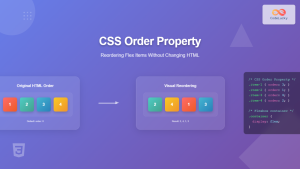
CSS Order Property: Complete Guide to Reordering Flex Items Visually
The CSS order property is a powerful flexbox feature that allows you to change the visual order of flex items...
CSS bottom Property: CSS Bottom
Understanding the CSS bottom Property The CSS bottom property is a fundamental tool for controlling the vertical positioning of elements...

CSS perspective Property: CSS Perspective
Understanding the CSS perspective Property The CSS perspective property allows you to give a 3D-positioned element some perspective. It defines...
CSS Order Property: Controlling Flexbox and Grid Item Placement
CSS order Property: Mastering Element Reordering in Flexbox and Grid Layouts The CSS order property is a powerful tool that...
CSS vertical-align Property: CSS Vertical Align
CSS vertical-align Property: Mastering Vertical Alignment The CSS vertical-align property specifies the vertical alignment of an inline or table-cell box....

CSS Absolute Positioning: Master Element Placement with Containing Blocks
CSS absolute positioning is one of the most powerful tools for creating precise layouts and complex designs. Understanding how absolutely...
CSS clear Property: Mastering CSS Clear for Layout Control
Understanding the CSS clear Property: Mastering Layout Control The clear property in CSS is a powerful tool for controlling the...


