
Progressive enhancement in CSS is a fundamental approach that ensures your web applications remain functional and accessible across all devices, browsers, and network conditions. By building features layer by layer, you create resilient experiences that gracefully degrade when advanced features aren’t supported.
What is CSS Progressive Enhancement?
CSS Progressive Enhancement is a web development strategy where you start with a basic, functional foundation and progressively add enhanced features for browsers that support them. This approach ensures that your website works for everyone, regardless of their browser capabilities, device limitations, or network conditions.
The core principle follows a three-layer approach:
- Content Layer (HTML): Semantic, accessible markup
- Presentation Layer (CSS): Basic styling that works everywhere
- Enhancement Layer (Advanced CSS): Modern features with fallbacks
The Foundation: Starting with Basic CSS
Before adding advanced features, establish a solid foundation with universally supported CSS properties. This ensures your site remains functional even when modern features fail to load or aren’t supported.
Basic Foundation Example
/* Base styles - universally supported */
.card {
  background: #ffffff;
  border: 1px solid #ddd;
  padding: 20px;
  margin: 10px 0;
  color: #333;
}

.card h3 {
  color: #2c3e50;
  margin-bottom: 10px;
}

.button {
  background: #007bff;
  color: white;
  padding: 10px 20px;
  border: none;
  cursor: pointer;
  text-decoration: none;
  display: inline-block;
}
Layer 1: CSS Feature Detection with @supports
The @supports rule is your primary tool for progressive enhancement. It allows you to apply CSS only when specific features are supported by the browser.
Feature Detection Example
/* Base flexbox fallback */
.navigation {
  display: block;
}

.nav-item {
  display: block;
  margin-bottom: 5px;
}

/* Enhanced with flexbox when supported */
@supports (display: flex) {
  .navigation {
    display: flex;
    justify-content: space-between;
    align-items: center;
  }

  .nav-item {
    margin-bottom: 0;
    margin-right: 20px;
  }
}
Layer 2: CSS Grid with Flexbox Fallback
CSS Grid provides powerful layout capabilities, but older browsers need alternatives. Here’s how to implement grid with flexbox fallbacks:
Grid with Flexbox Fallback
/* Flexbox fallback */
.gallery {
  display: flex;
  flex-wrap: wrap;
}

.gallery-item {
  flex: 1 1 300px;
  margin: 10px;
}

/* CSS Grid enhancement */
@supports (display: grid) {
  .gallery {
    display: grid;
    grid-template-columns: repeat(auto-fill, minmax(300px, 1fr));
    gap: 20px;
  }

  .gallery-item {
    margin: 0; /* Reset flex margins */
  }
}
Interactive Example: Progressive Enhancement in Action
Live Progressive Enhancement Demo
This example demonstrates multiple enhancement layers:
Base Layout
Works in all browsers with basic block display
Flexbox Enhanced
Improved layout when flexbox is supported
Grid Enhanced
Even better layout with CSS Grid support
Fully Enhanced
Advanced effects with modern CSS features
Try hovering over the cards if your browser supports backdrop-filter!
Layer 3: Modern CSS Features with Graceful Degradation
Modern CSS features like CSS Custom Properties, clip-path, and filter effects can significantly enhance user experience when implemented progressively.
Custom Properties with Fallbacks
/* Traditional approach - fallback values */
.theme-card {
  background: #ffffff; /* Fallback */
  background: var(--card-bg, #ffffff);
  color: #333333; /* Fallback */
  color: var(--card-text, #333333);
  border-radius: 4px; /* Fallback */
  border-radius: var(--card-radius, 4px);
}

/* Theme customization when supported */
@supports (--css: variables) {
  .theme-dark {
    --card-bg: #2d3748;
    --card-text: #e2e8f0;
    --card-radius: 8px;
  }

  .theme-blue {
    --card-bg: #ebf8ff;
    --card-text: #2b6cb0;
    --card-radius: 12px;
  }
}
Layer 4: Performance-Aware Loading
Progressive enhancement also means being mindful of performance. Load basic styles first, then enhance with additional features based on user preferences and capabilities.
Respecting User Preferences
/* Base animation - minimal */
.fade-in {
  opacity: 1;
  transition: opacity 0.3s ease;
}

/* Enhanced animations only when preferred */
@media (prefers-reduced-motion: no-preference) {
  @supports (transform: translateY(0)) {
    .fade-in {
      transform: translateY(0);
      transition: opacity 0.3s ease, transform 0.3s ease;
    }

    .fade-in.hidden {
      opacity: 0;
      transform: translateY(20px);
    }
  }
}

/* Respect reduced motion preference */
@media (prefers-reduced-motion: reduce) {
  .fade-in {
    transition: none;
    transform: none;
  }
}
Layer 5: Container Queries and Modern Layout
Container queries represent the latest in progressive enhancement, allowing components to adapt based on their container size rather than viewport size.
Container Query Enhancement
/* Base responsive design */
.component {
  padding: 10px;
}

.component-title {
  font-size: 1.2em;
}

/* Media query fallback */
@media (min-width: 768px) {
  .component {
    padding: 20px;
  }

  .component-title {
    font-size: 1.5em;
  }
}

/* Container query enhancement */
@supports (container-type: inline-size) {
  .component-container {
    container-type: inline-size;
    container-name: component;
  }

  @container component (min-width: 400px) {
    .component {
      padding: 30px;
      display: flex;
      align-items: center;
    }

    .component-title {
      font-size: 1.8em;
    }
  }
}
Testing Your Progressive Enhancement Strategy
To ensure your progressive enhancement approach works effectively, test across different scenarios:
Browser Testing Checklist
- Legacy Browser Testing: Test in older versions of major browsers
- Feature Toggle Testing: Disable CSS features in DevTools
- Network Simulation: Test with slow connections and CSS load failures
- Accessibility Testing: Ensure functionality without advanced CSS
DevTools Feature Detection
Use browser DevTools to simulate different capability levels:
Chrome DevTools Tip: Use the “Rendering” tab to disable CSS features like flexbox, grid, or CSS custom properties to test your fallbacks.
Common Progressive Enhancement Patterns
1. Layout Enhancement Pattern
/* Pattern: Block → Flexbox → Grid */
.layout { display: block; }

@supports (display: flex) {
  .layout { display: flex; flex-wrap: wrap; }
}

@supports (display: grid) {
  .layout { display: grid; grid-template-columns: 1fr 1fr; }
}
2. Visual Enhancement Pattern
/* Pattern: Solid → Gradient → Advanced Effects */
.enhanced {
  background: #4299e1; /* Solid fallback */
  background: linear-gradient(45deg, #4299e1, #667eea);
}

@supports (backdrop-filter: blur(10px)) {
  .enhanced {
    background: rgba(66, 153, 225, 0.8);
    backdrop-filter: blur(10px);
  }
}
Performance Benefits of Progressive Enhancement
Progressive enhancement in CSS provides several performance advantages:
- Faster Initial Load: Basic styles load first, content is immediately usable
- Reduced Bundle Size: Only load advanced features when supported
- Better Caching: Base styles can be cached separately from enhancements
- Improved Core Web Vitals: Faster LCP and reduced CLS
Real-World Implementation Strategy
Step 1: Establish Your Base Layer
Start with CSS that works in IE11 and older mobile browsers. Focus on:
- Basic layout with floats or simple flexbox
- Standard color and typography
- Simple transitions
- Accessible focus states
Step 2: Add Modern Layout Features
Layer in CSS Grid, advanced flexbox features, and modern unit types:
- CSS Grid for complex layouts
- CSS Custom Properties for theming
- Modern viewport units (dvh, svw)
- Container queries
Step 3: Implement Visual Enhancements
Add advanced visual features that enhance but don’t break the experience:
- Advanced gradients and masks
- Filter effects and backdrop-filter
- Complex animations
- Custom shapes with clip-path
Common Pitfalls to Avoid
1. Over-relying on Feature Detection
Don’t wrap every CSS property in @supports. Use it for truly problematic features or when you need specific fallback behavior.
2. Ignoring Performance Impact
Each @supports rule adds overhead. Group related features and consider the performance impact of your enhancement layers.
3. Forgetting Mobile-First Approach
Progressive enhancement works best with mobile-first CSS. Start with the most constrained environment and enhance upward.
Tools and Resources for Progressive Enhancement
Browser Support Tools
- Can I Use: Check feature support across browsers
- MDN Compatibility Tables: Detailed browser support information
- Browserstack: Test across real devices and browsers
CSS Feature Detection Libraries
- Modernizr: JavaScript-based feature detection
- CSS @supports: Native CSS feature queries
- PostCSS plugins: Build-time feature detection and fallbacks
Conclusion
CSS Progressive Enhancement is more than a development technique—it’s a philosophy of inclusive design. By building layer by layer, you ensure that your web experiences work for everyone, regardless of their browser, device, or network conditions.
The key to successful progressive enhancement lies in starting with a solid foundation and thoughtfully adding features that genuinely improve the user experience. Remember that the goal isn’t to make every site look identical across all browsers, but to ensure that every user can access your content and complete their tasks.
As CSS continues to evolve with new features like container queries, cascade layers, and advanced color functions, the progressive enhancement approach becomes even more valuable. It allows you to adopt new features confidently while maintaining broad compatibility and accessibility.
Start implementing progressive enhancement in your next project by identifying your core functionality, establishing your base layer, and then systematically adding enhancements that improve the experience without breaking it for anyone.
Related Posts

CSS Graceful Degradation: Essential Fallback Strategies for Modern Web Development
CSS graceful degradation is a fundamental web development strategy that ensures your website remains functional and accessible across all browsers,...

HTML Styles: Mastering Inline, Internal, and External CSS
Introduction Have you ever looked at a website and wondered how all the elements are so beautifully arranged and styled?...

CSS Future: Complete Guide to Upcoming CSS Features and Specifications 2025
The future of CSS is incredibly exciting, with numerous groundbreaking features and specifications currently in development that promise to revolutionize...
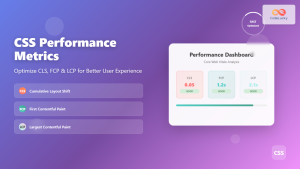
CSS Performance Metrics: Complete Guide to CLS, FCP, LCP Optimization
Website performance directly impacts user experience, search rankings, and conversion rates. CSS plays a crucial role in three critical performance...

HTML CSS: Styling Your Web Pages with Selectors, Properties, and the Cascade
Introduction Ever wondered how websites go from plain text to visually stunning experiences? The magic lies in CSS (Cascading Style...
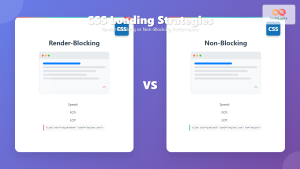
CSS Loading Strategies: Complete Guide to Render-Blocking and Non-Blocking Performance Optimization
CSS loading strategies are fundamental to web performance optimization, directly impacting user experience and search engine rankings. Understanding how different...
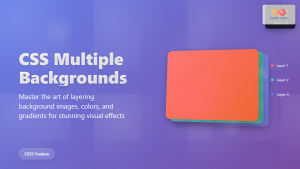
CSS Multiple Backgrounds: Complete Guide to Layering Images and Colors Like a Pro
CSS multiple backgrounds revolutionized web design by allowing developers to layer multiple background images, colors, and gradients on a single...

CSS Containment: Mastering the contain Property for Optimal Web Performance
CSS containment is a powerful performance optimization technique that allows developers to isolate parts of the DOM tree, preventing unnecessary...

CSS Browser Compatibility: Essential Guide to Vendor Prefixes and Fallbacks
Browser compatibility remains one of the most critical challenges in modern web development. Different browsers implement CSS features at varying...
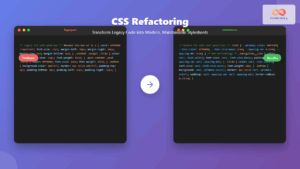
CSS Refactoring: Complete Guide to Modernizing Legacy Stylesheets
Legacy CSS codebases can become a significant burden on development teams, slowing down feature delivery and creating maintenance nightmares. CSS...

CSS Integration: Complete Guide to Inline, Internal and External Stylesheet Methods
Understanding CSS integration methods is fundamental to web development. Whether you're styling a simple webpage or building a complex web...
CSS Display Property: Complete Guide to Block, Inline, and Inline-Block Elements
The CSS display property is one of the most fundamental concepts in web development, controlling how elements are rendered and...


