
Understanding CSS integration methods is fundamental to web development. Whether you’re styling a simple webpage or building a complex web application, choosing the right CSS integration approach can significantly impact your project’s maintainability, performance, and scalability.
This comprehensive guide explores the three primary CSS integration methods: inline styles, internal stylesheets, and external stylesheets. You’ll learn when to use each method, their advantages and disadvantages, and best practices for implementation.
What is CSS Integration?
CSS integration refers to the various methods of applying Cascading Style Sheets to HTML documents. The way you integrate CSS affects how browsers interpret styles, load resources, and render web pages. Each integration method serves different purposes and use cases in web development.
Method 1: Inline CSS Styles
Inline CSS involves adding styles directly to HTML elements using the style attribute. This method applies styles immediately to specific elements without requiring separate CSS files or style blocks.
Inline CSS Syntax
The basic syntax for inline CSS follows this pattern:
<element style="property: value; property2: value2;">Content</element>Inline CSS Example
Live Example:
This paragraph uses inline CSS styling
This is a warning box created with inline styles
HTML Code:
<p style="color: #2563eb; font-size: 18px; font-weight: bold; text-decoration: underline;">
  This paragraph uses inline CSS styling
</p>

<div style="background-color: #fef3c7; padding: 15px; border-radius: 8px; border-left: 4px solid #f59e0b;">
  <p style="margin: 0; color: #92400e;">This is a warning box created with inline styles</p>
</div>

<button style="background-color: #10b981; color: white; padding: 10px 20px; border: none; border-radius: 6px; cursor: pointer; font-size: 16px;">
  Click Me
</button>
Advantages of Inline CSS
- High Specificity: Inline styles have the highest CSS specificity, overriding other style declarations
- Immediate Application: Styles apply directly to elements without external dependencies
- Quick Testing: Ideal for rapid prototyping and testing specific style changes
- Dynamic Styling: Perfect for JavaScript-generated styles or conditional styling
- No External Requests: Eliminates additional HTTP requests for stylesheet files
Disadvantages of Inline CSS
- Poor Maintainability: Difficult to maintain and update across multiple elements
- Code Repetition: Leads to redundant code and increased file sizes
- Limited Functionality: Cannot use CSS features like media queries, pseudo-classes, or keyframes
- Separation of Concerns: Violates the principle of separating content from presentation
- Performance Issues: Can increase HTML file size significantly
Method 2: Internal CSS Stylesheets
Internal CSS involves placing style rules within a <style> tag in the HTML document’s <head> section. This method keeps styles contained within the HTML file while maintaining better organization than inline styles.
Internal CSS Syntax
<head>
  <style>
    selector {
      property: value;
      property2: value2;
    }
  </style>
</head>
Internal CSS Example
Internal CSS Demonstration
This entire section is styled using internal CSS defined in the document head.
Feature 1
Gradient backgrounds and modern styling effects
Feature 2
Responsive flexbox layout with glass morphism
HTML and CSS Code:
<head>
  <style>
    .internal-demo {
      background: linear-gradient(135deg, #667eea 0%, #764ba2 100%);
      color: white;
      padding: 30px;
      border-radius: 12px;
      box-shadow: 0 8px 25px rgba(0,0,0,0.15);
    }

    .demo-card {
      background: rgba(255,255,255,0.1);
      backdrop-filter: blur(10px);
      padding: 20px;
      border-radius: 8px;
      border: 1px solid rgba(255,255,255,0.2);
    }

    .demo-button {
      background: #ff6b6b;
      color: white;
      border: none;
      padding: 12px 24px;
      border-radius: 25px;
      cursor: pointer;
      transition: all 0.3s ease;
    }

    .demo-button:hover {
      background: #ff5252;
      transform: translateY(-2px);
      box-shadow: 0 4px 15px rgba(255,107,107,0.4);
    }
  </style>
</head>

<body>
  <div class="internal-demo">
    <h4>Internal CSS Demonstration</h4>
    <p>This section uses internal CSS styling</p>
    <button class="demo-button">Interactive Button</button>
  </div>
</body>
Advantages of Internal CSS
- Better Organization: Centralizes styles in one location within the document
- Full CSS Features: Supports all CSS features including media queries, pseudo-classes, and animations
- No External Dependencies: Styles load with the HTML document, ensuring consistent rendering
- Faster Initial Load: Eliminates additional HTTP requests for small stylesheets
- Easy Testing: Convenient for single-page applications or standalone documents
Disadvantages of Internal CSS
- Limited Reusability: Styles only apply to the current document
- Increased File Size: Makes HTML files larger, especially with extensive styling
- Caching Issues: Styles reload with every page request, unlike cached external stylesheets
- Maintenance Challenges: Difficult to maintain consistent styling across multiple pages
- Performance Impact: Can slow down page rendering with large style blocks
Method 3: External CSS Stylesheets
External CSS involves creating separate stylesheet files with a .css extension and linking them to HTML documents using the <link> tag. This method provides the best separation of content and presentation.
External CSS Syntax
In the HTML head section:
<head>
  <link rel="stylesheet" href="styles.css">
</head>
In the separate CSS file (styles.css):
selector {
  property: value;
  property2: value2;
}

/* Additional CSS rules */
External CSS Example
External CSS Simulation
The following demonstrates how external CSS would style elements:
Note: In real external CSS, these styles would be defined in a separate .css file and linked to the HTML document.
HTML File (index.html):
<!DOCTYPE html>
<html lang="en">
<head>
  <meta charset="UTF-8">
  <meta name="viewport" content="width=device-width, initial-scale=1.0">
  <title>External CSS Example</title>
  <link rel="stylesheet" href="styles.css">
</head>
<body>
  <nav class="navigation">
    <a href="#" class="nav-link">Home</a>
    <a href="#" class="nav-link">About</a>
    <a href="#" class="nav-link">Contact</a>
  </nav>

  <form class="contact-form">
    <input type="text" class="form-input" placeholder="Enter your name">
    <button type="submit" class="submit-btn">Submit</button>
  </form>
</body>
</html>
CSS File (styles.css):
/* Navigation Styles */
.navigation {
  display: flex;
  gap: 15px;
  padding: 20px;
  background: white;
  border-radius: 8px;
  box-shadow: 0 2px 10px rgba(0,0,0,0.1);
}

.nav-link {
  color: #3b82f6;
  text-decoration: none;
  padding: 8px 15px;
  background: #eff6ff;
  border-radius: 20px;
  font-size: 14px;
  transition: all 0.3s ease;
}

.nav-link:hover {
  background: #dbeafe;
  transform: translateY(-1px);
}

/* Form Styles */
.contact-form {
  background: white;
  padding: 20px;
  border-radius: 8px;
  box-shadow: 0 2px 10px rgba(0,0,0,0.1);
  margin-top: 20px;
}

.form-input {
  width: 100%;
  padding: 10px;
  border: 2px solid #d1d5db;
  border-radius: 6px;
  margin-bottom: 10px;
  font-size: 14px;
}

.form-input:focus {
  outline: none;
  border-color: #3b82f6;
  box-shadow: 0 0 0 3px rgba(59, 130, 246, 0.1);
}

.submit-btn {
  background: #10b981;
  color: white;
  padding: 10px 20px;
  border: none;
  border-radius: 6px;
  cursor: pointer;
  font-weight: 500;
  transition: background 0.3s ease;
}

.submit-btn:hover {
  background: #059669;
}
Advantages of External CSS
- Maximum Reusability: One stylesheet can style multiple HTML documents
- Better Maintainability: Centralized styling makes updates and maintenance easier
- Improved Performance: Browsers cache external stylesheets, reducing load times
- Clean Separation: Complete separation of content (HTML) and presentation (CSS)
- Collaboration Friendly: Multiple developers can work on stylesheets independently
- Version Control: Easy to track changes and manage different versions of styles
Disadvantages of External CSS
- Additional HTTP Requests: Requires separate requests to load stylesheet files
- Potential Render Blocking: Large CSS files can delay page rendering
- Dependency Management: HTML depends on external files being available
- Initial Setup: Requires more initial setup and file organization
- Caching Issues: Aggressive caching might prevent style updates from appearing immediately
CSS Integration Methods Comparison
CSS Specificity and Cascade Order
Understanding CSS specificity is crucial when working with different integration methods. The browser applies styles based on specificity hierarchy:
- Inline styles – Highest priority (specificity: 1000)
- IDs – High priority (specificity: 100)
- Classes, attributes, pseudo-classes – Medium priority (specificity: 10)
- Elements and pseudo-elements – Low priority (specificity: 1)
Specificity Example:
If the same element has conflicting styles from different methods:
- Inline style:
color: red(wins) - Internal CSS:
#myId { color: blue; } - External CSS:
.myClass { color: green; }
The element will be red due to inline style’s higher specificity.
Best Practices for CSS Integration
When to Use Each Method
Use Inline CSS when:
- Making quick temporary changes or debugging styles
- Creating dynamic styles with JavaScript
- Overriding styles with highest priority
- Working with email templates (limited CSS support)
- Adding unique styles to specific elements
Use Internal CSS when:
- Developing single-page applications
- Creating landing pages or standalone documents
- Prototyping and testing style concepts
- Working on small projects with minimal styling
- When external CSS loading might be unreliable
Use External CSS when:
- Building multi-page websites or web applications
- Working on large-scale projects
- Collaborating with multiple developers
- Prioritizing performance and caching benefits
- Maintaining consistent styling across pages
Performance Optimization Tips
External CSS Optimization
- Minify CSS files to reduce file size
- Use CSS compression (gzip/brotli)
- Implement critical CSS for above-the-fold content
- Load non-critical CSS asynchronously
- Use CDN for faster delivery
General Performance
- Minimize CSS rule complexity
- Avoid deep nesting in selectors
- Use efficient CSS selectors
- Remove unused CSS rules
- Optimize CSS delivery timing
Loading External CSS Efficiently
Here are different methods to load external CSS with performance considerations:
<!-- Standard blocking load -->
<link rel="stylesheet" href="styles.css">

<!-- Preload for faster discovery -->
<link rel="preload" href="styles.css" as="style" onload="this.onload=null;this.rel='stylesheet'">

<!-- Async loading for non-critical CSS -->
<link rel="preload" href="non-critical.css" as="style" onload="this.onload=null;this.rel='stylesheet'">
<noscript><link rel="stylesheet" href="non-critical.css"></noscript>

<!-- Media queries for conditional loading -->
<link rel="stylesheet" href="print.css" media="print">
<link rel="stylesheet" href="mobile.css" media="(max-width: 768px)">
Common Pitfalls and Solutions
CSS Integration Mistakes to Avoid
❌ Common Mistakes:
- Overusing inline styles – Makes code hard to maintain
- Not considering specificity – Leads to unexpected style conflicts
Related Posts
HTML Styles: Mastering Inline, Internal, and External CSS
Introduction Have you ever looked at a website and wondered how all the elements are so beautifully arranged and styled?...

HTML style Property: Element Style
HTML style Property: Element Style The HTML style property allows you to apply inline CSS styles directly to individual HTML...
CSS Syntax: Complete Guide to Rules, Selectors, Properties and Values
CSS (Cascading Style Sheets) is the cornerstone of web design, transforming plain HTML into visually stunning websites. Understanding CSS syntax...
CSS Introduction: Complete Guide to Styling HTML with Cascading Style Sheets
CSS (Cascading Style Sheets) is the cornerstone technology that transforms plain HTML documents into visually stunning, professional websites. While HTML...
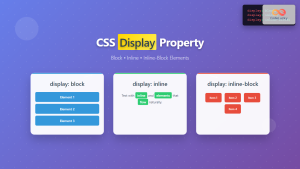
CSS Display Property: Complete Guide to Block, Inline, and Inline-Block Elements
The CSS display property is one of the most fundamental concepts in web development, controlling how elements are rendered and...

HTML Style Tag: Embedding CSS in HTML Documents
HTML <style> Tag The <style> tag in HTML is used to embed Cascading Style Sheets (CSS) directly into an HTML...

HTML CSS: Styling Your Web Pages with Selectors, Properties, and the Cascade
Introduction Ever wondered how websites go from plain text to visually stunning experiences? The magic lies in CSS (Cascading Style...

CSS-in-JS: Complete Guide to Styled Components Integration and Modern Styling
CSS-in-JS has revolutionized how developers approach styling in modern web applications. Among the various CSS-in-JS solutions, Styled Components stands out...
HTML Classes: Styling Multiple Elements with CSS
Introduction Have you ever found yourself needing to apply the same styles to multiple elements on your webpage? If you're...

HTML DOM Style Object: Accessing Style Elements
HTML DOM Style Object: Accessing and Modifying Styles The HTML DOM style object provides a powerful interface to dynamically access...
CSS Element Selectors: Complete Guide to Targeting HTML Tags by Name
CSS element selectors are the foundation of web styling, allowing developers to target HTML elements directly by their tag names....
CSS Style font Property: CSS Font
CSS font Property: A Comprehensive Guide The CSS font property is a shorthand property used to set several font-related styles...


