
CSS specificity is one of the most crucial concepts every web developer must master. It determines which styles the browser applies when multiple CSS rules target the same element. Understanding specificity prevents styling conflicts and helps you write more maintainable code.
When you write CSS, you’re essentially giving the browser instructions about how elements should look. But what happens when multiple rules contradict each other? The browser uses a sophisticated priority system called specificity to resolve these conflicts.
What is CSS Specificity?
CSS specificity is a scoring system that browsers use to determine which CSS rule takes precedence when multiple rules could apply to the same element. Think of it as a weighted voting system where different types of selectors carry different amounts of influence.
The CSS cascade works on four main principles:
- Origin and Importance: User agent styles vs. author styles vs. user styles
- Specificity: How specific a selector is
- Source Order: Later rules override earlier ones
- Inheritance: Child elements inherit certain properties from parents
The Specificity Hierarchy
CSS specificity follows a four-tier hierarchy, often represented as four numbers (a, b, c, d):
Specificity Weight System
- Inline Styles (1000 points): Styles applied directly to elements using the style attribute
- IDs (100 points): Selectors that target specific IDs (#header, #sidebar)
- Classes, Attributes, Pseudo-classes (10 points): .class, [attribute], :hover, :focus
- Elements and Pseudo-elements (1 point): div, p, h1, ::before, ::after
Calculating Specificity Scores
Let’s examine how browsers calculate specificity with practical examples:
/* Example 1: Element selector */
p { color: blue; }
/* Specificity: 0,0,0,1 (1 point) */

/* Example 2: Class selector */
.highlight { color: red; }
/* Specificity: 0,0,1,0 (10 points) */

/* Example 3: ID selector */
#main-title { color: green; }
/* Specificity: 0,1,0,0 (100 points) */

/* Example 4: Inline style */
<p style="color: purple;">Text</p>
/* Specificity: 1,0,0,0 (1000 points) */

/* Example 5: Complex selector */
#header .nav-item a:hover { color: orange; }
/* Specificity: 0,1,2,1 (100 + 10 + 10 + 1 = 121 points) */
Interactive Specificity Calculator
Test Your Understanding
Try these selectors and calculate their specificity:
Real-World Specificity Examples
Let’s explore how specificity works in practice with visual examples:
Example 1: Conflicting Text Colors
/* CSS Rules */
p { color: blue; }                    /* Specificity: 0,0,0,1 */
.special { color: red; }              /* Specificity: 0,0,1,0 */
#unique { color: green; }             /* Specificity: 0,1,0,0 */
p.special { color: purple; }          /* Specificity: 0,0,1,1 */
HTML:
This paragraph will be blue (only element selector applies)
This paragraph will be purple (p.special wins over .special)
This paragraph will be green (ID has highest specificity)
This paragraph will still be green (ID beats class)
Common Specificity Pitfalls
1. Overusing !important
The !important declaration gives a rule maximum priority, but it should be used sparingly:
/* Avoid this */
.button {
    background: blue !important;
    color: white !important;
}

/* Better approach */
.button.primary {
    background: blue;
    color: white;
}
2. Fighting Specificity with More Specificity
Instead of creating increasingly specific selectors, consider refactoring your CSS structure:
/* Problematic escalation */
.sidebar ul li a { color: blue; }
.sidebar .menu ul li a.active { color: red; }
.sidebar .main-menu ul li a.active.current { color: green; }

/* Better approach */
.sidebar-link { color: blue; }
.sidebar-link--active { color: red; }
.sidebar-link--current { color: green; }
Advanced Specificity Concepts
Pseudo-classes and Pseudo-elements
Different pseudo-selectors have different specificity weights:
/* Pseudo-classes (10 points each) */
a:hover { color: red; }           /* 0,0,1,1 */
input:focus { border: blue; }     /* 0,0,1,1 */
li:first-child { margin: 0; }     /* 0,0,1,1 */

/* Pseudo-elements (1 point each) */
p::before { content: "→"; }       /* 0,0,0,2 */
div::after { display: block; }    /* 0,0,0,2 */

/* :not() pseudo-class uses inner selector's specificity */
:not(.hidden) { display: block; } /* 0,0,1,0 */
Attribute Selectors
Attribute selectors count as class-level specificity:
[type="text"] { border: 1px solid gray; }     /* 0,0,1,0 */
input[required] { border-color: red; }        /* 0,0,1,1 */
a[href^="https"] { color: green; }            /* 0,0,1,1 */
Specificity Best Practices
1. Use the Specificity Pyramid
Structure your CSS from least to most specific:
2. Follow the BEM Methodology
BEM (Block Element Modifier) helps maintain consistent specificity:
/* Block */
.card { background: white; }

/* Element */
.card__title { font-size: 1.5rem; }
.card__content { padding: 1rem; }

/* Modifier */
.card--featured { border: 2px solid gold; }
.card__title--large { font-size: 2rem; }
3. Use CSS Custom Properties for Variations
CSS variables can help avoid specificity issues:
:root {
    --primary-color: #007bff;
    --secondary-color: #6c757d;
}

.button {
    background: var(--primary-color);
    color: white;
}

.button--secondary {
    --primary-color: var(--secondary-color);
}
Debugging Specificity Issues
Browser DevTools
Modern browsers provide excellent tools for debugging CSS specificity:
- Chrome DevTools: Shows computed styles and crossed-out overridden rules
- Firefox Developer Tools: Displays specificity values in the Rules panel
- Safari Web Inspector: Highlights specificity conflicts in the Styles sidebar
CSS Specificity Debugging Tips
Quick Debugging Checklist:
- Open browser DevTools and inspect the element
- Look for crossed-out styles in the Styles panel
- Check the computed values to see which rule won
- Use the specificity calculator to verify your calculations
- Consider refactoring overly specific selectors
Performance Implications of Specificity
CSS specificity doesn’t just affect which styles apply—it also impacts performance. Browsers parse CSS selectors from right to left, so overly complex selectors can slow down rendering:
/* Slow - browser checks every div, then every section, then body */
body section div.content p.text span.highlight { color: red; }

/* Fast - browser immediately finds elements with this class */
.highlight-text { color: red; }
CSS Cascade and Inheritance
Specificity works hand-in-hand with CSS inheritance. Some properties naturally inherit from parent elements, while others don’t:
Inherited Properties:
- color
- font-family
- font-size
- line-height
- text-align
Non-inherited Properties:
- background
- border
- margin
- padding
- width
Modern CSS and Specificity
CSS Layers (@layer)
CSS Layers provide a new way to manage specificity:
@layer reset, base, components, utilities;

@layer reset {
    * { margin: 0; padding: 0; }
}

@layer base {
    body { font-family: Arial, sans-serif; }
}

@layer components {
    .button { padding: 10px 20px; }
}

@layer utilities {
    .text-center { text-align: center; }
}
Container Queries and Specificity
Container queries follow the same specificity rules as media queries:
@container (min-width: 400px) {
    .card {
        display: grid;
        grid-template-columns: 1fr 1fr;
    }
}

/* Same specificity as regular rules */
.card { display: block; }  /* 0,0,1,0 */
Conclusion
CSS specificity is fundamental to writing maintainable, predictable stylesheets. By understanding how browsers calculate specificity scores and apply the cascade, you can avoid common pitfalls and write more efficient CSS.
Remember these key takeaways:
- Specificity follows a clear hierarchy: inline styles > IDs > classes > elements
- Calculate specificity by counting selectors in each category
- Use browser DevTools to debug specificity conflicts
- Structure your CSS from least to most specific
- Avoid overusing !important declarations
- Consider modern solutions like CSS Layers for better cascade control
Mastering CSS specificity will make you a more effective developer and help you create maintainable, scalable stylesheets that stand the test of time.
Related Posts
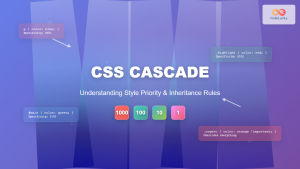
CSS Cascade: Understanding Style Priority and Inheritance Rules
The CSS cascade is the fundamental mechanism that determines which styles are applied to HTML elements when multiple CSS rules...
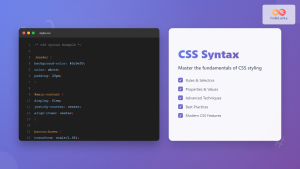
CSS Syntax: Complete Guide to Rules, Selectors, Properties and Values
CSS (Cascading Style Sheets) is the cornerstone of web design, transforming plain HTML into visually stunning websites. Understanding CSS syntax...
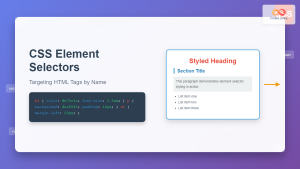
CSS Element Selectors: Complete Guide to Targeting HTML Tags by Name
CSS element selectors are the foundation of web styling, allowing developers to target HTML elements directly by their tag names....

CSS Containment: Mastering the contain Property for Optimal Web Performance
CSS containment is a powerful performance optimization technique that allows developers to isolate parts of the DOM tree, preventing unnecessary...

CSS Class Selectors: Master Targeting Elements with Class Attributes
What Are CSS Class Selectors? CSS class selectors are fundamental tools that allow you to target and style HTML elements...

CSS Attribute Selectors: Master Targeting Elements by Attribute Values
What Are CSS Attribute Selectors? CSS attribute selectors allow you to target HTML elements based on their attributes and attribute...
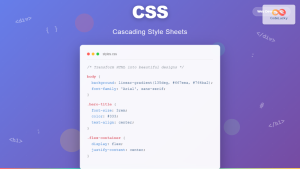
CSS Introduction: Complete Guide to Styling HTML with Cascading Style Sheets
CSS (Cascading Style Sheets) is the cornerstone technology that transforms plain HTML documents into visually stunning, professional websites. While HTML...

CSS Feature Detection: Complete Guide to @supports Rule and Browser Compatibility
CSS feature detection is a crucial technique that allows developers to write robust, future-proof stylesheets that gracefully handle browser compatibility...

CSS Validation: Complete Guide to W3C CSS Validator for Error-Free Stylesheets
What is CSS Validation? CSS validation is the process of checking your Cascading Style Sheets (CSS) code against the official...

HTML CSS: Styling Your Web Pages with Selectors, Properties, and the Cascade
Introduction Ever wondered how websites go from plain text to visually stunning experiences? The magic lies in CSS (Cascading Style...
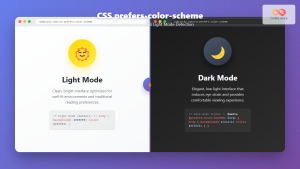
CSS Prefers-Color-Scheme: Complete Guide to Dark Mode and Light Mode Detection
The CSS prefers-color-scheme media query has revolutionized how we implement dark mode and light mode themes on websites. This powerful...

HTML Styles: Mastering Inline, Internal, and External CSS
Introduction Have you ever looked at a website and wondered how all the elements are so beautifully arranged and styled?...
- What is CSS Specificity?
- The Specificity Hierarchy
- Calculating Specificity Scores
- Interactive Specificity Calculator
- Real-World Specificity Examples
- Common Specificity Pitfalls
- Advanced Specificity Concepts
- Specificity Best Practices
- Debugging Specificity Issues
- Performance Implications of Specificity
- CSS Cascade and Inheritance
- Modern CSS and Specificity
- Conclusion


