
TeamViewer is one of the most popular remote desktop solutions available today, offering cross-platform compatibility and robust features for remote access, file sharing, and technical support. While primarily known for its Windows applications, TeamViewer provides excellent Linux support, making it an essential tool for system administrators, developers, and IT professionals working in mixed environments.
This comprehensive guide will walk you through everything you need to know about using TeamViewer on Linux systems, from installation to advanced configuration and troubleshooting.
What is TeamViewer?
TeamViewer is a proprietary remote access and remote control software that allows users to connect to computers, mobile devices, and IoT devices from anywhere in the world. It provides a secure, encrypted connection that enables:
- Remote desktop control and access
- File transfer between devices
- Screen sharing and presentations
- Remote printing capabilities
- Wake-on-LAN functionality
- Unattended access for servers and workstations
TeamViewer Linux System Requirements
Before installing TeamViewer on your Linux system, ensure your distribution meets the following requirements:
Supported Linux Distributions
- Ubuntu 18.04 LTS and newer
- Debian 9 and newer
- Red Hat Enterprise Linux 7 and newer
- SUSE Linux Enterprise 12 and newer
- Fedora 28 and newer
- CentOS 7 and newer
- openSUSE Leap 15.0 and newer
Hardware Requirements
- Minimum 1 GB RAM (2 GB recommended)
- 200 MB free disk space
- Internet connection for remote access
- X11 display server (for GUI access)
Installing TeamViewer on Linux
TeamViewer can be installed on Linux using several methods. We’ll cover the most common approaches for different distributions.
Method 1: Installing from Official DEB Package (Ubuntu/Debian)
For Ubuntu and Debian-based systems, download and install the official DEB package:
# Download the TeamViewer DEB package
wget https://download.teamviewer.com/download/linux/teamviewer_amd64.deb

# Install the package using dpkg
sudo dpkg -i teamviewer_amd64.deb

# Fix any dependency issues
sudo apt-get install -f
Expected Output:
Reading package lists... Done
Building dependency tree
Reading state information... Done
The following NEW packages will be installed:
  teamviewer
0 upgraded, 1 newly installed, 0 to remove and 0 not upgraded.
Need to get 0 B/48.2 MB of archives.
After this operation, 156 MB of additional disk space will be used.
Setting up teamviewer (15.44.3) ...
Method 2: Installing from RPM Package (Red Hat/Fedora/CentOS)
For Red Hat-based distributions:
# Download the TeamViewer RPM package
wget https://download.teamviewer.com/download/linux/teamviewer.x86_64.rpm

# Install using dnf (Fedora) or yum (CentOS/RHEL)
sudo dnf install teamviewer.x86_64.rpm
# OR
sudo yum install teamviewer.x86_64.rpm
Method 3: Using Snap Package
For systems with Snap support:
# Install TeamViewer via Snap
sudo snap install teamviewer
Method 4: Using Flatpak
For Flatpak-enabled systems:
# Add Flathub repository if not already added
flatpak remote-add --if-not-exists flathub https://flathub.org/repo/flathub.flatpakrepo

# Install TeamViewer
flatpak install flathub com.teamviewer.TeamViewer
Initial Setup and Configuration
After installation, you’ll need to configure TeamViewer for your specific needs.
Starting TeamViewer
Launch TeamViewer from the applications menu or use the command line:
# Start TeamViewer GUI
teamviewer

# Start TeamViewer daemon only
sudo teamviewer --daemon start
First-Time Setup
When you first launch TeamViewer, you’ll see the main interface with two important pieces of information:
- Your ID: A unique 9-digit number identifying your computer
- Password: A temporary password for remote access (changes with each session)
Setting Up Unattended Access
For permanent remote access, configure unattended access:
- Click on “Extras” → “Options”
- Navigate to the “Security” tab
- Check “Random password” or set a “Personal password”
- Under “Access Control,” select your preferred access level
- Apply the settings
Basic TeamViewer Operations
Connecting to a Remote Computer
To connect to another computer:
- Enter the Partner ID in the “Control Remote Computer” section
- Select the connection type (Remote control, File transfer, etc.)
- Click “Connect”
- Enter the password when prompted
# Command-line connection example
teamviewer --id 123456789 --password yourpassword
File Transfer Operations
TeamViewer provides built-in file transfer capabilities:
# Start file transfer session
teamviewer --id 123456789 --mode filetransfer
During a remote session, you can also access file transfer through:
- File transfer tab in the connection window
- Drag and drop files between local and remote systems
- Right-click context menu options
Command-Line Interface
TeamViewer offers extensive command-line functionality for automation and scripting.
Essential Command-Line Options
# Display help information
teamviewer --help

# Show version information
teamviewer --version

# Check daemon status
teamviewer --daemon status

# Start/stop/restart daemon
sudo teamviewer --daemon start
sudo teamviewer --daemon stop
sudo teamviewer --daemon restart

# Display current configuration
teamviewer --info
Sample Output for –info:
TeamViewer 15.44.3 (DEB) TeamViewer ID: 1 234 567 890 Daemon status: running LAN Address: 192.168.1.100 Public Address: 203.0.113.1Advanced Command-Line Usage
# Set up unattended access password sudo teamviewer --passwd [password] # Export settings teamviewer --export-settings /path/to/settings.tvopt # Import settings teamviewer --import-settings /path/to/settings.tvopt # Enable/disable LAN connections teamviewer --option=lan=1 # Enable teamviewer --option=lan=0 # DisableConfiguring TeamViewer for Different Use Cases
Server Administration Setup
For Linux servers, configure TeamViewer for headless operation:
# Install TeamViewer headless (without GUI dependencies) sudo apt-get install teamviewer-host # Configure for unattended access sudo teamviewer --setup # Set permanent password sudo teamviewer --passwd your_secure_password # Enable automatic startup sudo systemctl enable teamviewerd sudo systemctl start teamviewerdDevelopment Environment Setup
For developers working remotely:
- Enable clipboard synchronization
- Configure screen resolution optimization
- Set up file transfer shortcuts
- Enable remote printing if needed
# Configure for development use teamviewer --option=clipboard=1 teamviewer --option=resolution=1920x1080 teamviewer --option=quality=highSecurity Best Practices
Password Management
- Use strong, unique passwords for unattended access
- Regularly change passwords for security
- Enable two-factor authentication when available
# Change unattended access password
sudo teamviewer --passwd new_secure_password

# Generate random password
teamviewer --generate-password
Access Control Configuration
Configure access restrictions through the Options panel:
- Limit access to specific TeamViewer accounts
- Set up allow/deny lists for Partner IDs
- Configure session recording for audit purposes
- Enable connection confirmations
Network Security
# Configure firewall rules for TeamViewer
sudo ufw allow 5938/tcp
sudo ufw allow 5938/udp

# Check current network configuration
teamviewer --check-network
Troubleshooting Common Issues
Connection Problems
If you're experiencing connection issues:
# Check daemon status
teamviewer --daemon status

# Restart TeamViewer service
sudo systemctl restart teamviewerd

# Check network connectivity
teamviewer --check-network

# View detailed logs
tail -f /var/log/teamviewer15/TeamViewer15_Logfile.log
Installation Issues
Common installation problems and solutions:
# Fix missing dependencies (Ubuntu/Debian)
sudo apt-get install -f

# Fix library issues
sudo apt-get install lib32z1 lib32ncurses5

# Reinstall TeamViewer
sudo apt-get purge teamviewer
sudo dpkg -i teamviewer_amd64.deb
Display Issues
For display-related problems:
# Check X11 forwarding
echo $DISPLAY

# Set display manually if needed
export DISPLAY=:0

# Fix resolution issues
xrandr --output VGA-1 --mode 1920x1080
Performance Optimization
Bandwidth Optimization
Optimize TeamViewer for different network conditions:
# Set quality options
teamviewer --option=quality=low      # For slow connections
teamviewer --option=quality=medium   # Balanced
teamviewer --option=quality=high     # For fast connections

# Enable bandwidth optimization
teamviewer --option=bandwidth-optimization=1
Resource Usage Optimization
# Monitor TeamViewer resource usage
ps aux | grep teamviewer
top -p $(pgrep teamviewer)

# Limit CPU usage if necessary
cpulimit -p $(pgrep teamviewer) -l 50
Integration with System Administration
Automated Deployment
For mass deployment in enterprise environments:
#!/bin/bash
# TeamViewer installation script

# Download and install TeamViewer
wget -O /tmp/teamviewer.deb https://download.teamviewer.com/download/linux/teamviewer_amd64.deb
sudo dpkg -i /tmp/teamviewer.deb
sudo apt-get install -f

# Configure unattended access
sudo teamviewer --passwd "$UNATTENDED_PASSWORD"
sudo systemctl enable teamviewerd

# Apply custom configuration
sudo teamviewer --import-settings /path/to/company-settings.tvopt

echo "TeamViewer installation and configuration completed"
Monitoring and Logging
Set up comprehensive logging for audit purposes:
# Create custom log directory
sudo mkdir -p /var/log/teamviewer-audit

# Configure log rotation
sudo tee /etc/logrotate.d/teamviewer << EOF
/var/log/teamviewer15/*.log {
    daily
    rotate 30
    compress
    missingok
    notifempty
    create 0644 root root
}
EOF
Advanced Features
Wake-on-LAN Configuration
Enable remote wake-up capabilities:
# Enable WoL in network interface
sudo ethtool -s eth0 wol g

# Configure permanent WoL
echo 'NETDOWN=no' | sudo tee -a /etc/sysconfig/network
echo 'ethtool -s eth0 wol g' | sudo tee -a /etc/rc.local

# Test WoL functionality
teamviewer --wol 00:11:22:33:44:55
Custom Branding and Configuration
For business deployments, customize TeamViewer appearance:
# Apply custom configuration file
sudo teamviewer --import-settings /opt/company/teamviewer-config.tvopt

# Set custom Quick Connect button
teamviewer --option=quickconnect-button=1
Alternatives and Comparisons
While TeamViewer is excellent for Linux remote access, consider these alternatives:
- VNC (Virtual Network Computing): Open-source, lighter weight
- AnyDesk: Similar features with different pricing model
- Chrome Remote Desktop: Web-based, good for simple tasks
- SSH with X11 forwarding: Command-line focused, very secure
Conclusion
TeamViewer provides a robust and user-friendly solution for remote access on Linux systems. Whether you're managing servers, providing technical support, or accessing your desktop remotely, TeamViewer's comprehensive feature set and cross-platform compatibility make it an excellent choice.
The key to successful TeamViewer deployment on Linux lies in proper initial configuration, understanding security implications, and leveraging the command-line interface for automation and advanced management. By following the practices outlined in this guide, you'll be able to implement a secure and efficient remote access solution that meets your specific requirements.
Remember to regularly update TeamViewer to ensure you have the latest security patches and features, and always follow security best practices when configuring remote access to your Linux systems.
Related Posts
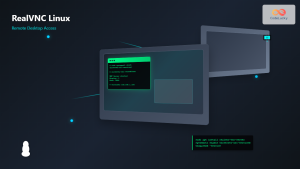
RealVNC Linux: Complete Guide to Remote Desktop Access and Control
RealVNC is a powerful remote desktop software that enables users to control Linux systems remotely over a network connection. As...

xrdp Command Linux: Complete Guide to Remote Desktop Server Setup
The xrdp command is a powerful Linux utility that implements Microsoft's Remote Desktop Protocol (RDP) server functionality on Unix-like systems....
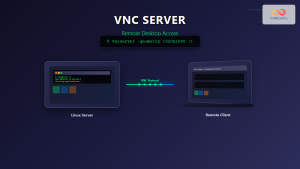
vncserver Command Linux: Complete Guide to VNC Server Setup and Management
The vncserver command is a powerful tool in Linux that enables remote desktop access by starting a Virtual Network Computing...
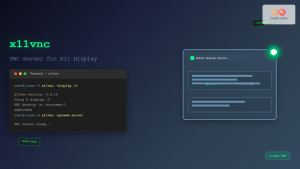
x11vnc Command Linux: Complete Guide to Remote Desktop Access via VNC Server
The x11vnc command is a powerful Linux utility that allows you to share your existing X11 desktop session via VNC...
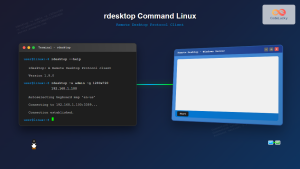
rdesktop Command Linux: Complete Guide to Remote Desktop Protocol Client
The rdesktop command is a powerful Remote Desktop Protocol (RDP) client for Linux systems that enables seamless connections to Windows...

xfreerdp Command Linux: Complete Guide to FreeRDP Remote Desktop Client
The xfreerdp command is a powerful Linux utility that serves as the primary client for the FreeRDP project, enabling users...
vinagre Command Linux: Complete Guide to VNC Viewer and Remote Desktop Access
The vinagre command is a powerful VNC (Virtual Network Computing) viewer for Linux systems that enables users to connect to...
tightvncserver Linux: Complete Guide to TightVNC Server Setup and Configuration
TightVNC Server is a powerful remote desktop solution that allows you to access and control Linux systems remotely over a...
NoMachine Linux: Complete Guide to Remote Desktop Access and Configuration
NoMachine is a powerful remote desktop solution that enables secure access to Linux systems from anywhere in the world. Unlike...
AnyDesk Linux: Complete Remote Desktop Solution Guide for Linux Users
AnyDesk is a powerful cross-platform remote desktop application that enables users to access computers remotely over the internet. For Linux...

Tools for Remote Agile: Essential Collaboration Platforms for Distributed Teams
Remote Agile development has become the norm for countless software teams worldwide. The success of distributed Agile teams heavily depends...
ssh Command Linux: Secure Shell Remote Access Tutorial with Examples
The ssh command in Linux, short for Secure Shell, is one of the most essential tools for system administrators, developers,...


