The node command is the cornerstone of Node.js development on Linux systems, providing developers with powerful capabilities to execute JavaScript applications, manage runtime environments, and debug code efficiently. Whether you’re a beginner starting your Node.js journey or an experienced developer looking to optimize your workflow, mastering the node command is essential for effective Linux-based development.
What is the node Command?
The node command is the primary executable for the Node.js runtime environment, allowing you to run JavaScript code outside of web browsers directly on Linux systems. It transforms your Linux machine into a powerful JavaScript execution environment, enabling server-side development, automation scripts, and command-line tools.
When you install Node.js on Linux, the node command becomes available system-wide, providing access to the V8 JavaScript engine that powers Google Chrome, but optimized for server-side execution.
Basic Syntax and Usage
The fundamental syntax of the node command follows this pattern:
node [options] [script.js] [arguments]Let’s explore the most common usage patterns with practical examples.
Running JavaScript Files
The most basic use case is executing a JavaScript file:
node app.jsCreate a simple example file called hello.js:
// hello.js
console.log('Hello, Linux Node.js!');
console.log('Current working directory:', process.cwd());
console.log('Node.js version:', process.version);
Execute it using:
$ node hello.jsOutput:
Hello, Linux Node.js!
Current working directory: /home/user/projects
Node.js version: v18.17.0
Interactive REPL Mode
Running node without any arguments launches the Read-Eval-Print Loop (REPL), perfect for testing code snippets:
$ node
Welcome to Node.js v18.17.0.
Type ".help" for more information.
> console.log('Testing REPL mode')
Testing REPL mode
undefined
> const sum = (a, b) => a + b
undefined
> sum(5, 3)
8
> .exit
Essential Command-Line Options
The node command offers numerous options to customize execution behavior. Here are the most important ones:
Version Information
$ node --version
v18.17.0

$ node -v
v18.17.0
Help and Documentation
$ node --helpThis displays comprehensive information about all available options and their usage.
Evaluating Code Directly
Execute JavaScript code without creating a file using the -e or --eval option:
$ node -e "console.log('Direct execution:', Math.random())"
Direct execution: 0.7234567890123456
Printing Evaluation Results
Use -p or --print to evaluate and print the result:
$ node -p "Math.PI * 2"
6.283185307179586

$ node -p "new Date().toISOString()"
2025-08-25T04:49:00.000Z
Checking Syntax
Validate JavaScript syntax without execution using -c or --check:
$ node -c app.js
# No output means syntax is valid

$ node -c broken.js
SyntaxError: Unexpected token '{'
Environment Management
Setting Environment Variables
Environment variables significantly impact Node.js behavior:
# Set NODE_ENV for production
$ NODE_ENV=production node app.js

# Set multiple environment variables
$ PORT=3000 NODE_ENV=development node server.js
Example application demonstrating environment usage:
// env-demo.js
console.log('Environment:', process.env.NODE_ENV || 'development');
console.log('Port:', process.env.PORT || 8080);
console.log('Database URL:', process.env.DATABASE_URL || 'localhost');

if (process.env.NODE_ENV === 'production') {
    console.log('Running in production mode');
} else {
    console.log('Running in development mode');
}
Run with different environments:
$ node env-demo.js
Environment: development
Port: 8080
Database URL: localhost
Running in development mode

$ NODE_ENV=production PORT=5000 node env-demo.js
Environment: production
Port: 5000
Database URL: localhost
Running in production mode
Module Resolution Paths
Control module loading with NODE_PATH:
$ NODE_PATH=/custom/modules/path node app.jsDebugging and Development
Built-in Debugger
Node.js includes a powerful built-in debugger:
$ node inspect debug-example.jsCreate a debug example:
// debug-example.js
function calculateSum(numbers) {
    debugger; // Breakpoint
    let sum = 0;
    for (let num of numbers) {
        sum += num;
        console.log(`Adding ${num}, sum is now ${sum}`);
    }
    return sum;
}

const result = calculateSum([1, 2, 3, 4, 5]);
console.log('Final result:', result);
When running with node inspect, you’ll enter an interactive debugging session:
$ node inspect debug-example.js
< Debugger listening on ws://127.0.0.1:9229/...
< For help, see: https://nodejs.org/en/docs/inspector
< Debugger attached.
Break on start in debug-example.js:1
> 1 function calculateSum(numbers) {
  2     debugger; // Breakpoint
  3     let sum = 0;
debug> cont
break in debug-example.js:2
  1 function calculateSum(numbers) {
> 2     debugger; // Breakpoint
  3     let sum = 0;
  4     for (let num of numbers) {
debug> next
break in debug-example.js:3
  2     debugger; // Breakpoint
> 3     let sum = 0;
  4     for (let num of numbers) {
  5         sum += num;
Inspector Mode for Chrome DevTools
Enable Chrome DevTools debugging:
$ node --inspect app.js
Debugger listening on ws://127.0.0.1:9229/...
For help, see: https://nodejs.org/en/docs/inspector
For immediate debugging, use:
$ node --inspect-brk app.jsPerformance and Memory Management
Memory Limits
Adjust heap memory limits for memory-intensive applications:
# Increase old space to 4GB
$ node --max-old-space-size=4096 memory-intensive-app.js

# Set new space size to 256MB
$ node --max-new-space-size=256 app.js
Performance Monitoring
Enable performance timing:
$ node --perf-basic-prof app.jsExample performance monitoring script:
// performance-demo.js
console.time('Execution Time');

// Simulate CPU-intensive task
function fibonacci(n) {
    if (n <= 1) return n;
    return fibonacci(n - 1) + fibonacci(n - 2);
}

console.log('Fibonacci(30):', fibonacci(30));

// Memory usage
const used = process.memoryUsage();
for (let key in used) {
    console.log(`${key}: ${Math.round(used[key] / 1024 / 1024 * 100) / 100} MB`);
}

console.timeEnd('Execution Time');
Sample Output:
$ node performance-demo.js
Fibonacci(30): 832040
rss: 25.45 MB
heapTotal: 7.31 MB
heapUsed: 4.28 MB
external: 0.91 MB
arrayBuffers: 0.02 MB
Execution Time: 45.123ms
Module and Package Management
Running npm Scripts
While not directly a node command feature, understanding how node works with npm is crucial:
# package.json
{
  "scripts": {
    "start": "node server.js",
    "dev": "node --inspect server.js",
    "test": "node test/runner.js"
  }
}
Loading ES Modules
Handle ES modules with appropriate flags:
# For .mjs files
$ node module.mjs

# For .js files with "type": "module" in package.json
$ node --input-type=module --eval "import fs from 'fs'; console.log(fs.readFileSync('package.json', 'utf8'))"
Error Handling and Stack Traces
Enhanced Error Information
Get detailed error information:
$ node --trace-warnings app.jsExample error handling demonstration:
// error-demo.js
process.on('uncaughtException', (error) => {
    console.error('Uncaught Exception:', error.message);
    console.error('Stack trace:', error.stack);
    process.exit(1);
});

process.on('unhandledRejection', (reason, promise) => {
    console.error('Unhandled Rejection at:', promise, 'reason:', reason);
});

// Simulate an error
setTimeout(() => {
    throw new Error('Intentional error for demonstration');
}, 1000);

console.log('Application started...');
Stack Trace Limits
Control stack trace depth:
$ node --stack-trace-limit=50 app.jsSecurity Considerations
Permissions and Policies
Node.js offers experimental permission models:
# Restrict file system access
$ node --experimental-permission --allow-fs-read=./safe-directory app.js
Disable Dangerous Features
# Disable eval and similar functions
$ node --disallow-code-generation-from-strings app.js
Advanced Usage Patterns
Process Management
Understanding process signals and lifecycle:
// process-demo.js
process.on('SIGINT', () => {
    console.log('Received SIGINT. Graceful shutdown...');
    // Cleanup code here
    process.exit(0);
});

process.on('SIGTERM', () => {
    console.log('Received SIGTERM. Graceful shutdown...');
    process.exit(0);
});

console.log('Process ID:', process.pid);
console.log('Press Ctrl+C to exit gracefully');

setInterval(() => {
    console.log('Application running...', new Date().toISOString());
}, 2000);
Command-Line Arguments
Handle command-line arguments effectively:
// args-demo.js
const args = process.argv.slice(2);

console.log('Command-line arguments:');
args.forEach((arg, index) => {
    console.log(`  ${index + 1}: ${arg}`);
});

// Parse named arguments
const namedArgs = {};
args.forEach(arg => {
    if (arg.startsWith('--')) {
        const [key, value] = arg.substring(2).split('=');
        namedArgs[key] = value || true;
    }
});

console.log('Named arguments:', namedArgs);
Usage example:
$ node args-demo.js --port=3000 --debug file1.txt file2.txt
Command-line arguments:
  1: --port=3000
  2: --debug
  3: file1.txt
  4: file2.txt
Named arguments: { port: '3000', debug: true }
Troubleshooting Common Issues
Module Not Found Errors
Debug module resolution issues:
$ node --trace-module-resolution app.jsPerformance Issues
Profile CPU usage:
$ node --prof app.js
# Generates v8.log file for analysis
$ node --prof-process v8.log > profile.txt
Memory Leaks
Generate heap snapshots:
$ node --heap-prof app.jsBest Practices and Optimization
Production Deployment
Optimal settings for production environments:
# Production-ready node execution
$ NODE_ENV=production node --max-old-space-size=2048 --optimize-for-size app.js
Development Workflow
Enhanced development experience:
# Development with auto-restart and debugging
$ node --inspect --trace-warnings --trace-deprecation app.js
Integration with Linux System Tools
Systemd Integration
Create a systemd service for Node.js applications:
# /etc/systemd/system/myapp.service
[Unit]
Description=My Node.js Application
After=network.target

[Service]
Type=simple
User=nodejs
WorkingDirectory=/opt/myapp
ExecStart=/usr/bin/node server.js
Restart=always
RestartSec=10
Environment=NODE_ENV=production
Environment=PORT=3000

[Install]
WantedBy=multi-user.target
Process Monitoring
Use Linux tools to monitor Node.js processes:
# Monitor process resource usage
$ top -p $(pgrep node)

# Check process details
$ ps aux | grep node

# Monitor file descriptors
$ lsof -p $(pgrep node)
Conclusion
The node command is a versatile and powerful tool that forms the foundation of Node.js development on Linux systems. From basic script execution to advanced debugging and performance optimization, mastering its various options and patterns will significantly enhance your development productivity.
Remember to leverage environment variables for configuration management, use the built-in debugging tools for troubleshooting, and apply appropriate security measures for production deployments. With practice and understanding of these concepts, you’ll be able to harness the full potential of Node.js on Linux platforms.
Whether you’re building web servers, automation scripts, or command-line tools, the node command provides the flexibility and power needed for modern JavaScript development outside the browser environment.
Related Posts
Top 10 Programming Languages in 2025: Complete Developer’s Guide to Best Technologies
The programming landscape continues to evolve rapidly, with new languages emerging and established ones adapting to modern development needs. As...

JavaScript Language Overview: Summarizing Key Features and Concepts
JavaScript, often abbreviated as JS, is a versatile and powerful programming language that has become an integral part of web...
java Command Linux: Complete Guide to Running Java Applications and Programs
The java command is one of the most essential tools for developers working with Java applications on Linux systems. This...
ruby Command Linux: Complete Guide to Running Ruby Scripts and Programs
The ruby command is a powerful tool for executing Ruby scripts and programs directly from the Linux command line. Whether...

JavaScript DOM Node Lists: Understanding and Using NodeList Objects
In the world of web development, manipulating the Document Object Model (DOM) is a crucial skill. One of the key...
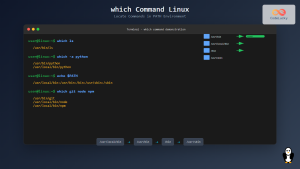
which Command Linux: Complete Guide to Locating Executable Commands in PATH
The which command is a fundamental Linux utility that helps you locate executable files in your system's PATH environment variable....

kubectl Command Linux: Kubernetes Management Made Simple
The kubectl command is the primary command-line interface for interacting with Kubernetes clusters. This powerful tool allows administrators and developers...

JavaScript Editor: Building an Interactive Code Editor
In the ever-evolving world of web development, interactive code editors have become an essential tool for developers, educators, and learners...

JavaScript Modules: Organizing and Sharing Code
In the world of modern JavaScript development, organizing and sharing code efficiently is crucial for building maintainable and scalable applications....
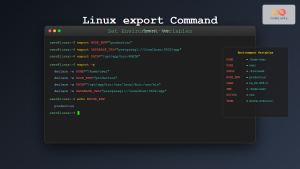
export Command Linux: Complete Guide to Environment Variables Management
The export command is one of the most fundamental tools in Linux for managing environment variables. Whether you're a system...
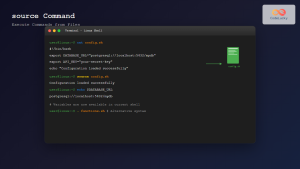
source Command Linux: Execute Scripts and Load Functions Efficiently
The source command in Linux is a powerful built-in shell command that executes commands from a file within the current...

JavaScript Asynchronous Programming: Concepts and Techniques
JavaScript, being a single-threaded language, relies heavily on asynchronous programming to handle time-consuming operations without blocking the main execution thread....