
The efibootmgr command is an essential Linux utility for managing EFI (Extensible Firmware Interface) boot entries on UEFI-enabled systems. This powerful tool allows system administrators to view, create, modify, and delete boot entries directly from the command line, making it indispensable for system configuration and troubleshooting.
What is efibootmgr?
The efibootmgr command is a userspace application that modifies the EFI Boot Manager. It can display current boot information, change the boot order, create new boot entries, and remove existing ones. This tool communicates directly with the system’s UEFI firmware through the EFI variables interface, making it a crucial component for modern Linux system management.
Prerequisites and Installation
Before using efibootmgr, ensure your system meets these requirements:
- UEFI-based system (not legacy BIOS)
- Linux kernel with EFI support enabled
- Root privileges for most operations
Installing efibootmgr
Most Linux distributions include efibootmgr in their repositories:
# Ubuntu/Debian
sudo apt update
sudo apt install efibootmgr

# CentOS/RHEL/Fedora
sudo dnf install efibootmgr
# or for older versions
sudo yum install efibootmgr

# Arch Linux
sudo pacman -S efibootmgr
Basic Syntax and Options
The basic syntax of efibootmgr follows this pattern:
efibootmgr [OPTIONS]Common Options
| Option | Description |
|---|---|
-v, --verbose |
Display detailed boot information |
-o, --bootorder |
Set the boot order |
-n, --bootnext |
Set the next boot entry |
-c, --create |
Create a new boot entry |
-B, --delete-bootnum |
Delete a boot entry |
-d, --disk |
Specify the disk device |
-p, --part |
Specify the partition number |
-L, --label |
Set the boot entry label |
Viewing Current Boot Configuration
To display the current EFI boot configuration, use the basic command without any options:
sudo efibootmgrExample output:
BootCurrent: 0001
Timeout: 1 seconds
BootOrder: 0001,0000,0002,0003
Boot0000* Windows Boot Manager
Boot0001* Ubuntu
Boot0002* UEFI: Built-in EFI Shell
Boot0003* UEFI: USB Device
For more detailed information, use the verbose flag:
sudo efibootmgr -vVerbose output example:
BootCurrent: 0001
Timeout: 1 seconds
BootOrder: 0001,0000,0002,0003
Boot0000* Windows Boot Manager	HD(1,GPT,12345678-1234-1234-1234-123456789012,0x800,0x32000)/File(\EFI\Microsoft\Boot\bootmgfw.efi)
Boot0001* Ubuntu	HD(1,GPT,87654321-4321-4321-4321-210987654321,0x800,0x32000)/File(\EFI\ubuntu\grubx64.efi)
Boot0002* UEFI: Built-in EFI Shell	VenHw(5023b95c-db26-429b-a648-bd47664c8012)
Boot0003* UEFI: USB Device	USB(1,0)/USB(0,0)
Managing Boot Order
Changing Boot Order
To modify the boot order, use the -o option followed by comma-separated boot entry numbers:
sudo efibootmgr -o 0001,0000,0002This command sets the boot order to:
- Boot0001 (Ubuntu)
- Boot0000 (Windows Boot Manager)
- Boot0002 (UEFI Shell)
Setting Next Boot Entry
To boot from a specific entry only on the next restart:
sudo efibootmgr -n 0000This will boot from Boot0000 on the next restart, then return to the normal boot order.
Creating New Boot Entries
Creating a new boot entry requires several parameters. Here’s the basic syntax:
sudo efibootmgr -c -d /dev/sdX -p Y -L "Boot Label" -l "\EFI\path\to\bootloader.efi"Example: Creating a Ubuntu Boot Entry
sudo efibootmgr -c -d /dev/sda -p 1 -L "Ubuntu 22.04" -l "\EFI\ubuntu\grubx64.efi"Parameters explained:
-c: Create a new entry-d /dev/sda: Boot device-p 1: EFI system partition number-L "Ubuntu 22.04": Boot entry label-l "\EFI\ubuntu\grubx64.efi": Path to bootloader
Creating Entry with Additional Parameters
You can add kernel parameters using the -u option:
sudo efibootmgr -c -d /dev/sda -p 1 -L "Ubuntu Debug" -l "\EFI\ubuntu\grubx64.efi" -u "quiet splash debug"Deleting Boot Entries
To remove a boot entry, use the -B option with the boot number:
sudo efibootmgr -B -b 0003This removes Boot0003 from the boot menu.
Removing Multiple Entries
To delete multiple entries, run the command for each:
sudo efibootmgr -B -b 0003
sudo efibootmgr -B -b 0004
sudo efibootmgr -B -b 0005
Advanced efibootmgr Usage
Activating and Deactivating Entries
You can activate a boot entry without deleting it:
sudo efibootmgr -b 0002 -aTo deactivate (but not delete) an entry:
sudo efibootmgr -b 0002 -ATimeout Configuration
Set the boot menu timeout (in seconds):
sudo efibootmgr -t 10To disable timeout (wait indefinitely):
sudo efibootmgr -t 0Practical Examples and Use Cases
Dual Boot Setup
Setting up a dual-boot system with Windows and Linux:
# View current entries
sudo efibootmgr -v

# Create Linux entry
sudo efibootmgr -c -d /dev/sda -p 1 -L "Linux Mint" -l "\EFI\linuxmint\grubx64.efi"

# Set boot order (Linux first, then Windows)
sudo efibootmgr -o 0004,0000
Recovery Boot Entry
Creating a recovery boot entry for system maintenance:
sudo efibootmgr -c -d /dev/sda -p 1 -L "System Recovery" -l "\EFI\recovery\bootx64.efi"Fixing Boot Issues
If your system won’t boot, you can recreate the boot entry from a live USB:
# Boot from live USB, then mount your system
sudo mount /dev/sda2 /mnt
sudo mount /dev/sda1 /mnt/boot/efi

# Chroot into your system
sudo chroot /mnt

# Recreate boot entry
efibootmgr -c -d /dev/sda -p 1 -L "Ubuntu Recovery" -l "\EFI\ubuntu\grubx64.efi"
Troubleshooting Common Issues
EFI Variables Not Accessible
If you get permission errors, ensure:
# Check if efivarfs is mounted
mount | grep efivarfs

# If not mounted, mount it
sudo mount -t efivarfs efivarfs /sys/firmware/efi/efivars
Boot Entry Not Appearing
Sometimes firmware ignores entries. Try:
# Check if entry exists but is inactive
sudo efibootmgr -v

# Activate the entry
sudo efibootmgr -b 0001 -a

# Update boot order
sudo efibootmgr -o 0001,0000
Secure Boot Issues
For systems with Secure Boot enabled, ensure your bootloader is properly signed or disable Secure Boot in UEFI settings.
Security Considerations
When using efibootmgr, consider these security aspects:
- Always run with sudo/root privileges
- Backup current boot configuration before making changes
- Verify bootloader paths exist before creating entries
- Be cautious with Secure Boot modifications
Integration with Other Tools
Working with GRUB
After modifying boot entries, update GRUB configuration:
sudo update-grub
# or
sudo grub-mkconfig -o /boot/grub/grub.cfg
Systemd-boot Integration
For systemd-boot users:
sudo bootctl status
sudo bootctl update
Best Practices
- Backup First: Always record current boot configuration before modifications
- Test Changes: Verify boot entries work before making permanent changes
- Use Descriptive Labels: Choose clear, informative names for boot entries
- Regular Maintenance: Periodically clean unused boot entries
- Document Changes: Keep records of customizations for future reference
Conclusion
The efibootmgr command is an indispensable tool for managing UEFI boot configurations in Linux. From simple boot order changes to complex dual-boot setups, mastering this utility enables precise control over your system’s boot process. Whether you’re a system administrator managing multiple machines or a user fine-tuning your personal setup, efibootmgr provides the flexibility and power needed for effective boot management.
Remember to always exercise caution when modifying boot configurations, as incorrect changes can make your system unbootable. With proper understanding and careful implementation, efibootmgr becomes a powerful ally in maintaining and optimizing your Linux system’s boot behavior.
Related Posts
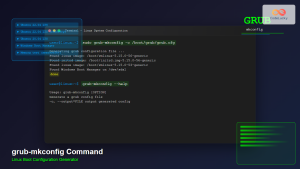
grub-mkconfig Command Linux: Complete Guide to Generate GRUB Configuration Files
The grub-mkconfig command is an essential tool for Linux system administrators and users who need to manage their system's boot...
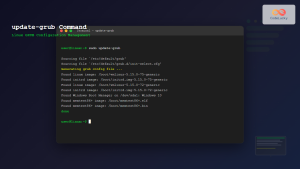
update-grub Command Linux: Complete Guide to GRUB Configuration Management
The update-grub command is an essential tool for Linux system administrators and users who need to manage their GRUB (Grand...

Secure Boot Process: Trusted Platform Module Complete Guide
The Secure Boot process with Trusted Platform Module (TPM) represents a fundamental shift in computer security, providing hardware-based protection against...
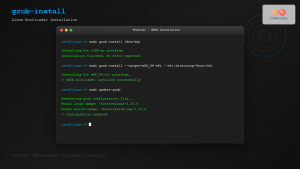
grub-install Command Linux: Complete Guide to Install GRUB Bootloader
The grub-install command is a critical system administration tool in Linux that installs the GRUB (Grand Unified Bootloader) bootloader to...
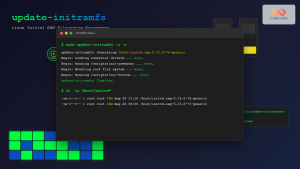
update-initramfs Command Linux: Complete Guide to Initial RAM Filesystem Management
The update-initramfs command is a crucial Linux system administration tool that manages the initial RAM filesystem (initramfs). This command creates,...

init Command Linux: Complete Guide to Process Control and System Initialization
The init command in Linux serves as the cornerstone of system initialization and process control. As the first process started...
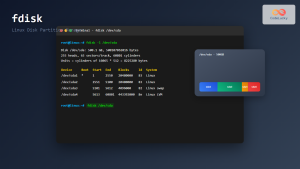
fdisk Command Linux: Complete Guide to Disk Partition Management
The fdisk command is one of the most powerful and essential tools for disk partition management in Linux systems. Whether...
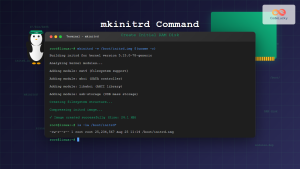
mkinitrd Command Linux: Complete Guide to Creating Initial RAM Disks
The mkinitrd command is a crucial Linux utility that creates initial RAM disk (initrd) images, which are essential for the...

e2fsck Command Linux: Complete Guide to Check and Repair Ext2/3/4 Filesystems
The e2fsck command is a critical system administration tool in Linux designed to check and repair Ext2, Ext3, and Ext4...
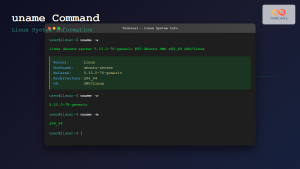
uname Command Linux: Complete Guide to Display System Information
The uname command is one of the most fundamental Linux utilities for retrieving system information. Whether you're a system administrator,...
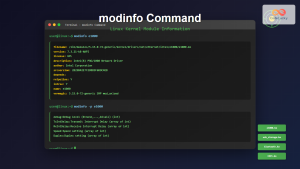
modinfo Command Linux: Complete Guide to Display Kernel Module Information
The modinfo command is an essential Linux utility that displays detailed information about kernel modules. Whether you're troubleshooting hardware issues,...
insmod Command Linux: Complete Guide to Insert Kernel Modules
The insmod command is a fundamental Linux utility that allows system administrators and developers to insert kernel modules into the...


