
The CSS visibility property is a fundamental tool for controlling element visibility on web pages. Unlike other hiding methods, it maintains the element’s space in the document flow while controlling whether users can see it. This comprehensive guide explores everything you need to know about the visibility property.
Understanding CSS Visibility Property
The visibility property determines whether an element is visible or hidden. When an element is hidden using visibility, it still occupies space in the layout but becomes invisible to users. This behavior differs significantly from the display: none property, which removes the element from the document flow entirely.
Basic Syntax
selector {
  visibility: value;
}
CSS Visibility Values
The visibility property accepts three main values:
1. visible (Default)
The visible value makes the element visible and is the default behavior for all elements.
Example: Visible Element
.visible-element {
  visibility: visible;
  background-color: #4CAF50;
  color: white;
  padding: 15px;
}
2. hidden
The hidden value makes the element invisible while preserving its space in the layout. The element becomes completely transparent but still affects the page structure.
Example: Hidden Element
Notice the gap where the hidden element should be
.hidden-element {
  visibility: hidden;
  background-color: #f44336;
  color: white;
  padding: 15px;
}
3. collapse
The collapse value behaves differently depending on the element type. For table elements (rows, columns, groups), it removes them from display and frees up space. For other elements, it behaves like hidden.
Example: Collapse in Tables
| Name | Age | City |
|---|---|---|
| John | 25 | New York |
| Jane | 30 | London |
| Bob | 35 | Paris |
The middle row is collapsed and doesn’t take up space
tr.collapsed-row {
  visibility: collapse;
}
Interactive Visibility Demo
Try Different Visibility Values
Visibility vs Display: Key Differences
Understanding the difference between visibility and display properties is crucial for effective web development:
Comparison Demo
Using visibility: hidden
Using display: none
| Property | visibility: hidden | display: none |
|---|---|---|
| Space Occupation | Maintains space | Removes from flow |
| Layout Impact | No layout changes | Layout reflows |
| Performance | Better for animations | Triggers reflow |
| Accessibility | Still in DOM | Completely hidden |
Inheritance and Cascading
The visibility property is inherited by child elements, but children can override their parent’s visibility setting. This creates interesting possibilities for showing specific parts of hidden containers.
Example: Inheritance Override
.hidden-parent {
  visibility: hidden;
}

.visible-child {
  visibility: visible; /* Override parent's hidden value */
}
Practical Use Cases
1. Loading States and Placeholders
Use visibility to maintain layout stability while content loads:
Loading State Example
2. Tooltips and Hover Effects
Visibility works well for creating smooth tooltip interactions:
Tooltip Example
Hover over me
3. Print Styles
Control element visibility for different media types:
/* Hide navigation for print */
@media print {
  .navigation {
    visibility: hidden;
  }

  .print-only {
    visibility: visible;
  }
}

/* Hide print-specific content on screen */
@media screen {
  .print-only {
    visibility: hidden;
  }
}
Browser Compatibility
The CSS visibility property enjoys excellent browser support across all modern browsers:
- Chrome: Full support since version 1
- Firefox: Full support since version 1
- Safari: Full support since version 1
- Edge: Full support since version 12
- Internet Explorer: Full support since version 4
The collapse value has slightly different support, particularly for non-table elements, but is well-supported for table elements across all browsers.
Performance Considerations
When working with visibility, consider these performance aspects:
Advantages of visibility over display
- No layout recalculation: Changing visibility doesn’t trigger reflow
- Smooth animations: Better for CSS transitions and animations
- Preserved layout: Maintains document structure integrity
When to use display instead
- Memory efficiency: When you need to completely remove elements
- Dynamic layouts: When layout should adapt to missing elements
- Accessibility: When elements should be completely hidden from screen readers
Accessibility Best Practices
When using visibility for accessibility, remember these guidelines:
- Screen readers: Elements with
visibility: hiddenare still accessible to screen readers - Focus management: Hidden elements can still receive focus, which may confuse users
- ARIA attributes: Use
aria-hidden="true"alongside visibility for better accessibility - Keyboard navigation: Ensure hidden interactive elements don’t interfere with keyboard navigation
Accessibility Example
/* Proper accessibility hiding */
.accessible-hide {
  visibility: hidden;
  /* Remove from tab order */
  pointer-events: none;
}

/* For screen readers */
.screen-reader-hide {
  visibility: hidden;
  aria-hidden: true;
}
Common Mistakes and Solutions
Mistake 1: Expecting visibility: hidden to remove space
Solution: Use display: none if you need to remove the element from the document flow.
Mistake 2: Forgetting about inheritance
Solution: Remember that child elements inherit visibility and can override it with visibility: visible.
Mistake 3: Using visibility for performance-critical animations
Solution: Consider using opacity combined with pointer-events: none for better animation performance.
Advanced Techniques
Combining with CSS Transforms
Smooth Visibility Transitions
.advanced-hide {
  opacity: 0;
  transform: scale(0.8);
  transition: all 0.5s ease;
  /* Delay visibility change until animation completes */
  transition-delay: 0s, 0s, 0.5s;
  transition-property: opacity, transform, visibility;
  visibility: hidden;
}

.advanced-show {
  opacity: 1;
  transform: scale(1);
  visibility: visible;
  transition-delay: 0s;
}
Conclusion
The CSS visibility property is a powerful tool for controlling element visibility while maintaining layout structure. Understanding when to use visible, hidden, or collapse values, and how they differ from the display property, enables you to create better user experiences with smoother interactions and maintained layouts.
Key takeaways for using visibility effectively:
- Use
visibility: hiddenwhen you need to hide elements while preserving layout space - Combine with opacity and transforms for smooth animations
- Consider accessibility implications and use appropriate ARIA attributes
- Remember that visibility is inherited and can be overridden by child elements
- Choose between visibility and display based on your specific layout needs
Master these concepts, and you’ll have greater control over your web page layouts and user interactions, creating more polished and professional web experiences.
Related Posts

CSS Style visibility Property: CSS Visibility
Understanding the CSS visibility Property The visibility property in CSS controls the visibility of an element without affecting the layout...
CSS clear Property: Mastering CSS Clear for Layout Control
Understanding the CSS clear Property: Mastering Layout Control The clear property in CSS is a powerful tool for controlling the...

CSS display Property: CSS Display
Understanding the CSS display Property: A Comprehensive Guide The display property in CSS is a cornerstone for controlling the layout...

CSS Style opacity Property: CSS Opacity
CSS Opacity Property: A Comprehensive Guide The CSS opacity property is a fundamental tool for controlling the transparency of elements...
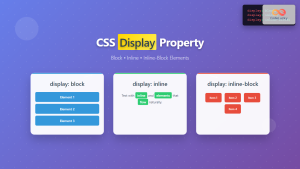
CSS Display Property: Complete Guide to Block, Inline, and Inline-Block Elements
The CSS display property is one of the most fundamental concepts in web development, controlling how elements are rendered and...
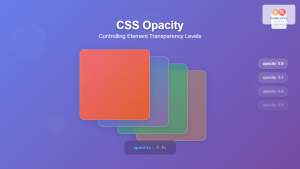
CSS Opacity: Complete Guide to Controlling Element Transparency Levels
Understanding CSS Opacity Property The CSS opacity property is a fundamental styling tool that controls the transparency level of HTML...
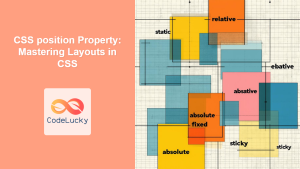
CSS position Property: Mastering Layouts in CSS
Understanding the CSS position Property: A Comprehensive Guide The position property in CSS is a fundamental tool for controlling the...
CSS Style right Property: CSS Right
Understanding the CSS right Property The CSS right property plays a crucial role in positioning elements within a web page....
CSS Style minWidth Property: CSS Min Width
CSS min-width Property: Controlling Element Size The CSS min-width property sets the minimum width of an element. It prevents the...
HTML Hidden Property: Hidden Input Form
HTML Hidden Property: Hidden Input Form The hidden attribute in HTML is a boolean attribute that specifies whether an element...

HTML Hidden value Property: Hidden Input Value
HTML Hidden Value Property: Storing Data Invisibly The HTML value property, when used with the <input type="hidden"> element, allows you...

HTML style Property: Element Style
HTML style Property: Element Style The HTML style property allows you to apply inline CSS styles directly to individual HTML...


