
Understanding the CSS visibility Property
The visibility property in CSS controls the visibility of an element without affecting the layout of the document. This means that even if an element is invisible, it still occupies its space in the layout. This is a key difference compared to display: none, which removes the element from the layout entirely. The visibility property is useful for creating effects like hiding elements temporarily or controlling the appearance of elements in specific states.
Purpose of the visibility Property
The primary purpose of the visibility property is to:
- Hide or show elements while maintaining their space in the document flow.
- Control the visibility of table rows, columns, and column groups.
- Create dynamic effects through JavaScript by toggling visibility.
Syntax and Values
The visibility property accepts several values, each with its own effect on the element:
visibility: visible | hidden | collapse | initial | inherit;
| Value | Description |
|---|---|
| `visible` | The element is visible. This is the default value. |
| `hidden` | The element is invisible, but its space in the layout is preserved. |
| `collapse` | When used on table rows, columns, or column groups, the element is removed, and the space it occupied may be available for other content. In other elements, it behaves like `hidden`. |
| `initial` | Sets the property to its default value (`visible`). |
| `inherit` | Inherits the `visibility` value from its parent element. |
Examples of the visibility Property
Let’s explore how to use the visibility property with practical examples.
Setting Element Visibility
The visible and hidden values are the most commonly used. The visible value ensures the element is displayed, while hidden makes it invisible.
<div id="visibilityExample">
  <p style="visibility: visible;">This paragraph is visible.</p>
  <p style="visibility: hidden;">This paragraph is hidden.</p>
</div>
This paragraph is visible.
Using collapse with Tables
The collapse value is specific to table elements, rows, columns, and column groups.
<table id="collapseTable" style="border-collapse: collapse;">
  <tr>
    <th>Header 1</th>
    <th>Header 2</th>
  </tr>
  <tr>
    <td>Row 1, Cell 1</td>
    <td style="visibility: collapse;">Row 1, Cell 2</td>
  </tr>
  <tr>
    <td>Row 2, Cell 1</td>
    <td>Row 2, Cell 2</td>
  </tr>
</table>
| Header 1 | Header 2 |
|---|---|
| Row 1, Cell 1 | Row 1, Cell 2 |
| Row 2, Cell 1 | Row 2, Cell 2 |
Dynamic Visibility Control with JavaScript
You can dynamically change the visibility of an element using JavaScript.
<button id="toggleButton">Toggle Visibility</button>
<p id="dynamicVisibility" style="visibility: visible;">
  This paragraph can be toggled.
</p>

<script>
  const toggleButtonEl = document.getElementById("toggleButton");
  const dynamicVisibilityEl = document.getElementById("dynamicVisibility");

  toggleButtonEl.addEventListener("click", function () {
    if (dynamicVisibilityEl.style.visibility === "visible") {
      dynamicVisibilityEl.style.visibility = "hidden";
    } else {
      dynamicVisibilityEl.style.visibility = "visible";
    }
  });
</script>
This paragraph can be toggled.
Clicking the button toggles the visibility of the paragraph.
Key Differences: visibility: hidden vs. display: none
It’s essential to understand the distinction between visibility: hidden and display: none.
visibility: hidden: The element becomes invisible, but it still occupies its original space in the layout. Other elements are not repositioned to fill the void.display: none: The element is completely removed from the document flow. It takes up no space, and other elements are repositioned as if the element doesn’t exist.
<div id="differenceExample">
  <p>This is the first paragraph.</p>
  <p style="visibility: hidden;">This paragraph is hidden.</p>
  <p>This is the third paragraph.</p>
</div>

<div id="differenceExample2">
  <p>This is the first paragraph.</p>
  <p style="display: none;">This paragraph is hidden.</p>
  <p>This is the third paragraph.</p>
</div>
This is the first paragraph.
This is the third paragraph.
This is the first paragraph.
This is the third paragraph.
In the first example, the second paragraph is hidden, but the third paragraph remains in its original position. In the second example, the second paragraph is removed, and the third paragraph moves up.
Real-World Applications of the visibility Property
The visibility property is used in various scenarios:
- Tooltips and Popovers: Displaying tooltips or popovers on hover or click.
- Form Validation: Showing or hiding validation messages based on input.
- Conditional Content: Displaying different content based on user roles or settings.
- Progress Indicators: Showing or hiding progress indicators during asynchronous operations.
Use Case Example: Creating a Simple Tooltip
Let’s create a practical example of a tooltip that appears on hover using the visibility property.
<div id="tooltipContainer" style="position: relative; display: inline-block;">
  Hover over me
  <span id="tooltipText" style="visibility: hidden; position: absolute; top: -30px; left: 50%; transform: translateX(-50%); background-color: black; color: white; padding: 5px; border-radius: 5px; white-space: nowrap;">
    This is a tooltip!
  </span>
</div>

<style>
  #tooltipContainer:hover #tooltipText {
    visibility: visible;
  }
</style>
This is a tooltip!
When you hover over the text, the tooltip appears.
Browser Support
The visibility property is widely supported across all modern browsers.
Tips and Best Practices
- Use
visibility: hiddenwhen you want to maintain the element’s space in the layout. - Use
display: nonewhen you want to completely remove the element from the layout. - Use JavaScript to dynamically toggle the
visibilityproperty for interactive effects. - Consider accessibility when using
visibility, as screen readers may not announce hidden content.
Conclusion
The visibility property in CSS is a versatile tool for controlling the visibility of elements without affecting the layout. Understanding its values and differences from display: none allows you to create dynamic and visually appealing web pages. By following the examples and best practices outlined in this guide, you can effectively use the visibility property to enhance your web development projects.
Related Posts

CSS Visibility Property: Complete Guide to Showing and Hiding Elements
The CSS visibility property is a fundamental tool for controlling element visibility on web pages. Unlike other hiding methods, it...

CSS display Property: CSS Display
Understanding the CSS display Property: A Comprehensive Guide The display property in CSS is a cornerstone for controlling the layout...
CSS clear Property: Mastering CSS Clear for Layout Control
Understanding the CSS clear Property: Mastering Layout Control The clear property in CSS is a powerful tool for controlling the...
CSS table-layout Property: CSS Table Layout Explained
Understanding the CSS table-layout Property The table-layout property in CSS controls how the browser calculates the layout of a table....
CSS position Property: Mastering Layouts in CSS
Understanding the CSS position Property: A Comprehensive Guide The position property in CSS is a fundamental tool for controlling the...

HTML style Property: Element Style
HTML style Property: Element Style The HTML style property allows you to apply inline CSS styles directly to individual HTML...

CSS Style opacity Property: CSS Opacity
CSS Opacity Property: A Comprehensive Guide The CSS opacity property is a fundamental tool for controlling the transparency of elements...
CSS Style height Property: CSS Height
Understanding the CSS height Property: A Comprehensive Guide The height property in CSS specifies the height of an element's content...
CSS Style right Property: CSS Right
Understanding the CSS right Property The CSS right property plays a crucial role in positioning elements within a web page....
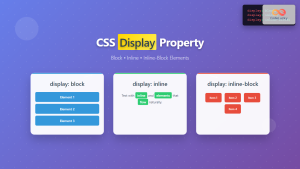
CSS Display Property: Complete Guide to Block, Inline, and Inline-Block Elements
The CSS display property is one of the most fundamental concepts in web development, controlling how elements are rendered and...
CSS Style paddingTop Property: CSS Padding Top
Understanding the CSS padding-top Property The padding-top property in CSS defines the amount of space between the top edge of...

CSS Isolation Property: Isolate Styles for Reusable Components
CSS isolation Property: Isolating Styles for Reusable Components The CSS isolation property controls whether an element must create a new...


