
The xfs_repair command is a powerful utility in Linux designed specifically for checking and repairing XFS filesystems. As XFS is widely used in enterprise environments and high-performance computing systems, understanding how to properly use xfs_repair is crucial for system administrators and Linux users dealing with filesystem corruption or integrity issues.
What is xfs_repair?
xfs_repair is a filesystem repair utility that comes as part of the XFS utilities package. It’s designed to detect and repair corruption in XFS filesystems, making it an essential tool for maintaining data integrity and system stability. Unlike some filesystem checkers that can run on mounted filesystems, xfs_repair requires the filesystem to be unmounted before operation.
Installation and Prerequisites
Before using xfs_repair, ensure you have the XFS utilities installed on your system:
Ubuntu/Debian:
sudo apt update
sudo apt install xfsprogs
CentOS/RHEL/Fedora:
sudo yum install xfsprogs
# or for newer versions
sudo dnf install xfsprogs
Arch Linux:
sudo pacman -S xfsprogsBasic Syntax
The basic syntax of the xfs_repair command is:
xfs_repair [options] deviceWhere device is the path to the XFS filesystem device (e.g., /dev/sda1, /dev/nvme0n1p2).
Important Safety Considerations
🚨 Critical Warning
- Always unmount the filesystem before running
xfs_repair - Create a backup of important data before attempting repairs
- Never run xfs_repair on a mounted filesystem – this can cause severe data corruption
- Ensure sufficient free space on the system for repair operations
Common xfs_repair Options
| Option | Description |
|---|---|
-n |
Check-only mode (no repairs performed) |
-v |
Verbose output |
-f |
Force repair even if filesystem appears clean |
-L |
Zero the log (use with extreme caution) |
-d |
Repair dangerously (repairs even with active log) |
Step-by-Step Repair Process
Step 1: Unmount the Filesystem
First, unmount the XFS filesystem you want to repair:
sudo umount /dev/sda1If the filesystem is busy, you can check which processes are using it:
sudo lsof /mount/point
sudo fuser -v /mount/point
Step 2: Check Filesystem Status (Dry Run)
Before making any changes, perform a check-only scan to assess the damage:
sudo xfs_repair -n /dev/sda1Example output:
Phase 1 - find and verify superblock...
Phase 2 - using internal log
        - zero log...
        - scan filesystem freespace and inode maps...
Phase 3 - for each AG...
        - scan and clear agi unlinked lists...
        - process known inodes and perform inode discovery...
        - agno = 0
        - agno = 1
        - agno = 2
        - agno = 3
        - process newly discovered inodes...
Phase 4 - check for duplicate blocks...
        - setting up duplicate extent list...
        - check for inodes claiming duplicate blocks...
        - agno = 0
        - agno = 1
        - agno = 2
        - agno = 3
Phase 5 - rebuild AG headers and trees...
        - reset superblock...
Phase 6 - check inode connectivity...
        - resetting contents of realtime bitmap and summary inodes
        - traversing filesystem ...
        - traversal finished ...
        - moving disconnected inodes to lost+found ...
Phase 7 - verify and correct link counts...
No modify flag set, skipping filesystem flush.
done
Step 3: Perform the Actual Repair
If issues were found in the check phase, run the repair:
sudo xfs_repair /dev/sda1Real-World Examples
Example 1: Basic Filesystem Check
Let’s check an XFS filesystem for errors without making any repairs:
# Unmount the filesystem first
sudo umount /home

# Perform check-only scan
sudo xfs_repair -n /dev/sda2
Sample output for a clean filesystem:
Phase 1 - find and verify superblock...
Phase 2 - using internal log
        - zero log...
        - scan filesystem freespace and inode maps...
Phase 3 - for each AG...
        - scan and clear agi unlinked lists...
        - process known inodes and perform inode discovery...
        - agno = 0
        - agno = 1
        - process newly discovered inodes...
Phase 4 - check for duplicate blocks...
        - setting up duplicate extent list...
        - check for inodes claiming duplicate blocks...
Phase 5 - rebuild AG headers and trees...
        - reset superblock...
Phase 6 - check inode connectivity...
        - traversing filesystem ...
        - traversal finished ...
Phase 7 - verify and correct link counts...
No modify flag set, skipping filesystem flush.
done
Example 2: Verbose Repair Operation
For detailed information during the repair process:
sudo xfs_repair -v /dev/sda2Sample verbose output:
Phase 1 - find and verify superblock...
        - block cache size set to 131072 entries
Phase 2 - using internal log
        - zero log...
        - scan filesystem freespace and inode maps...
        - found root inode chunk
Phase 3 - for each AG...
        - scan and clear agi unlinked lists...
        - process known inodes and perform inode discovery...
        - agno = 0
        - agno = 1
        - process newly discovered inodes...
Phase 4 - check for duplicate blocks...
        - setting up duplicate extent list...
        - check for inodes claiming duplicate blocks...
        - agno = 0
        - agno = 1
Phase 5 - rebuild AG headers and trees...
        - reset superblock counters...
Phase 6 - check inode connectivity...
        - resetting contents of realtime bitmap and summary inodes
        - traversing filesystem ...
        - traversal finished ...
        - moving disconnected inodes to lost+found ...
Phase 7 - verify and correct link counts...
done
Example 3: Emergency Log Zeroing
In extreme cases where the log is corrupted and preventing normal repair:
⚠️ Danger Zone
Use the -L option only as a last resort, as it can cause data loss:
sudo xfs_repair -L /dev/sda2Understanding xfs_repair Phases
The xfs_repair utility works in seven distinct phases:
- Phase 1: Locates and verifies the superblock
- Phase 2: Checks the log and scans filesystem metadata
- Phase 3: Processes inodes and allocation groups
- Phase 4: Identifies and resolves duplicate blocks
- Phase 5: Rebuilds allocation group headers and trees
- Phase 6: Verifies inode connectivity and moves orphaned files
- Phase 7: Corrects link counts
Common Error Scenarios and Solutions
Scenario 1: Filesystem is Mounted
Error:
xfs_repair: /dev/sda1 contains a mounted filesystem
xfs_repair: /dev/sda1 contains a mounted and writable filesystem

fatal error -- couldn't initialize XFS library
Solution:
# Unmount the filesystem first
sudo umount /dev/sda1

# Then run repair
sudo xfs_repair /dev/sda1
Scenario 2: Dirty Log Detected
Error:
Log appears to be dirty, not replaying log.
Use -L option to destroy the log and attempt repair.
Solution:
# First try normal repair
sudo xfs_repair /dev/sda1

# If that fails, use -L as last resort (DATA LOSS POSSIBLE)
sudo xfs_repair -L /dev/sda1
Scenario 3: Superblock Corruption
If the primary superblock is corrupted, xfs_repair will automatically try to use secondary superblocks:
sudo xfs_repair /dev/sda1You can also manually specify a secondary superblock:
sudo xfs_repair -s 1 /dev/sda1Best Practices and Tips
1. Regular Filesystem Monitoring
Use xfs_info to monitor filesystem health:
xfs_info /mount/point2. Check Filesystem Statistics
Before repair, gather filesystem information:
sudo xfs_db -r /dev/sda1 -c "sb 0" -c "print"3. Monitor Repair Progress
For large filesystems, repairs can take hours. Monitor progress with:
sudo xfs_repair -v /dev/sda1 | tee repair.log4. Post-Repair Verification
After repair, mount the filesystem and check for a lost+found directory:
sudo mount /dev/sda1 /mount/point
ls -la /mount/point/lost+found
Performance Considerations
For large XFS filesystems, consider these performance optimizations:
1. Increase Buffer Cache
sudo xfs_repair -t 60 /dev/sda12. Use Multiple Threads (for newer versions)
sudo xfs_repair -m 8 /dev/sda1Troubleshooting Common Issues
Issue: Repair Takes Too Long
Symptoms: Repair process seems stuck or takes excessive time
Solutions:
- Ensure sufficient system RAM
- Check for hardware issues using
dmesg - Consider using
-moption for multi-threading
Issue: Out of Space During Repair
Symptoms: Repair fails with “No space left on device”
Solutions:
- Free up space on the root filesystem
- Use a different temporary directory with
-toption - Clean up system logs and temporary files
Advanced Usage Examples
Repairing RAID Arrays
For XFS filesystems on RAID arrays:
# Check RAID status first
cat /proc/mdstat

# Repair the XFS filesystem
sudo xfs_repair /dev/md0
Network Attached Storage
For NFS-exported XFS filesystems:
# Stop NFS services
sudo systemctl stop nfs-server

# Unmount and repair
sudo umount /export/data
sudo xfs_repair /dev/sdb1

# Remount and restart services
sudo mount /dev/sdb1 /export/data
sudo systemctl start nfs-server
Prevention and Maintenance
Regular Monitoring Script
Create a monitoring script to check XFS filesystem health:
#!/bin/bash
# xfs_health_check.sh

DEVICE="/dev/sda1"
LOGFILE="/var/log/xfs_health.log"

echo "$(date): Checking XFS filesystem health" >> $LOGFILE

# Perform read-only check
if xfs_repair -n $DEVICE >> $LOGFILE 2>&1; then
    echo "$(date): Filesystem is clean" >> $LOGFILE
else
    echo "$(date): Issues detected - manual intervention required" >> $LOGFILE
    # Send alert notification here
fi
Automated Backup Before Repair
#!/bin/bash
# backup_and_repair.sh

DEVICE="/dev/sda1"
MOUNT_POINT="/data"
BACKUP_DIR="/backup/$(date +%Y%m%d_%H%M%S)"

# Create backup
mkdir -p $BACKUP_DIR
rsync -av $MOUNT_POINT/ $BACKUP_DIR/

# Unmount and repair
umount $MOUNT_POINT
xfs_repair $DEVICE

# Remount
mount $DEVICE $MOUNT_POINT
Conclusion
The xfs_repair command is an essential tool for maintaining XFS filesystem integrity in Linux environments. By understanding its various options, phases, and best practices, system administrators can effectively diagnose and repair filesystem corruption while minimizing data loss risks.
Remember the golden rules: always unmount the filesystem before repair, create backups when possible, and start with check-only mode before making actual repairs. With proper usage and regular monitoring, xfs_repair can help maintain stable and reliable XFS filesystems in production environments.
For complex scenarios or critical data recovery situations, consider consulting with filesystem specialists or using professional data recovery services to minimize the risk of permanent data loss.
Related Posts
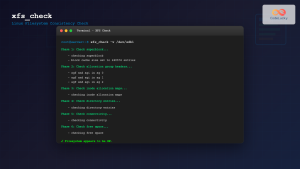
xfs_check Command Linux: Complete Guide to XFS Filesystem Consistency Verification
The xfs_check command is a crucial system administration tool in Linux for verifying the consistency and integrity of XFS filesystems....

fsck Command Linux: Complete Guide to Filesystem Check and Repair
The fsck (file system check) command is one of the most crucial system administration tools in Linux, designed to check...

xfs_info Command Linux: Complete Guide to Display XFS Filesystem Information
The xfs_info command is a powerful utility in Linux systems that provides comprehensive information about XFS filesystems. This command is...

e2fsck Command Linux: Complete Guide to Check and Repair Ext2/3/4 Filesystems
The e2fsck command is a critical system administration tool in Linux designed to check and repair Ext2, Ext3, and Ext4...

tune2fs Command Linux: Complete Guide to Ext2/3/4 Filesystem Tuning
The tune2fs command is a powerful Linux utility that allows system administrators to modify and tune various parameters of ext2,...

dumpe2fs Command Linux: Complete Guide to Display Ext2/3/4 Filesystem Information
The dumpe2fs command is a powerful Linux utility that displays detailed information about ext2, ext3, and ext4 filesystems. This essential...
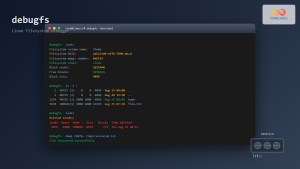
debugfs Command Linux: Complete Guide to Debug Ext2/3/4 Filesystems
The debugfs command is a powerful interactive filesystem debugger for ext2, ext3, and ext4 filesystems in Linux. It provides low-level...

zfs Command Linux: Complete Guide to ZFS Filesystem Administration
The ZFS (Zettabyte File System) is a revolutionary filesystem that combines traditional filesystem capabilities with logical volume management, RAID functionality,...
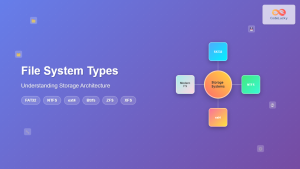
File System Types: FAT32, NTFS, ext4 and Modern Linux Filesystems Explained
Understanding File Systems: The Foundation of Data Storage A file system is the method and data structure that an operating...
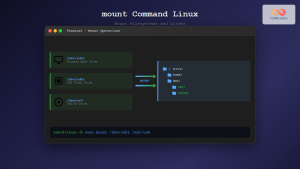
mount Command Linux: Complete Guide to Mount Filesystems and Drives
The mount command is one of the most fundamental tools in Linux system administration, allowing you to attach filesystems from...
resize2fs Command Linux: Complete Guide to Resize Ext2/3/4 Filesystems Safely
The resize2fs command is a powerful Linux utility designed to resize ext2, ext3, and ext4 filesystems. Whether you need to...
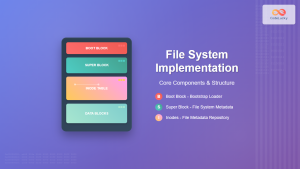
File System Implementation: Boot Block, Super Block and Inodes Explained
Understanding File System Implementation File system implementation is a critical component of operating systems that manages how data is stored,...


