
The xfreerdp command is a powerful Linux utility that serves as the primary client for the FreeRDP project, enabling users to establish Remote Desktop Protocol (RDP) connections to Windows machines and other RDP-enabled servers. This comprehensive guide will walk you through everything you need to know about using xfreerdp effectively.
What is xfreerdp?
xfreerdp is the X11-based client implementation of the FreeRDP project, which provides an open-source implementation of the Remote Desktop Protocol. It allows Linux users to connect to Windows desktops, Windows Server machines, and other systems that support RDP connections with full graphical interface support.
Key Features of xfreerdp
- Multi-platform support: Works across various Linux distributions
- High-performance rendering: Optimized graphics and video streaming
- Audio redirection: Support for remote audio playback
- Drive mapping: Share local directories with remote sessions
- Clipboard integration: Copy-paste between local and remote systems
- Multi-monitor support: Span sessions across multiple displays
Installation
Before using xfreerdp, you need to install it on your Linux system. The installation process varies by distribution:
Ubuntu/Debian
sudo apt update
sudo apt install freerdp2-x11
Red Hat/CentOS/Fedora
# For Fedora
sudo dnf install freerdp

# For CentOS/RHEL
sudo yum install freerdp
Arch Linux
sudo pacman -S freerdpBasic Syntax
The basic syntax of the xfreerdp command follows this pattern:
xfreerdp [options] /v:hostname[:port]Where:
options: Various configuration parametershostname: Target server IP address or domain nameport: RDP port (default is 3389)
Essential Command Options
Connection Parameters
| Option | Description | Example |
|---|---|---|
/v: |
Specify server address | /v:192.168.1.100 |
/u: |
Username for authentication | /u:administrator |
/p: |
Password for authentication | /p:mypassword |
/d: |
Domain name | /d:company.local |
/port: |
Custom RDP port | /port:3390 |
Display and Resolution Options
| Option | Description | Example |
|---|---|---|
/w: |
Screen width | /w:1920 |
/h: |
Screen height | /h:1080 |
/f |
Full screen mode | /f |
/bpp: |
Color depth (bits per pixel) | /bpp:32 |
/multimon |
Multi-monitor support | /multimon |
Practical Examples
Basic Connection
The simplest way to connect to a remote Windows machine:
xfreerdp /v:192.168.1.100 /u:usernameExpected Output:
Password: [password prompt will appear]
[INFO][com.freerdp.core] - freerdp_connect:freerdp_set_last_error_ex resetting error state
[INFO][com.freerdp.core] - established connection to 192.168.1.100:3389
[Window opens showing remote desktop]
Connection with Full Credentials
Connect with username, password, and domain specified:
xfreerdp /v:server.company.com /u:john.doe /p:SecurePass123 /d:COMPANYFull Screen Connection
Establish a full-screen remote desktop session:
xfreerdp /v:192.168.1.100 /u:administrator /fCustom Resolution Connection
Connect with specific screen dimensions:
xfreerdp /v:192.168.1.100 /u:user /w:1440 /h:900 /bpp:24Advanced Configuration Options
Audio and Multimedia
# Enable audio redirection
xfreerdp /v:192.168.1.100 /u:user /sound:sys:alsa

# Disable audio
xfreerdp /v:192.168.1.100 /u:user /audio-mode:0
Drive and Folder Sharing
Share local directories with the remote session:
# Share home directory
xfreerdp /v:192.168.1.100 /u:user /drive:home,/home/username

# Share multiple directories
xfreerdp /v:192.168.1.100 /u:user /drive:docs,/home/user/Documents /drive:downloads,/home/user/Downloads
Clipboard Integration
# Enable clipboard sharing
xfreerdp /v:192.168.1.100 /u:user +clipboard
Network Optimization
# For slow connections
xfreerdp /v:192.168.1.100 /u:user /compression /network:modem

# For LAN connections
xfreerdp /v:192.168.1.100 /u:user /network:lan

# Custom bandwidth
xfreerdp /v:192.168.1.100 /u:user /network:auto
Security and Authentication
Certificate Handling
# Ignore certificate warnings (use with caution)
xfreerdp /v:192.168.1.100 /u:user /cert:ignore

# Accept certificate automatically
xfreerdp /v:192.168.1.100 /u:user /cert:tofu
Network Level Authentication
# Enable NLA
xfreerdp /v:192.168.1.100 /u:user +auth-only

# Disable NLA
xfreerdp /v:192.168.1.100 /u:user -auth-only
Multi-Monitor Setup
For users with multiple monitors, xfreerdp provides excellent multi-monitor support:
# Use all available monitors
xfreerdp /v:192.168.1.100 /u:user /multimon

# Specify monitor layout
xfreerdp /v:192.168.1.100 /u:user /monitors:0,1

# Single monitor from multi-monitor setup
xfreerdp /v:192.168.1.100 /u:user /monitor-id:1
Performance Optimization
Graphics and Rendering
# Hardware acceleration
xfreerdp /v:192.168.1.100 /u:user +gfx-h264

# Software rendering for compatibility
xfreerdp /v:192.168.1.100 /u:user /gfx:RFX

# Disable desktop composition
xfreerdp /v:192.168.1.100 /u:user +toggle-fullscreen
Connection Quality Settings
# High quality for fast networks
xfreerdp /v:192.168.1.100 /u:user /quality:high

# Low quality for slow connections
xfreerdp /v:192.168.1.100 /u:user /quality:low
Keyboard and Input Options
# Set keyboard layout
xfreerdp /v:192.168.1.100 /u:user /kbd:0x00000409  # US English

# Enable Unicode keyboard
xfreerdp /v:192.168.1.100 /u:user +unicode

# Grab keyboard focus
xfreerdp /v:192.168.1.100 /u:user /grab-keyboard
Logging and Debugging
When troubleshooting connection issues, logging can be invaluable:
# Enable verbose logging
xfreerdp /v:192.168.1.100 /u:user /log-level:DEBUG

# Log to file
xfreerdp /v:192.168.1.100 /u:user /log-level:INFO /log-filters:com.freerdp.core
Common Use Cases and Scripts
Automated Connection Script
Create a bash script for frequent connections:
#!/bin/bash
# rdp-connect.sh

SERVER="192.168.1.100"
USERNAME="administrator"
DOMAIN="COMPANY"

xfreerdp /v:$SERVER /u:$USERNAME /d:$DOMAIN \
         /w:1920 /h:1080 \
         +clipboard \
         /drive:shared,/home/$USER/shared \
         /sound:sys:alsa \
         /cert:tofu
Multiple Server Management
#!/bin/bash
# multi-rdp.sh

case $1 in
    "server1")
        xfreerdp /v:server1.company.com /u:admin /d:COMPANY /f
        ;;
    "server2")
        xfreerdp /v:server2.company.com /u:admin /d:COMPANY /w:1440 /h:900
        ;;
    *)
        echo "Usage: $0 {server1|server2}"
        exit 1
        ;;
esac
Troubleshooting Common Issues
Connection Refused
If you encounter connection refused errors:
# Test with telnet first
telnet 192.168.1.100 3389

# Try different port
xfreerdp /v:192.168.1.100 /port:3390 /u:user
Authentication Failures
# Disable NLA if having auth issues
xfreerdp /v:192.168.1.100 /u:user -auth-only

# Try older security protocols
xfreerdp /v:192.168.1.100 /u:user /sec:rdp
Display Issues
# Force software rendering
xfreerdp /v:192.168.1.100 /u:user /gfx:AVC444

# Disable desktop effects
xfreerdp /v:192.168.1.100 /u:user +fonts +aero
Performance Monitoring
Monitor your RDP session performance:
# Show connection statistics
xfreerdp /v:192.168.1.100 /u:user /network:auto +heartbeat

# Enable performance counters
xfreerdp /v:192.168.1.100 /u:user +async-channels
Best Practices
Security Recommendations
- Use strong passwords: Never use default or weak passwords
- Enable certificate verification: Always verify server certificates in production
- Use VPN: Connect through VPN for external RDP access
- Regular updates: Keep FreeRDP updated to latest version
Performance Tips
- Match network conditions: Use appropriate quality settings for your connection
- Optimize resolution: Don’t use higher resolution than necessary
- Disable unnecessary features: Turn off audio/drive sharing if not needed
- Use hardware acceleration: Enable when available for better performance
Integration with System Tools
Desktop Shortcuts
Create desktop entries for frequent connections:
# ~/.local/share/applications/rdp-server.desktop
[Desktop Entry]
Version=1.0
Type=Application
Name=RDP Server Connection
Comment=Connect to Windows Server
Exec=xfreerdp /v:192.168.1.100 /u:administrator /f
Icon=preferences-desktop-remote-desktop
Terminal=false
Categories=Network;RemoteAccess;
SSH Tunneling
Combine with SSH for secure connections:
# Create SSH tunnel first
ssh -L 3389:windows-server:3389 user@gateway-server

# Then connect through tunnel
xfreerdp /v:localhost /u:administrator
Version Differences and Updates
Different versions of FreeRDP may have varying syntax. Check your version:
xfreerdp --versionExpected Output:
This is FreeRDP version 2.4.1 (git 2.4.1)
Built with CMake 3.18.4
Built with Compiler GCC 9.3.0
Conclusion
The xfreerdp command is an essential tool for Linux administrators and users who need to access Windows systems remotely. Its rich feature set, from basic connectivity to advanced multimedia support, makes it suitable for both casual use and enterprise environments. By mastering the various options and configurations covered in this guide, you can establish reliable, secure, and high-performance remote desktop connections tailored to your specific needs.
Remember to always prioritize security when establishing remote connections, especially over untrusted networks. Regular practice with different scenarios will help you become proficient with xfreerdp and troubleshoot issues effectively when they arise.
Related Posts

xrdp Command Linux: Complete Guide to Remote Desktop Server Setup
The xrdp command is a powerful Linux utility that implements Microsoft's Remote Desktop Protocol (RDP) server functionality on Unix-like systems....
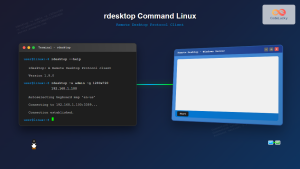
rdesktop Command Linux: Complete Guide to Remote Desktop Protocol Client
The rdesktop command is a powerful Remote Desktop Protocol (RDP) client for Linux systems that enables seamless connections to Windows...
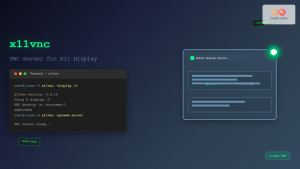
x11vnc Command Linux: Complete Guide to Remote Desktop Access via VNC Server
The x11vnc command is a powerful Linux utility that allows you to share your existing X11 desktop session via VNC...
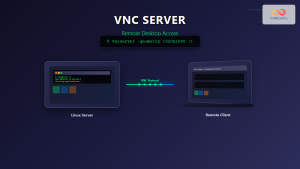
vncserver Command Linux: Complete Guide to VNC Server Setup and Management
The vncserver command is a powerful tool in Linux that enables remote desktop access by starting a Virtual Network Computing...
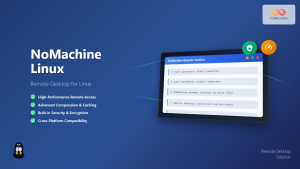
NoMachine Linux: Complete Guide to Remote Desktop Access and Configuration
NoMachine is a powerful remote desktop solution that enables secure access to Linux systems from anywhere in the world. Unlike...
RealVNC Linux: Complete Guide to Remote Desktop Access and Control
RealVNC is a powerful remote desktop software that enables users to control Linux systems remotely over a network connection. As...
TeamViewer Linux: Complete Guide to Remote Desktop Access and Support
TeamViewer is one of the most popular remote desktop solutions available today, offering cross-platform compatibility and robust features for remote...
tightvncserver Linux: Complete Guide to TightVNC Server Setup and Configuration
TightVNC Server is a powerful remote desktop solution that allows you to access and control Linux systems remotely over a...
AnyDesk Linux: Complete Remote Desktop Solution Guide for Linux Users
AnyDesk is a powerful cross-platform remote desktop application that enables users to access computers remotely over the internet. For Linux...
vinagre Command Linux: Complete Guide to VNC Viewer and Remote Desktop Access
The vinagre command is a powerful VNC (Virtual Network Computing) viewer for Linux systems that enables users to connect to...
Remote Procedure Call: Complete Guide to Distributed System Communication
Remote Procedure Call (RPC) is a fundamental communication protocol that enables programs to execute procedures or functions on remote systems...
screen Command Linux: Complete Guide to Managing Multiple Terminal Sessions
The screen command is one of the most powerful tools in a Linux administrator's arsenal, allowing you to create, manage,...
- What is xfreerdp?
- Installation
- Basic Syntax
- Essential Command Options
- Practical Examples
- Advanced Configuration Options
- Security and Authentication
- Multi-Monitor Setup
- Performance Optimization
- Keyboard and Input Options
- Logging and Debugging
- Common Use Cases and Scripts
- Troubleshooting Common Issues
- Performance Monitoring
- Best Practices
- Integration with System Tools
- Version Differences and Updates
- Conclusion


