
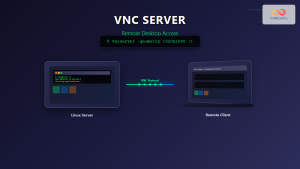
The x11vnc command is a powerful Linux utility that allows you to share your existing X11 desktop session via VNC (Virtual Network Computing). Unlike traditional VNC servers that create a new desktop session, x11vnc enables remote access to your current running desktop, making it perfect for remote troubleshooting, administration, and desktop sharing.
What is x11vnc?
x11vnc is a VNC server that provides remote access to an existing X Window System desktop session. It captures the display content of your current X11 session and makes it available to VNC clients over the network. This tool is particularly useful for:
- Remote desktop access and control
- Technical support and troubleshooting
- Screen sharing and demonstrations
- Server administration without physical access
- Accessing GUI applications on headless servers
Installing x11vnc
Before using x11vnc, you need to install it on your Linux system. The installation process varies depending on your distribution:
Ubuntu/Debian
sudo apt update
sudo apt install x11vnc
CentOS/RHEL/Fedora
# For CentOS/RHEL
sudo yum install x11vnc

# For Fedora
sudo dnf install x11vnc
Arch Linux
sudo pacman -S x11vncBasic x11vnc Syntax
The basic syntax for x11vnc command is:
x11vnc [options] [display]Where [options] are various configuration parameters and [display] specifies the X11 display to share (defaults to :0).
Starting x11vnc Server
Basic Usage
To start x11vnc with default settings:
x11vnc -display :0Expected Output:
26/08/2025 04:08:15 passing arg to libvncserver: -rfbport
26/08/2025 04:08:15 passing arg to libvncserver: 5900
26/08/2025 04:08:15 x11vnc version: 0.9.16 lastmod: 2019-01-05  pid: 12345
26/08/2025 04:08:15 Using X display :0
26/08/2025 04:08:15 rootwin: 0x2a3 reswin: 0x2a3 dpy: 0x7f8b4c000e50
26/08/2025 04:08:15
26/08/2025 04:08:15 ------------------ USEFUL INFORMATION ------------------
26/08/2025 04:08:15 X DAMAGE available on display, using it for polling hints.
26/08/2025 04:08:15 Wireframe: -wireframe mode is in effect for window moves.
26/08/2025 04:08:15 The VNC desktop is:      hostname:0
26/08/2025 04:08:15 PORT=5900
This starts x11vnc on the default VNC port 5900, sharing display :0.
Setting a Password
For security, always set a password when starting x11vnc:
x11vnc -display :0 -passwd mypasswordAlternatively, you can use a password file:
# Create password file
x11vnc -storepasswd mypassword ~/.vnc/passwd

# Use password file
x11vnc -display :0 -rfbauth ~/.vnc/passwd
Common x11vnc Options
Display and Port Configuration
| Option | Description | Example |
|---|---|---|
-display |
Specify X11 display | -display :1 |
-rfbport |
Set VNC port | -rfbport 5901 |
-localhost |
Accept only local connections | -localhost |
-nolookup |
Skip DNS lookup | -nolookup |
Security Options
# Run with authentication
x11vnc -display :0 -passwd secretpass -localhost

# Use SSL encryption
x11vnc -display :0 -ssl -sslverify

# Allow specific IP addresses
x11vnc -display :0 -allow 192.168.1.100,192.168.1.101
Advanced x11vnc Usage
Running as Daemon
To run x11vnc as a background daemon:
x11vnc -display :0 -passwd mypass -forever -bgThe -forever option keeps the server running even after client disconnections, while -bg runs it in the background.
Logging and Monitoring
# Enable detailed logging
x11vnc -display :0 -passwd mypass -logfile /var/log/x11vnc.log -verbose

# Monitor connections
x11vnc -display :0 -passwd mypass -connect_or_exit hostname:5900
Performance Optimization
# Optimize for slow connections
x11vnc -display :0 -passwd mypass -noxdamage -noxfixes -noxrandr

# Enable compression
x11vnc -display :0 -passwd mypass -compression 9
Practical Examples
Example 1: Basic Remote Desktop Setup
# Start x11vnc with password protection
x11vnc -display :0 -passwd desktop123 -forever -bg -o /tmp/x11vnc.log
Expected Output:
26/08/2025 04:08:20 x11vnc version: 0.9.16 lastmod: 2019-01-05  pid: 12456
26/08/2025 04:08:20 Using X display :0
26/08/2025 04:08:20 Backgrounding: fork returned: 12457
26/08/2025 04:08:20 VNC server started on port 5900
Example 2: Secure Local Access Only
# Restrict to localhost connections only
x11vnc -display :0 -localhost -passwd localpass -forever -bg
This setup only allows connections from the local machine, perfect for SSH tunneling.
Example 3: SSH Tunnel Setup
First, start x11vnc with localhost restriction:
x11vnc -display :0 -localhost -passwd tunnelpass -forever -bgThen create SSH tunnel from remote machine:
# On remote machine
ssh -L 5900:localhost:5900 user@server-ip
Now connect VNC client to localhost:5900 on the remote machine.
Security Considerations
Password Protection
Always use strong passwords and consider using password files:
# Create secure password file
x11vnc -storepasswd
# Enter password when prompted
# Password file saved to ~/.vnc/passwd

# Use the password file
x11vnc -display :0 -rfbauth ~/.vnc/passwd
SSL Encryption
# Enable SSL encryption
x11vnc -display :0 -ssl SAVE -sslverify -rfbauth ~/.vnc/passwd
IP Filtering
# Allow specific IP ranges
x11vnc -display :0 -allow 192.168.1.0/24 -deny all
Troubleshooting Common Issues
Permission Denied Errors
If you encounter permission issues:
# Check X11 permissions
xhost +si:localuser:$(whoami)

# Or run with proper authentication
x11vnc -display :0 -auth ~/.Xauthority
Display Not Found
To list available displays:
# Check running X sessions
ps aux | grep Xorg
w
who
Firewall Issues
Open VNC port in firewall:
# UFW (Ubuntu)
sudo ufw allow 5900

# Firewalld (CentOS/RHEL)
sudo firewall-cmd --permanent --add-port=5900/tcp
sudo firewall-cmd --reload
Systemd Service Setup
Create a systemd service for automatic x11vnc startup:
# Create service file
sudo nano /etc/systemd/system/x11vnc.service
Service file content:
[Unit]
Description=x11vnc VNC Server
After=graphical-session.target

[Service]
Type=simple
User=your-username
ExecStart=/usr/bin/x11vnc -display :0 -rfbauth /home/your-username/.vnc/passwd -forever -bg -o /var/log/x11vnc.log
Restart=always
RestartSec=10

[Install]
WantedBy=graphical-session.target
Enable and start the service:
sudo systemctl enable x11vnc.service
sudo systemctl start x11vnc.service
sudo systemctl status x11vnc.service
Performance Monitoring
Connection Statistics
# Monitor with verbose output
x11vnc -display :0 -passwd mypass -verbose -stats
Resource Usage
# Check x11vnc process resource usage
ps aux | grep x11vnc
top -p $(pgrep x11vnc)
Best Practices
- Always use passwords: Never run x11vnc without authentication
- Limit access: Use
-localhostand SSH tunneling when possible - Enable logging: Monitor connections and potential security issues
- Use SSL: Encrypt connections for sensitive environments
- Regular updates: Keep x11vnc updated for security patches
- Firewall configuration: Properly configure network access
Conclusion
The x11vnc command is an essential tool for Linux system administrators and users who need remote desktop access. Its ability to share existing X11 sessions makes it more convenient than traditional VNC servers for many use cases. By following the security best practices and configuration examples provided in this guide, you can set up secure and efficient remote desktop access to your Linux systems.
Remember to always prioritize security when setting up remote access, use strong authentication methods, and consider using SSH tunneling for connections over untrusted networks. With proper configuration, x11vnc provides a reliable solution for remote Linux desktop access and administration.
Related Posts
vncserver Command Linux: Complete Guide to VNC Server Setup and Management
The vncserver command is a powerful tool in Linux that enables remote desktop access by starting a Virtual Network Computing...
tightvncserver Linux: Complete Guide to TightVNC Server Setup and Configuration
TightVNC Server is a powerful remote desktop solution that allows you to access and control Linux systems remotely over a...
RealVNC Linux: Complete Guide to Remote Desktop Access and Control
RealVNC is a powerful remote desktop software that enables users to control Linux systems remotely over a network connection. As...

xrdp Command Linux: Complete Guide to Remote Desktop Server Setup
The xrdp command is a powerful Linux utility that implements Microsoft's Remote Desktop Protocol (RDP) server functionality on Unix-like systems....
vinagre Command Linux: Complete Guide to VNC Viewer and Remote Desktop Access
The vinagre command is a powerful VNC (Virtual Network Computing) viewer for Linux systems that enables users to connect to...

xfreerdp Command Linux: Complete Guide to FreeRDP Remote Desktop Client
The xfreerdp command is a powerful Linux utility that serves as the primary client for the FreeRDP project, enabling users...
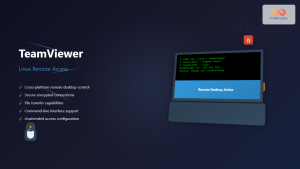
TeamViewer Linux: Complete Guide to Remote Desktop Access and Support
TeamViewer is one of the most popular remote desktop solutions available today, offering cross-platform compatibility and robust features for remote...
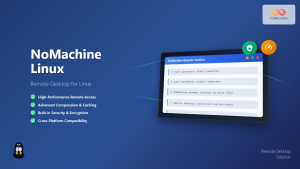
NoMachine Linux: Complete Guide to Remote Desktop Access and Configuration
NoMachine is a powerful remote desktop solution that enables secure access to Linux systems from anywhere in the world. Unlike...
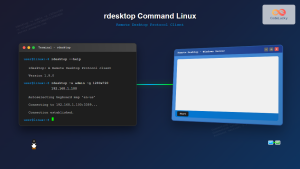
rdesktop Command Linux: Complete Guide to Remote Desktop Protocol Client
The rdesktop command is a powerful Remote Desktop Protocol (RDP) client for Linux systems that enables seamless connections to Windows...
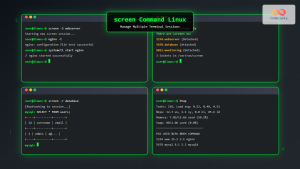
screen Command Linux: Complete Guide to Managing Multiple Terminal Sessions
The screen command is one of the most powerful tools in a Linux administrator's arsenal, allowing you to create, manage,...
AnyDesk Linux: Complete Remote Desktop Solution Guide for Linux Users
AnyDesk is a powerful cross-platform remote desktop application that enables users to access computers remotely over the internet. For Linux...
w Command Linux: Complete Guide to Monitor Active Users and System Activity
The w command is one of the most essential system monitoring tools in Linux, providing administrators and users with real-time...


