
The wipe command in Linux is a powerful utility designed for secure file deletion that goes far beyond the standard rm command. While regular deletion simply removes file references from the filesystem, wipe overwrites the actual data multiple times, making recovery virtually impossible. This comprehensive guide explores everything you need to know about using the wipe command effectively.
What is the wipe Command?
The wipe command is a security-focused file deletion utility that securely removes files by overwriting their data multiple times with random patterns. Unlike standard file deletion methods that only remove directory entries, wipe ensures that sensitive data cannot be recovered using data recovery tools.
Key features of the wipe command:
- Overwrites files multiple times with random data
- Supports various wiping algorithms
- Can wipe entire directories recursively
- Provides verbose output for monitoring progress
- Includes verification options
Installation
The wipe command may not be installed by default on all Linux distributions. Here’s how to install it:
Ubuntu/Debian:
sudo apt update
sudo apt install wipe
CentOS/RHEL/Fedora:
# For older versions
sudo yum install wipe

# For newer versions with dnf
sudo dnf install wipe
Arch Linux:
sudo pacman -S wipeBasic Syntax
The basic syntax for the wipe command is:
wipe [options] file1 file2 directory1 ...Essential Options and Parameters
Here are the most commonly used options with the wipe command:
| Option | Description |
|---|---|
-r |
Recursively wipe directories |
-f |
Force wiping without confirmation |
-v |
Verbose output |
-q |
Quiet mode (suppress output) |
-n <passes> |
Specify number of overwrite passes |
-k |
Keep files after wiping (don’t delete) |
-z |
Final overwrite with zeros |
-s |
Swap-based algorithm (more secure) |
Practical Examples
1. Basic File Wiping
To securely delete a single file:
wipe sensitive_document.txtOutput:
Wiping sensitive_document.txt
.
2. Wiping Multiple Files
Delete multiple files simultaneously:
wipe file1.txt file2.txt confidential.docOutput:
Wiping file1.txt
.
Wiping file2.txt
.
Wiping confidential.doc
.
3. Verbose Wiping
Use the -v option to see detailed progress:
wipe -v important_file.txtOutput:
Wiping important_file.txt
Pass 1/4 (random)...
Pass 2/4 (random)...
Pass 3/4 (random)...
Pass 4/4 (0x00)...
Removing important_file.txt... done
4. Recursive Directory Wiping
To securely wipe an entire directory and its contents:
wipe -r confidential_folder/Output:
Wiping confidential_folder/file1.txt
.
Wiping confidential_folder/subfolder/file2.txt
.
Removing confidential_folder/subfolder... done
Removing confidential_folder... done
5. Specifying Number of Passes
Increase security by specifying more overwrite passes:
wipe -n 7 -v highly_sensitive.txtOutput:
Wiping highly_sensitive.txt
Pass 1/7 (random)...
Pass 2/7 (random)...
Pass 3/7 (random)...
Pass 4/7 (random)...
Pass 5/7 (random)...
Pass 6/7 (random)...
Pass 7/7 (0x00)...
Removing highly_sensitive.txt... done
6. Force Wiping Without Confirmation
Use the -f option to bypass confirmation prompts:
wipe -f -r old_project/7. Wiping with Final Zero Pass
Ensure the final pass overwrites with zeros:
wipe -z -v document.pdfOutput:
Wiping document.pdf
Pass 1/4 (random)...
Pass 2/4 (random)...
Pass 3/4 (random)...
Pass 4/4 (0x00)...
Removing document.pdf... done
8. Keeping Files After Wiping
Wipe file contents but keep the file structure:
wipe -k data_file.txtThis overwrites the file content but doesn’t delete the file itself, leaving a zero-byte file.
Advanced Usage Scenarios
Wiping Free Space
You can use wipe to clean free space on a filesystem:
# Create a large temporary file to fill free space
wipe -k /tmp/freespace_wipe
# Then remove it
rm /tmp/freespace_wipe
Batch Wiping with Find
Combine wipe with find to wipe files based on patterns:
find /path/to/directory -name "*.tmp" -exec wipe {} \;Wiping Specific File Types
Wipe all log files in a directory:
wipe -v *.logSecurity Considerations
Number of Passes
The default number of passes (usually 4) is sufficient for most purposes. However, for highly sensitive data, consider using more passes:
wipe -n 35 top_secret.txt # DoD 5220.22-M standardSSD Considerations
On SSDs, the wipe command may not be as effective due to wear leveling. For SSDs, consider using:
- Built-in secure erase commands
- Full disk encryption before deletion
- ATA Secure Erase command
Filesystem Types
Different filesystems handle deletion differently:
- ext4, ext3: wipe works effectively
- Btrfs: Copy-on-write may complicate wiping
- ZFS: Similar challenges with copy-on-write
Best Practices
1. Always Verify
Use verbose mode to verify the wiping process:
wipe -v -n 3 sensitive_file.txt2. Test Before Production Use
Test the wipe command on non-critical files first:
# Create test file
echo "test data" > test_file.txt
# Wipe with verbose output
wipe -v test_file.txt
3. Backup Important Data
Always ensure you have backups before using wipe, as the process is irreversible.
4. Use Appropriate Pass Numbers
- Standard files: 3-4 passes
- Sensitive data: 7-35 passes
- Top secret: 35+ passes
Troubleshooting Common Issues
Permission Denied
If you encounter permission issues:
sudo wipe sensitive_system_file.txtFile in Use
If a file is being used by another process:
# Find processes using the file
lsof filename
# Kill the process or close the application
# Then wipe the file
wipe filename
Read-only Files
For read-only files, use force option:
wipe -f readonly_file.txtAlternatives to wipe
While wipe is excellent, consider these alternatives for specific use cases:
shred
shred -vfz -n 3 filename.txtdd with random data
dd if=/dev/urandom of=filename bs=1024 count=filesize_in_kbsrm (secure rm)
srm -v filename.txtPerformance Considerations
The wipe command can be resource-intensive:
- CPU Usage: Random data generation requires CPU cycles
- Disk I/O: Multiple passes increase disk activity
- Time: Large files with many passes take considerable time
Monitor progress with:
wipe -v -n 5 large_file.imgConclusion
The wipe command is an essential tool for secure file deletion in Linux environments. It provides robust protection against data recovery attempts by overwriting files multiple times with random data. Whether you’re handling sensitive documents, clearing confidential information, or ensuring privacy compliance, mastering the wipe command gives you the confidence that your deleted data stays deleted.
Remember to always use wipe responsibly, maintain backups of important data, and choose appropriate security levels based on your data sensitivity requirements. With the knowledge gained from this guide, you can now implement secure file deletion practices that protect your sensitive information effectively.
For maximum security in enterprise environments, consider combining wipe with full disk encryption and comprehensive data handling policies to create multiple layers of protection for your sensitive information.
Related Posts
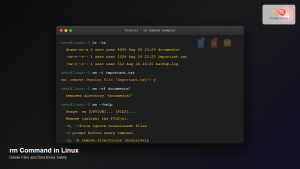
rm Command in Linux: Complete Guide to Delete Files and Directories Safely
The rm command is one of the most powerful and potentially dangerous commands in Linux. It stands for "remove" and...
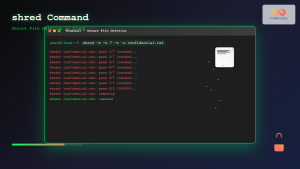
shred Command Linux: Complete Guide to Securely Delete Files and Protect Data
When you delete files in Linux using the standard rm command, the data isn't actually removed from your storage device....
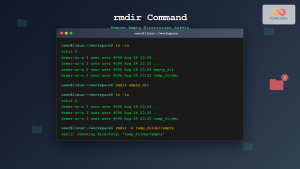
rmdir Command in Linux: Complete Guide to Remove Empty Directories Safely
The rmdir command is a fundamental Linux utility designed specifically for removing empty directories. Unlike the more powerful rm -r...
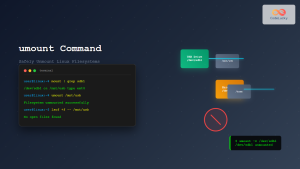
umount Command Linux: Complete Guide to Safely Unmounting Filesystems
The umount command is an essential Linux utility that allows you to safely disconnect filesystems from the directory tree. Whether...

Java Delete Files: Removing Files from System
Java provides robust file handling capabilities, including the ability to delete files from the system. Whether you're cleaning up temporary...
unset Command Linux: Complete Guide to Remove Variables and Functions Efficiently
The unset command in Linux is a powerful built-in shell utility that allows you to remove variables and functions from...
userdel Command Linux: Complete Guide to Safely Delete User Accounts
The userdel command is a crucial system administration tool in Linux that allows you to safely remove user accounts from...
file Command Advanced Linux: Master Detailed File Type Analysis and Detection
The file command is one of the most powerful and underutilized utilities in Linux for determining file types and analyzing...
strip Command Linux: Complete Guide to Removing Symbols from Object Files
The strip command is a powerful Linux utility that removes symbols, debugging information, and other metadata from executable files, object...
mv Command in Linux: Complete Guide to Moving and Renaming Files
The mv command is one of the most fundamental and frequently used commands in Linux systems. Whether you're a system...

PHP MySQL Delete Data: Removing Records
In the world of database management, deleting data is just as crucial as inserting or updating it. Whether you're cleaning...
quotaoff Command Linux: Complete Guide to Disable Disk Quotas Safely
The quotaoff command is a crucial Linux system administration tool used to disable disk quotas on file systems. When you...


