
The usermod command is a powerful Linux utility that allows system administrators to modify existing user account properties without deleting and recreating accounts. This essential command provides flexibility in managing user configurations, from changing usernames and home directories to modifying group memberships and login shells.
What is the usermod Command?
The usermod command (user modify) is a system administration tool used to alter user account attributes in Linux and Unix-like operating systems. It modifies the /etc/passwd, /etc/shadow, and /etc/group files to update user information without requiring account recreation.
Basic Syntax
usermod [options] usernameThe command requires administrative privileges (root or sudo access) to execute successfully.
Essential usermod Options
Primary Options
| Option | Description | Example |
|---|---|---|
-l |
Change username (login name) | usermod -l newname oldname |
-d |
Change home directory | usermod -d /new/home user |
-m |
Move home directory contents | usermod -d /new/home -m user |
-s |
Change login shell | usermod -s /bin/zsh user |
-g |
Change primary group | usermod -g newgroup user |
-G |
Set supplementary groups | usermod -G group1,group2 user |
-a |
Append to supplementary groups | usermod -aG group user |
-c |
Change comment (full name) | usermod -c "John Doe" user |
-L |
Lock user account | usermod -L user |
-U |
Unlock user account | usermod -U user |
Practical Examples
1. Changing Username
To change a user’s login name from johndoe to john:
sudo usermod -l john johndoeOutput: No output indicates successful execution. Verify with:
id john
# Output: uid=1001(john) gid=1001(johndoe) groups=1001(johndoe)
Note: The primary group name remains unchanged. Use
groupmodto change the group name separately.
2. Changing Home Directory
Change home directory and move existing files:
sudo usermod -d /home/newlocation -m johnThis command:
- Changes the home directory path in
/etc/passwd - Moves all files from the old to the new location
- Updates ownership automatically
Verification:
grep john /etc/passwd
# Output: john:x:1001:1001::/home/newlocation:/bin/bash
3. Changing Login Shell
Switch a user’s shell from bash to zsh:
sudo usermod -s /bin/zsh johnAvailable shells can be found in:
cat /etc/shells
# Output:
# /bin/sh
# /bin/bash
# /bin/zsh
# /bin/dash
4. Managing Group Memberships
Adding User to Additional Groups
sudo usermod -aG sudo,docker,developers johnThis adds john to three groups while preserving existing memberships.
Setting Complete Group List
sudo usermod -G sudo,docker johnWarning: This replaces ALL supplementary groups. The user will only belong to the specified groups plus their primary group.
Changing Primary Group
sudo usermod -g developers johnVerification:
groups john
# Output: john : developers sudo docker
5. Account Security Operations
Locking a User Account
sudo usermod -L johnThis prefixes the password hash with an exclamation mark, preventing login.
Unlocking a User Account
sudo usermod -U johnSetting Account Expiration
sudo usermod -e 2025-12-31 johnThe account will be disabled after December 31, 2025.
6. Updating User Information
Changing Full Name and Contact Info
sudo usermod -c "John Doe,Room 123,555-1234,555-5678" johnThe comment field follows the format: Full Name, Room Number, Work Phone, Home Phone
Changing User ID (UID)
sudo usermod -u 2001 johnImportant: This doesn’t change file ownership. Use find and chown to update file ownership:
sudo find / -user 1001 -exec chown 2001:2001 {} \;Advanced Usage Scenarios
Complete User Migration
When moving a user completely (username, home directory, and group):
# Step 1: Change username
sudo usermod -l newusername oldusername

# Step 2: Change home directory and move files
sudo usermod -d /home/newusername -m newusername

# Step 3: Change group name
sudo groupmod -n newusername oldusername

# Step 4: Update primary group
sudo usermod -g newusername newusername
Setting up Development Environment
Configure a user for development work:
# Add to development groups
sudo usermod -aG sudo,docker,www-data,git developer

# Change shell to zsh
sudo usermod -s /bin/zsh developer

# Update user information
sudo usermod -c "Development User" developer
Interactive Examples
User Modification Script
Here’s a practical script for common user modifications:
#!/bin/bash

read -p "Enter username to modify: " username
echo "Select modification:"
echo "1. Change shell"
echo "2. Add to group"
echo "3. Change home directory"
echo "4. Lock/Unlock account"

read -p "Enter choice (1-4): " choice

case $choice in
    1)
        echo "Available shells:"
        cat /etc/shells
        read -p "Enter new shell path: " shell
        sudo usermod -s "$shell" "$username"
        echo "Shell changed successfully"
        ;;
    2)
        read -p "Enter group name: " group
        sudo usermod -aG "$group" "$username"
        echo "User added to group: $group"
        ;;
    3)
        read -p "Enter new home directory: " homedir
        read -p "Move existing files? (y/n): " move
        if [[ $move == "y" ]]; then
            sudo usermod -d "$homedir" -m "$username"
        else
            sudo usermod -d "$homedir" "$username"
        fi
        echo "Home directory updated"
        ;;
    4)
        read -p "Lock or unlock? (l/u): " action
        if [[ $action == "l" ]]; then
            sudo usermod -L "$username"
            echo "Account locked"
        else
            sudo usermod -U "$username"
            echo "Account unlocked"
        fi
        ;;
esac
Common Errors and Solutions
Permission Denied
Error: usermod: Permission denied
Solution: Run with sudo privileges
User Currently Logged In
Error: usermod: user username is currently used by process PID
Solution: Log out the user or kill their processes:
sudo pkill -u username
sudo usermod [options] username
Invalid Shell
Error: usermod: invalid shell '/bin/invalid'
Solution: Choose a shell from /etc/shells
Group Doesn’t Exist
Error: usermod: group 'nonexistent' does not exist
Solution: Create the group first:
sudo groupadd nonexistent
sudo usermod -aG nonexistent username
Best Practices
Before Modifying Users
- Backup user data: Always backup important files before major changes
- Check active sessions: Use
whoorwto see logged-in users - Verify group existence: Ensure target groups exist before assignment
- Test with non-critical accounts: Practice on test users first
Security Considerations
- Use
-aGfor group additions: Prevents accidental removal from existing groups - Lock unused accounts: Use
-Lto disable inactive user accounts - Set expiration dates: Use
-efor temporary accounts - Regular audits: Review user permissions periodically
Verification Commands
After making changes, verify modifications using these commands:
# Check user details
id username
getent passwd username

# Check group memberships
groups username

# Check home directory
ls -la /home/username

# Check login shell
grep username /etc/passwd

# Check account status
passwd -S username
Related Commands
useradd: Create new user accountsuserdel: Delete user accountsgroupmod: Modify group propertiespasswd: Change user passwordschage: Modify password aging informationsu: Switch user context
Conclusion
The usermod command is an indispensable tool for Linux system administration, offering comprehensive user account management capabilities. From simple username changes to complex user migrations, understanding its options and best practices ensures efficient and secure user management.
Regular practice with these commands in a safe environment will build confidence in user administration tasks. Remember to always verify changes and maintain backups when performing significant user modifications.
Master these usermod techniques to streamline your Linux user management workflow and maintain a well-organized, secure system environment.
Related Posts
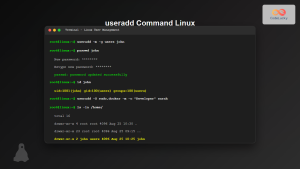
useradd Command Linux: Complete Guide to Add New User Accounts
The useradd command is one of the most essential tools in Linux system administration for creating new user accounts. Whether...
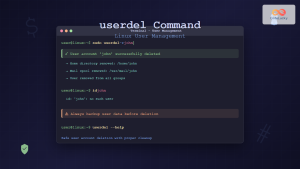
userdel Command Linux: Complete Guide to Safely Delete User Accounts
The userdel command is a crucial system administration tool in Linux that allows you to safely remove user accounts from...

chown Command Linux: Master File and Directory Ownership Management
The chown command is one of the most fundamental tools in Linux system administration, allowing users to change file and...
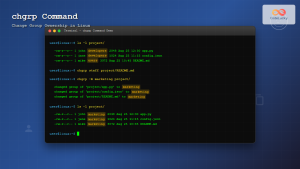
chgrp Command in Linux: Complete Guide to Change Group Ownership
The chgrp command is an essential Linux utility that allows you to change the group ownership of files and directories....
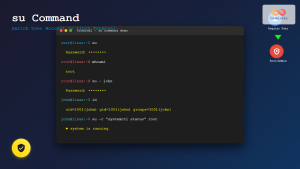
su Command in Linux: Complete Guide to Switch User Accounts in Terminal
The su command (substitute user or switch user) is one of the most fundamental commands in Linux system administration. It...
chmod Command in Linux: Complete File Permissions Tutorial with Examples
The chmod command is one of the most essential Linux commands for managing file and directory permissions. Whether you're a...
groups Command Linux: Complete Guide to Display User Group Memberships
The groups command is a fundamental Linux utility that displays the group memberships of users on your system. Understanding how...
id Command Linux: Complete Guide to Display User and Group IDs
The id command is a fundamental Linux utility that displays user and group identification information for the current user or...
chattr Command Linux: Complete Guide to Change File Attributes with Examples
The chattr command in Linux is a powerful utility that allows system administrators and users to change file attributes on...
passwd Command Linux: Complete Guide to Password Management from Terminal
The passwd command is one of the most essential utilities in Linux system administration, allowing users and administrators to change...
setfacl Command Linux: Complete Guide to File Access Control Lists Management
The setfacl command is a powerful Linux utility that allows you to set and modify File Access Control Lists (ACLs)...
whoami Command Linux: Display Current Username and Identity Information
The whoami command is one of the most fundamental and frequently used commands in Linux systems. This simple yet powerful...


