
The useradd command is one of the most essential tools in Linux system administration for creating new user accounts. Whether you’re managing a single-user desktop or a multi-user server environment, understanding how to properly add users is crucial for system security and organization.
What is the useradd Command?
The useradd command is a low-level utility for adding user accounts to Linux systems. It creates new user entries in system files like /etc/passwd, /etc/shadow, and /etc/group, while also setting up the user’s home directory and initial environment.
Basic Syntax
useradd [OPTIONS] USERNAMEThe basic syntax requires root privileges or sudo access to execute successfully.
Simple useradd Example
Let’s start with the most basic example of creating a user:
sudo useradd johnExpected Output:
# No output is displayed for successful execution
# User 'john' is created with default settings
To verify the user was created:
id johnOutput:
uid=1001(john) gid=1001(john) groups=1001(john)Essential useradd Options
Creating User with Home Directory (-m)
By default, useradd might not create a home directory on all distributions. Use the -m option to ensure it’s created:
sudo useradd -m sarahVerification:
ls -la /home/
total 16
drwxr-xr-x  4 root  root  4096 Aug 25 10:30 .
drwxr-xr-x 23 root  root  4096 Aug 25 09:15 ..
drwxr-xr-x  2 john  john  4096 Aug 25 10:25 john
drwxr-xr-x  2 sarah sarah 4096 Aug 25 10:30 sarah
Specifying User ID (-u)
Assign a specific user ID to maintain consistency across systems:
sudo useradd -u 1050 -m mikeVerification:
id mike
uid=1050(mike) gid=1050(mike) groups=1050(mike)
Setting Primary Group (-g)
Specify the user’s primary group by name or GID:
sudo useradd -g users -m lisaOutput when checking:
id lisa
uid=1051(lisa) gid=100(users) groups=100(users)
Adding to Supplementary Groups (-G)
Add users to multiple groups simultaneously:
sudo useradd -G sudo,docker,www-data -m developerVerification:
groups developer
developer : developer sudo docker www-data
Advanced useradd Options
Setting Custom Home Directory (-d)
sudo useradd -d /opt/custom/home -m customuserDirectory Structure:
ls -la /opt/custom/
total 12
drwxr-xr-x 3 root       root       4096 Aug 25 10:35 .
drwxr-xr-x 3 root       root       4096 Aug 25 10:35 ..
drwxr-xr-x 2 customuser customuser 4096 Aug 25 10:35 home
Specifying Default Shell (-s)
Set the user’s login shell:
sudo useradd -s /bin/zsh -m zshuserVerification:
grep zshuser /etc/passwd
zshuser:x:1052:1052::/home/zshuser:/bin/zsh
Adding User Comment/Full Name (-c)
sudo useradd -c "John Doe - Marketing Manager" -m johndoeResult in /etc/passwd:
johndoe:x:1053:1053:John Doe - Marketing Manager:/home/johndoe:/bin/shSetting Account Expiration (-e)
Create accounts with expiration dates for temporary users:
sudo useradd -e 2025-12-31 -m tempuserCheck expiration:
sudo chage -l tempuser
Last password change                                    : Aug 25, 2025
Password expires                                        : never
Password inactive                                       : never
Account expires                                         : Dec 31, 2025
Minimum number of days between password change          : 0
Maximum number of days between password change          : 99999
Number of days of warning before password expires       : 7
Complete User Creation Example
Here’s a comprehensive example combining multiple options:
sudo useradd -m -u 2000 -g developers -G sudo,docker -c "Alice Johnson - Senior Developer" -s /bin/bash -e 2026-06-30 aliceThis command creates a user with:
- Home directory created (-m)
- User ID 2000 (-u 2000)
- Primary group “developers” (-g developers)
- Additional groups: sudo and docker (-G sudo,docker)
- Full name comment (-c “Alice Johnson – Senior Developer”)
- Bash shell (-s /bin/bash)
- Account expiration date (-e 2026-06-30)
Verification:
id alice
uid=2000(alice) gid=1001(developers) groups=1001(developers),27(sudo),999(docker)

ls -la /home/alice
total 20
drwxr-xr-x 2 alice developers 4096 Aug 25 10:40 .
drwxr-xr-x 6 root  root       4096 Aug 25 10:40 ..
-rw-r--r-- 1 alice developers  220 Aug 25 10:40 .bash_logout
-rw-r--r-- 1 alice developers 3771 Aug 25 10:40 .bashrc
-rw-r--r-- 1 alice developers  807 Aug 25 10:40 .profile
Setting Password for New Users
After creating a user, set their password using the passwd command:
sudo passwd aliceInteractive Output:
New password:
Retype new password:
passwd: password updated successfully
Using System Defaults (/etc/default/useradd)
View current default settings:
sudo useradd -DSample Output:
GROUP=100
HOME=/home
INACTIVE=-1
EXPIRE=
SHELL=/bin/sh
SKEL=/etc/skel
CREATE_MAIL_SPOOL=yes
Common useradd Error Messages and Solutions
Permission Denied Error
useradd: Permission denied.
useradd: cannot lock /etc/passwd; try again later.
Solution: Use sudo or run as root:
sudo useradd usernameUser Already Exists
useradd: user 'john' already existsSolution: Choose a different username or use usermod to modify the existing user.
Invalid User ID
useradd: UID 1001 is not uniqueSolution: Use a unique UID or allow the system to assign one automatically.
Best Practices for useradd
1. Always Create Home Directories
Use the -m option to ensure users have a proper working environment:
sudo useradd -m username2. Use Descriptive Comments
Include full names and roles for easier user management:
sudo useradd -c "Jane Smith - System Administrator" -m jane3. Set Appropriate Groups
Assign users to relevant groups for proper permissions:
sudo useradd -G wheel,developers -m newdev4. Use Strong Naming Conventions
Establish consistent username patterns (e.g., firstname.lastname, employee.id).
Batch User Creation Script
For creating multiple users, consider this bash script approach:
#!/bin/bash
# Create multiple users from a list
users=("user1" "user2" "user3")

for user in "${users[@]}"; do
    sudo useradd -m -c "Auto-created user $user" "$user"
    echo "User $user created successfully"
done
Verifying User Creation
Always verify that users were created correctly:
# Check user exists in passwd file
grep username /etc/passwd

# Verify home directory
ls -la /home/username

# Check group memberships
groups username

# View account details
sudo chage -l username
useradd vs adduser
While useradd is the low-level command, many distributions provide adduser as a more user-friendly wrapper:
| Feature | useradd | adduser |
|---|---|---|
| Availability | All Linux distributions | Debian/Ubuntu mainly |
| Interactivity | Command-line only | Interactive prompts |
| Home directory | Requires -m flag | Created automatically |
| Password setting | Separate passwd command | Prompts during creation |
Security Considerations
Account Lockdown
Create system accounts that cannot login:
sudo useradd -r -s /bin/false serviceaccountTemporary Accounts
Always set expiration dates for temporary users:
sudo useradd -e 2025-09-30 -m contractorMinimal Privileges
Only add users to groups they absolutely need.
Troubleshooting Common Issues
Home Directory Not Created
If the home directory wasn’t created, manually create it:
sudo mkdir /home/username
sudo cp -r /etc/skel/. /home/username/
sudo chown -R username:username /home/username
Wrong Shell Assignment
Change the shell after user creation:
sudo usermod -s /bin/bash usernameRelated Commands
usermod– Modify existing user accountsuserdel– Delete user accountspasswd– Set or change user passwordschage– Modify password aging informationgroups– Display group membershipsid– Display user and group IDs
The useradd command is a powerful tool for Linux system administration. By understanding its various options and best practices, you can efficiently manage user accounts while maintaining system security and organization. Remember to always verify user creation and follow your organization’s security policies when adding new accounts to your Linux systems.
Related Posts
usermod Command Linux: Complete Guide to Modify User Account Properties
The usermod command is a powerful Linux utility that allows system administrators to modify existing user account properties without deleting...
userdel Command Linux: Complete Guide to Safely Delete User Accounts
The userdel command is a crucial system administration tool in Linux that allows you to safely remove user accounts from...
su Command in Linux: Complete Guide to Switch User Accounts in Terminal
The su command (substitute user or switch user) is one of the most fundamental commands in Linux system administration. It...
id Command Linux: Complete Guide to Display User and Group IDs
The id command is a fundamental Linux utility that displays user and group identification information for the current user or...
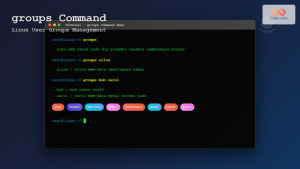
groups Command Linux: Complete Guide to Display User Group Memberships
The groups command is a fundamental Linux utility that displays the group memberships of users on your system. Understanding how...
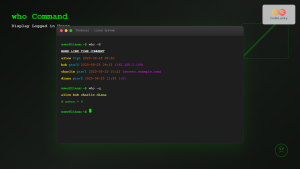
who Command in Linux: Complete Guide to Display Logged in Users
The who command is one of the most fundamental system administration tools in Linux, designed to display information about currently...
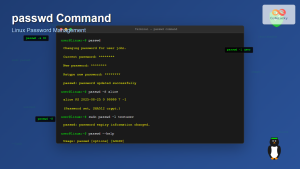
passwd Command Linux: Complete Guide to Password Management from Terminal
The passwd command is one of the most essential utilities in Linux system administration, allowing users and administrators to change...
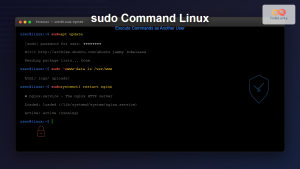
sudo Command Linux: Execute Commands as Another User with Full Administrative Control
The sudo command is one of the most powerful and essential tools in Linux system administration. Short for "superuser do"...
loginctl Command Linux: Master Session Management with Practical Examples
The loginctl command is a powerful systemd utility that allows system administrators to introspect and control the systemd login manager...
whoami Command Linux: Display Current Username and Identity Information
The whoami command is one of the most fundamental and frequently used commands in Linux systems. This simple yet powerful...
Linux Commands Tutorial: Complete Beginner’s Guide to Terminal Basics
The Linux terminal is a powerful command-line interface that gives you direct control over your operating system. While it might...

chown Command Linux: Master File and Directory Ownership Management
The chown command is one of the most fundamental tools in Linux system administration, allowing users to change file and...


