
The Uncomplicated Firewall (ufw) is a user-friendly frontend for managing iptables firewall rules in Linux systems. Designed to simplify firewall configuration, ufw provides an intuitive command-line interface that makes network security accessible to both beginners and experienced system administrators.
What is ufw and Why Use It?
ufw stands for “Uncomplicated Firewall” and serves as a simplified interface for the complex iptables system. While iptables is powerful, its syntax can be intimidating for newcomers. ufw bridges this gap by offering:
- Simple syntax: Easy-to-understand commands
- Default security: Secure default configurations
- IPv6 support: Built-in IPv6 compatibility
- Application profiles: Pre-configured rules for common services
- Logging capabilities: Comprehensive logging options
Installing ufw
Most modern Linux distributions include ufw by default. However, if it’s not installed, you can easily add it:
Ubuntu/Debian:
sudo apt update
sudo apt install ufw
CentOS/RHEL/Fedora:
sudo dnf install ufw
# or for older systems
sudo yum install ufw
Arch Linux:
sudo pacman -S ufwBasic ufw Commands and Usage
Checking ufw Status
Before configuring ufw, check its current status:
sudo ufw statusSample Output:
Status: inactiveFor more detailed information:
sudo ufw status verboseSample Output:
Status: inactive
Default: deny (incoming), allow (outgoing), disabled (routed)
New profiles: skip
Enabling and Disabling ufw
To activate ufw with default settings:
sudo ufw enableSample Output:
Command may disrupt existing ssh connections. Proceed with operation (y|n)? y
Firewall is active and enabled on system startup
To disable ufw:
sudo ufw disableSample Output:
Firewall stopped and disabled on system startupUnderstanding Default Policies
ufw operates with three default policies:
- Incoming: deny (block all incoming connections)
- Outgoing: allow (permit all outgoing connections)
- Routed: disabled (no packet forwarding)
To modify default policies:
sudo ufw default deny incoming
sudo ufw default allow outgoing
sudo ufw default deny routed
Creating and Managing Rules
Basic Rule Syntax
The basic ufw rule syntax follows this pattern:
sudo ufw [rule] [direction] [port/service] [protocol]Allowing Connections
Allow specific ports:
# Allow HTTP traffic
sudo ufw allow 80

# Allow HTTPS traffic
sudo ufw allow 443

# Allow SSH (port 22)
sudo ufw allow ssh
Allow port ranges:
# Allow ports 1000-2000
sudo ufw allow 1000:2000/tcp
Allow from specific IP addresses:
# Allow from specific IP
sudo ufw allow from 192.168.1.100

# Allow from IP to specific port
sudo ufw allow from 192.168.1.100 to any port 22
Denying Connections
Block specific ports or services:
# Deny FTP
sudo ufw deny ftp

# Deny from specific IP
sudo ufw deny from 203.0.113.4
Protocol-Specific Rules
Specify protocols when creating rules:
# Allow UDP on port 53 (DNS)
sudo ufw allow 53/udp

# Allow TCP on port 80 (HTTP)
sudo ufw allow 80/tcp

# Allow both TCP and UDP
sudo ufw allow 53
Advanced Rule Management
Numbered Rules
View rules with numbers for easier management:
sudo ufw status numberedSample Output:
Status: active

     To                         Action      From
     --                         ------      ----
[ 1] 22/tcp                     ALLOW IN    Anywhere
[ 2] 80/tcp                     ALLOW IN    Anywhere
[ 3] 443/tcp                    ALLOW IN    Anywhere
[ 4] 22/tcp (v6)                ALLOW IN    Anywhere (v6)
[ 5] 80/tcp (v6)                ALLOW IN    Anywhere (v6)
[ 6] 443/tcp (v6)               ALLOW IN    Anywhere (v6)
Deleting Rules
Delete rules by number or specification:
# Delete by rule number
sudo ufw delete 2

# Delete by rule specification
sudo ufw delete allow 80/tcp
Inserting Rules
Insert rules at specific positions:
# Insert at position 1
sudo ufw insert 1 allow from 192.168.1.0/24
Application Profiles
ufw includes predefined application profiles for common services:
Listing Available Profiles
sudo ufw app listSample Output:
Available applications:
  Apache
  Apache Full
  Apache Secure
  OpenSSH
  Postfix
  Postfix SMTPS
  Postfix Submission
Getting Profile Information
sudo ufw app info 'Apache Full'Sample Output:
Profile: Apache Full
Title: Web Server (HTTP,HTTPS)
Description: Apache v2 is the next generation of the omnipresent Apache web
server.

Ports:
  80,443/tcp
Using Application Profiles
# Allow Apache Full profile
sudo ufw allow 'Apache Full'

# Allow OpenSSH profile
sudo ufw allow 'OpenSSH'
Logging Configuration
Enabling Logging
ufw supports different logging levels:
# Enable basic logging
sudo ufw logging on

# Set logging level
sudo ufw logging medium
Available logging levels:
- off: Disable logging
- low: Log blocked packets and rate-limited connections
- medium: Log blocked, allowed, and rate-limited connections
- high: Log all packets
- full: Same as high with additional rate limiting
Viewing Logs
ufw logs are typically stored in /var/log/ufw.log:
sudo tail -f /var/log/ufw.logRate Limiting
Protect against brute-force attacks using rate limiting:
# Limit SSH connections
sudo ufw limit ssh

# Limit connections to port 80
sudo ufw limit 80/tcp
Rate limiting blocks connections if an IP makes more than 6 connection attempts within 30 seconds.
IPv6 Support
ufw handles IPv6 automatically when enabled. To ensure IPv6 support:
# Edit ufw configuration
sudo nano /etc/default/ufw
Ensure this line is set:
IPV6=yesPractical Examples
Web Server Configuration
Complete setup for a web server:
# Reset to default
sudo ufw --force reset

# Set defaults
sudo ufw default deny incoming
sudo ufw default allow outgoing

# Allow SSH (important!)
sudo ufw allow ssh

# Allow web traffic
sudo ufw allow 'Apache Full'
# Or manually:
# sudo ufw allow 80/tcp
# sudo ufw allow 443/tcp

# Enable firewall
sudo ufw enable
Database Server Configuration
Configuration for a database server accessible from specific networks:
# Allow MySQL from local network
sudo ufw allow from 192.168.1.0/24 to any port 3306

# Allow PostgreSQL from specific server
sudo ufw allow from 192.168.1.100 to any port 5432
Mail Server Configuration
# Allow SMTP
sudo ufw allow 25/tcp

# Allow SMTPS
sudo ufw allow 465/tcp

# Allow IMAP
sudo ufw allow 143/tcp

# Allow IMAPS
sudo ufw allow 993/tcp

# Allow POP3S
sudo ufw allow 995/tcp
Troubleshooting Common Issues
SSH Lockout Prevention
Always allow SSH before enabling ufw to prevent lockout:
sudo ufw allow ssh
sudo ufw enable
Rule Conflicts
Check for conflicting rules:
sudo ufw status verboseRules are processed in order, so earlier rules take precedence.
Service Not Starting
If ufw fails to start, check system logs:
sudo systemctl status ufw
sudo journalctl -u ufw
Security Best Practices
- Default Deny: Always use “deny incoming” as default
- Minimal Access: Only allow necessary ports and services
- IP Restrictions: Limit access to trusted IP ranges when possible
- Regular Audits: Periodically review and clean up rules
- Logging: Enable appropriate logging for monitoring
- Rate Limiting: Use rate limiting for public services
- Backup Rules: Save rule configurations for quick restoration
Backing Up and Restoring Rules
Backup Rules
# Create backup directory
mkdir ~/ufw-backup

# Backup rules
sudo cp /etc/ufw/user.rules ~/ufw-backup/
sudo cp /etc/ufw/user6.rules ~/ufw-backup/
Restore Rules
# Disable ufw
sudo ufw disable

# Restore rules
sudo cp ~/ufw-backup/user.rules /etc/ufw/
sudo cp ~/ufw-backup/user6.rules /etc/ufw/

# Re-enable ufw
sudo ufw enable
Integration with System Services
Automatic Startup
Enable ufw to start automatically on boot:
sudo systemctl enable ufwService Management
# Check service status
sudo systemctl status ufw

# Start service
sudo systemctl start ufw

# Stop service
sudo systemctl stop ufw

# Restart service
sudo systemctl restart ufw
Conclusion
The ufw command provides a powerful yet accessible way to manage Linux firewall rules. Its simplified syntax makes network security configuration approachable for system administrators at all skill levels. By following the examples and best practices outlined in this guide, you can effectively secure your Linux systems while maintaining the flexibility needed for various network configurations.
Remember to always test firewall rules in a safe environment before applying them to production systems, and maintain regular backups of your configurations to ensure quick recovery when needed. With ufw’s intuitive interface and comprehensive feature set, you have all the tools necessary to implement robust network security policies on your Linux systems.
Related Posts
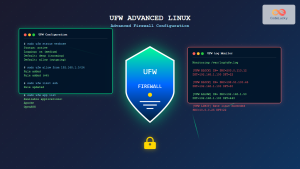
UFW Advanced Linux: Complete Guide to Advanced Firewall Configuration and Security Management
UFW (Uncomplicated Firewall) serves as Ubuntu's default firewall configuration tool, providing a user-friendly interface to manage iptables rules. While UFW...

iptables Command Linux: Complete Guide to Configure Firewall Rules
The iptables command is one of the most powerful and essential tools for managing firewall rules in Linux systems. As...
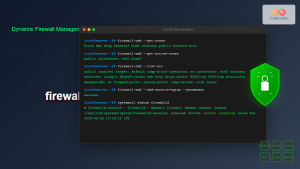
firewalld Linux: Complete Dynamic Firewall Management Guide
firewalld is a powerful, dynamic firewall management tool for Linux systems that provides a flexible and user-friendly interface for managing...
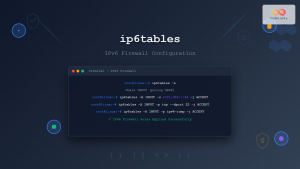
ip6tables Command Linux: Complete Guide to IPv6 Firewall Management and Security
The ip6tables command is the IPv6 counterpart to the popular iptables firewall utility in Linux. As IPv6 adoption continues to...
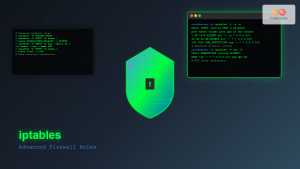
iptables Advanced Linux: Complete Guide to Advanced Firewall Rules and Security Configuration
iptables is the most powerful and flexible firewall solution available for Linux systems, offering granular control over network traffic through...

nftables Command Linux: Complete Guide to Next Generation Firewall Framework
nftables is a modern Linux kernel subsystem that provides packet classification and filtering capabilities, serving as the next-generation replacement for...
ip Command Linux: Complete Guide to Advanced Network Configuration and Management
The ip command is one of the most powerful and versatile networking tools in Linux, serving as the modern replacement...
ifconfig Command Linux: Complete Guide to Network Interface Configuration (Deprecated)
The ifconfig (interface configuration) command has been a cornerstone of Linux network administration for decades. While officially deprecated in favor...

fail2ban Linux: Complete Intrusion Prevention and Security Framework Guide
fail2ban is a powerful intrusion prevention framework designed to protect Linux servers from brute force attacks, dictionary attacks, and other...
route Command Linux: Configure Network Routing Tables (Deprecated Guide)
The route command in Linux has been a fundamental tool for network administrators to view and manipulate the kernel's IP...
iptraf Command Linux: Complete Interactive Network Monitoring Guide
The iptraf command is a powerful console-based network monitoring utility for Linux systems that provides real-time IP LAN monitoring capabilities....
nmcli Command Linux: Complete Guide to NetworkManager Command Line Tool
The nmcli (NetworkManager Command Line Interface) is a powerful command-line tool that allows you to control NetworkManager and configure network...


