
The tmux command is a powerful terminal multiplexer that allows you to create multiple terminal sessions, split windows, and manage complex terminal workflows efficiently. Whether you’re a system administrator, developer, or Linux enthusiast, mastering tmux can significantly boost your productivity by enabling you to run multiple processes simultaneously within a single terminal window.
What is tmux?
Tmux (Terminal Multiplexer) is a command-line application that lets you create, manage, and switch between multiple terminal sessions. Think of it as a window manager for your terminal, allowing you to:
- Create multiple sessions that persist even after disconnecting
- Split terminal windows into multiple panes
- Share sessions between different users
- Run long-running processes without losing them when disconnecting
- Organize your workspace with multiple windows and panes
Installing tmux
Before diving into tmux commands, you need to install it on your system:
Ubuntu/Debian:
sudo apt update
sudo apt install tmux
CentOS/RHEL/Fedora:
sudo yum install tmux
# or for newer versions
sudo dnf install tmux
macOS (using Homebrew):
brew install tmuxVerify the installation:
tmux --versionBasic tmux Commands
Starting and Managing Sessions
Let’s start with the fundamental tmux commands for session management:
1. Creating a New Session
# Create a new tmux session
tmux

# Create a named session
tmux new -s mysession

# Create a session with a specific name and command
tmux new -s development -c ~/projects
Expected Output: You’ll see a new terminal with a green status bar at the bottom showing session information.
2. Listing Active Sessions
tmux list-sessions
# or shorthand
tmux ls
Sample Output:
development: 1 windows (created Mon Aug 25 01:36:15 2025)
mysession: 2 windows (created Mon Aug 25 01:30:22 2025)
3. Attaching to Sessions
# Attach to the most recent session
tmux attach

# Attach to a specific session
tmux attach -t mysession

# Attach to session by number
tmux attach -t 0
4. Detaching from Sessions
While inside a tmux session, use the key combination:
Ctrl+b, then dThis detaches you from the session without terminating it.
Key Bindings and Shortcuts
Tmux uses a prefix key (default: Ctrl+b) followed by other keys to execute commands. Here are the essential key bindings:
Session Management
Ctrl+b, d– Detach from current sessionCtrl+b, s– List and switch sessionsCtrl+b, $– Rename current session
Window Management
Ctrl+b, c– Create new windowCtrl+b, n– Next windowCtrl+b, p– Previous windowCtrl+b, 0-9– Switch to window by numberCtrl+b, ,– Rename current windowCtrl+b, &– Kill current window
Pane Management
Ctrl+b, %– Split pane verticallyCtrl+b, "– Split pane horizontallyCtrl+b, arrow keys– Navigate between panesCtrl+b, x– Kill current paneCtrl+b, z– Zoom/unzoom current pane
Advanced Window and Pane Operations
Working with Panes
Panes are subdivisions within a tmux window. Here’s how to work with them effectively:
Creating Panes
# Split current window vertically (side by side)
Ctrl+b, %

# Split current window horizontally (top and bottom)
Ctrl+b, "
You can also create panes with specific commands:
tmux split-window -h    # horizontal split
tmux split-window -v    # vertical split
Resizing Panes
# Resize pane (hold Ctrl+b and use arrow keys)
Ctrl+b, Ctrl+arrow keys

# Resize by specific amount
tmux resize-pane -L 10  # Left by 10 columns
tmux resize-pane -R 5   # Right by 5 columns
tmux resize-pane -U 3   # Up by 3 rows
tmux resize-pane -D 2   # Down by 2 rows
Practical Example: Development Environment Setup
Let’s create a typical development environment with tmux:
# 1. Start a new named session
tmux new -s devwork

# 2. Create a horizontal split (Ctrl+b, ")
# Top pane: for editing
# Bottom pane: for running commands

# 3. In the bottom pane, create a vertical split (Ctrl+b, %)
# Bottom-left: for git commands
# Bottom-right: for system monitoring

# 4. Navigate between panes using Ctrl+b + arrow keys
Result: You’ll have a three-pane layout perfect for development work.
tmux Configuration
Customize tmux behavior by creating a configuration file at ~/.tmux.conf:
Basic Configuration Example
# Change prefix key from Ctrl+b to Ctrl+a
set -g prefix C-a
unbind C-b
bind C-a send-prefix

# Enable mouse mode
set -g mouse on

# Start windows and panes at index 1
set -g base-index 1
setw -g pane-base-index 1

# Reload config file
bind r source-file ~/.tmux.conf \; display-message "Config reloaded!"

# Split panes using | and -
bind | split-window -h
bind - split-window -v

# Enable vi mode
setw -g mode-keys vi
Apply the configuration:
tmux source-file ~/.tmux.confSession Sharing and Remote Work
Tmux excels in remote work scenarios where you need persistent sessions:
Creating Shared Sessions
# Create a session that multiple users can attach to
tmux new -s shared-session

# Another user can attach to the same session
tmux attach -t shared-session
SSH and tmux Integration
Perfect for maintaining work sessions across SSH connections:
# SSH to remote server
ssh user@server

# Start or attach to tmux session
tmux attach -t work || tmux new -s work

# Even if SSH disconnects, your session continues running
Practical Use Cases
1. System Monitoring Dashboard
# Create monitoring session
tmux new -s monitoring

# Split into four panes for different monitoring tools
# Top-left: htop
# Top-right: iostat
# Bottom-left: tail logs
# Bottom-right: network stats
2. Development Workflow
# Create development session
tmux new -s coding -c ~/project

# Window 0: Editor (vim/nano)
# Window 1: Testing (Ctrl+b, c)
tmux new-window -n testing

# Window 2: Server (Ctrl+b, c)
tmux new-window -n server
3. Long-running Tasks
# Start a session for long-running processes
tmux new -s background-tasks

# Run backup script, compilation, or data processing
# Detach safely knowing processes continue
Troubleshooting Common Issues
Session Won’t Start
If tmux won’t start, check if there are dead sessions:
tmux kill-server  # Kills all tmux sessions
tmux new -s fresh-start
Panes Not Responding
Sometimes panes become unresponsive:
# Kill specific pane
Ctrl+b, x

# Kill entire window
Ctrl+b, &
Configuration Not Loading
# Manually reload configuration
tmux source-file ~/.tmux.conf

# Check configuration syntax
tmux show-options -g
Advanced tmux Features
Copy Mode
Navigate and copy text within tmux:
# Enter copy mode
Ctrl+b, [

# Navigate with arrow keys or vi commands
# Space to start selection
# Enter to copy selection
# Ctrl+b, ] to paste
Session Templates with tmuxinator
For complex setups, consider using tmuxinator:
# Install tmuxinator
gem install tmuxinator

# Create project template
tmuxinator new myproject
Best Practices
- Use meaningful session names: Instead of default numbers, use descriptive names like “work”, “monitoring”, or “development”.
- Customize your prefix key: Many users prefer
Ctrl+aoverCtrl+bfor easier access. - Enable mouse mode: Makes pane resizing and selection more intuitive.
- Create reusable configurations: Build templates for common workflows.
- Regular cleanup: Periodically kill unused sessions to keep things organized.
Conclusion
The tmux command is an indispensable tool for Linux users who work extensively with terminals. It transforms a single terminal into a powerful workspace management system, enabling you to organize multiple tasks, maintain persistent sessions, and work more efficiently.
From basic session management to advanced pane layouts and custom configurations, tmux offers the flexibility to adapt to any workflow. Whether you’re managing servers, developing applications, or monitoring systems, integrating tmux into your daily routine will significantly enhance your productivity and make terminal-based work more enjoyable.
Start with the basic commands covered in this guide, gradually incorporating more advanced features as you become comfortable. With practice, tmux will become second nature, and you’ll wonder how you ever managed without this powerful terminal multiplexer.
Related Posts
screen Command Linux: Complete Guide to Managing Multiple Terminal Sessions
The screen command is one of the most powerful tools in a Linux administrator's arsenal, allowing you to create, manage,...
jobs Command Linux: Complete Guide to Managing Background Jobs in Terminal
The jobs command is an essential tool for Linux users who need to manage multiple processes running in the background....
Linux Commands Tutorial: Complete Beginner’s Guide to Terminal Basics
The Linux terminal is a powerful command-line interface that gives you direct control over your operating system. While it might...
nohup Command Linux: Run Commands After Logout and Keep Processes Running
The nohup command is one of the most essential tools for Linux system administrators and developers who need to run...
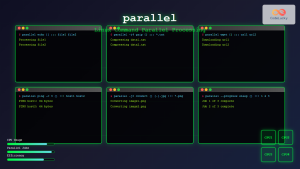
parallel Command Linux: Run Commands Concurrently for Maximum Efficiency
The parallel command in Linux is a powerful tool that allows you to execute multiple commands simultaneously, dramatically improving efficiency...
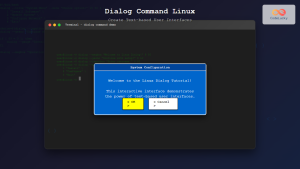
dialog Command Linux: Create Interactive Text-Based User Interfaces with Ease
The dialog command in Linux is a powerful utility that enables developers and system administrators to create sophisticated text-based user...
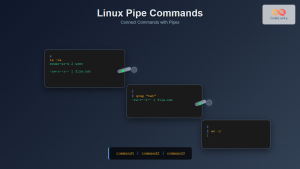
pipe Command Linux: Complete Guide to Connecting Commands with Pipes
The pipe command in Linux is one of the most powerful and fundamental concepts that allows you to connect multiple...
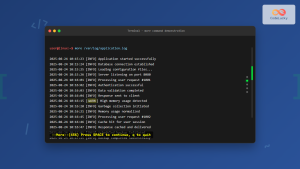
more Command Linux: Complete Guide to Paginated File Viewing
The more command is one of the most essential Linux utilities for viewing file contents in a controlled, paginated manner....
bg Command in Linux: Resume Jobs in Background with Examples
The bg command in Linux is a powerful built-in shell command that allows you to resume suspended jobs in the...
bash Command Linux: Start New Shell Sessions and Execute Scripts Efficiently
The bash command is one of the most fundamental tools in Linux systems, serving as both a command-line interpreter and...
Windows Process Management: Complete Guide to Task Manager and Services
Windows process management is a fundamental aspect of system administration that every IT professional and power user should master. At...
history Command Linux: Complete Guide to View and Manage Your Command History
The history command in Linux is one of the most powerful tools for managing and navigating your command line experience....


