
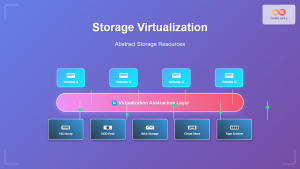
Storage virtualization through Logical Volume Management (LVM) represents one of the most powerful features in modern Linux systems, providing administrators with unprecedented flexibility in managing disk storage. Unlike traditional partitioning schemes, LVM creates an abstraction layer between physical storage devices and the file systems that use them, enabling dynamic resizing, snapshots, and sophisticated storage management strategies.
Understanding Storage Virtualization Concepts
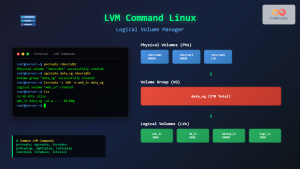
Storage virtualization fundamentally changes how we think about disk management. Traditional approaches tie file systems directly to physical partitions, creating rigid boundaries that are difficult to modify without significant downtime. LVM introduces a three-tier architecture that separates physical storage from logical allocation.

The three core components work together to provide this flexibility:
- Physical Volumes (PV): Raw storage devices or partitions prepared for LVM use
- Volume Groups (VG): Collections of physical volumes that create storage pools
- Logical Volumes (LV): Virtual partitions carved from volume groups
Physical Volumes: The Foundation Layer
Physical volumes form the base layer of LVM architecture. Any block device—whether a complete disk, partition, or even a RAID array—can become a physical volume. The process involves writing LVM metadata to the device, which includes information about the volume group membership and physical extent allocation.
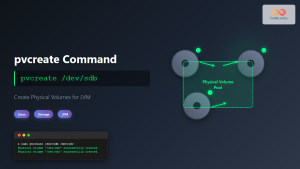
Creating Physical Volumes
The pvcreate command initializes devices for LVM use:
# Initialize a single device
sudo pvcreate /dev/sdb

# Initialize multiple devices simultaneously
sudo pvcreate /dev/sdc /dev/sdd /dev/sde

# Force creation on a device with existing data
sudo pvcreate --force /dev/sdf
After creation, verify the physical volumes using diagnostic commands:
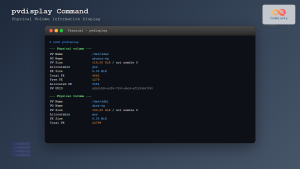
# Display detailed physical volume information
sudo pvdisplay

# Show summary information
sudo pvs

# Get specific information about a physical volume
sudo pvdisplay /dev/sdb
Expected output from pvdisplay:
--- Physical volume ---
PV Name               /dev/sdb
VG Name               storage_vg
PV Size               100.00 GiB / not usable 4.00 MiB
Allocatable           yes
PE Size               4.00 MiB
Total PE              25599
Free PE               12800
Allocated PE          12799
PV UUID               J5w2Kf-ordy-LRMZ-4z5C-9sNF-PrOd-QKxXyZ
Volume Groups: Creating Storage Pools
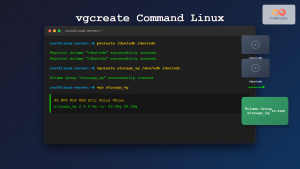
Volume groups aggregate physical volumes into unified storage pools. This pooling concept allows administrators to combine multiple disks of different sizes and types into a single logical unit, providing both flexibility and simplified management.
Volume Group Operations
Creating and managing volume groups involves several key operations:
# Create a volume group with multiple physical volumes
sudo vgcreate storage_vg /dev/sdb /dev/sdc
# Add additional physical volumes to existing volume group
sudo vgextend storage_vg /dev/sdd
# Remove a physical volume from volume group
sudo vgreduce storage_vg /dev/sdd
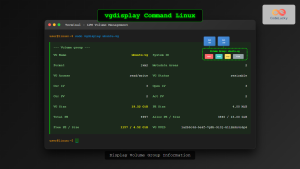
# Display volume group information
sudo vgdisplay storage_vgThe vgdisplay command provides comprehensive information about volume group status:
--- Volume group ---
VG Name               storage_vg
System ID
Format                lvm2
Metadata Areas        2
Metadata Sequence No  3
VG Access             read/write
VG Status             resizable
MAX LV                0
Cur LV                2
Open LV               2
Max PV                0
Cur PV                2
Act PV                2
VG Size               199.99 GiB
PE Size               4.00 MiB
Total PE              51198
Alloc PE / Size       25600 / 100.00 GiB
Free  PE / Size       25598 / 99.99 GiB
VG UUID               Kf5j9L-3jSw-9Qr2-xVvT-7hN8-mPqR-8sCtYz
Logical Volumes: Virtual Partitions
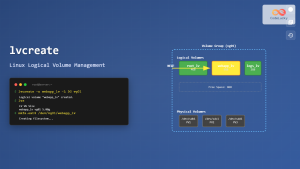
Logical volumes represent the user-facing component of LVM, functioning as virtual partitions that can be dynamically resized, moved, and managed independently of underlying physical storage. Unlike traditional partitions, logical volumes can span multiple physical devices and be resized without unmounting file systems.
Creating and Managing Logical Volumes
Logical volume creation offers multiple sizing options and advanced features:
# Create logical volume with specific size
sudo lvcreate -L 50G -n web_data storage_vg

# Create logical volume using percentage of volume group
sudo lvcreate -l 100%VG -n backup_lv storage_vg

# Create logical volume with specific extent count
sudo lvcreate -l 12800 -n database_lv storage_vg

# Create a thin provisioned logical volume
sudo lvcreate -T storage_vg/thin_pool -V 200G -n thin_lv
Dynamic Resizing Capabilities
One of LVM’s most powerful features is the ability to resize logical volumes online:
# Extend logical volume by 20GB
sudo lvextend -L +20G /dev/storage_vg/web_data

# Extend logical volume to use all free space
sudo lvextend -l +100%FREE /dev/storage_vg/web_data

# Resize the file system simultaneously
sudo lvextend -L +20G -r /dev/storage_vg/web_data

# Reduce logical volume size (requires unmounting)
sudo umount /mnt/web_data
sudo lvreduce -L -10G /dev/storage_vg/web_data
sudo mount /dev/storage_vg/web_data /mnt/web_data
Advanced LVM Features
LVM Snapshots
Snapshots provide point-in-time copies of logical volumes, essential for backup operations and testing environments:
# Create a snapshot with 10GB space for changes
sudo lvcreate -L 10G -s -n web_data_snapshot /dev/storage_vg/web_data

# Mount the snapshot for backup
sudo mkdir /mnt/snapshot
sudo mount /dev/storage_vg/web_data_snapshot /mnt/snapshot

# Remove snapshot after backup completion
sudo umount /mnt/snapshot
sudo lvremove /dev/storage_vg/web_data_snapshot
Striped Logical Volumes
Striping distributes data across multiple physical volumes to improve performance:
# Create striped logical volume across 3 physical volumes
sudo lvcreate -L 60G -i3 -I64 -n striped_lv storage_vg

# The -i3 specifies 3 stripes, -I64 sets 64KB stripe size
Practical Implementation Scenarios
Database Server Storage Layout
Consider a database server requiring flexible storage management:
# Initialize physical volumes
sudo pvcreate /dev/sdb /dev/sdc /dev/sdd

# Create volume group for database storage
sudo vgcreate db_vg /dev/sdb /dev/sdc /dev/sdd

# Create logical volumes for different database components
sudo lvcreate -L 100G -n db_data db_vg
sudo lvcreate -L 50G -n db_logs db_vg
sudo lvcreate -L 20G -n db_backup db_vg

# Format and mount the logical volumes
sudo mkfs.ext4 /dev/db_vg/db_data
sudo mkfs.ext4 /dev/db_vg/db_logs
sudo mkfs.ext4 /dev/db_vg/db_backup

sudo mkdir -p /var/lib/mysql /var/log/mysql /var/backup/mysql
sudo mount /dev/db_vg/db_data /var/lib/mysql
sudo mount /dev/db_vg/db_logs /var/log/mysql
sudo mount /dev/db_vg/db_backup /var/backup/mysql
Web Server with Growth Management
A web server scenario demonstrating dynamic growth handling:
# Initial setup with conservative sizing
sudo vgcreate web_vg /dev/sdb
sudo lvcreate -L 30G -n web_root web_vg
sudo lvcreate -L 20G -n web_logs web_vg

# Later expansion when storage needs grow
sudo pvcreate /dev/sdc
sudo vgextend web_vg /dev/sdc
sudo lvextend -L +50G /dev/web_vg/web_root
sudo resize2fs /dev/web_vg/web_root
Monitoring and Maintenance
System Monitoring Commands
Regular monitoring ensures optimal LVM performance and identifies potential issues:
# Monitor volume group space usage
sudo vgs

# Detailed logical volume information
sudo lvs -a

# Physical volume allocation details
sudo pvs --segments

# Display LVM configuration
sudo lvmdiskscan

# Check for LVM inconsistencies
sudo vgck storage_vg
Performance Optimization
Several techniques optimize LVM performance for different workloads:
# Optimize for sequential I/O with larger extents
sudo vgcreate -s 32M high_performance_vg /dev/sdb

# Create striped volume for parallel I/O
sudo lvcreate -L 100G -i2 -I128 -n fast_lv high_performance_vg

# Use separate physical volumes for different access patterns
sudo lvcreate -L 50G -n random_io_lv high_performance_vg /dev/sdb
sudo lvcreate -L 50G -n sequential_io_lv high_performance_vg /dev/sdc
Troubleshooting Common Issues
Recovery Procedures
LVM provides robust recovery mechanisms for various failure scenarios:
# Recover from missing physical volume
sudo vgreduce --removemissing storage_vg

# Restore LVM metadata from backup
sudo vgcfgrestore storage_vg

# Activate volume group after boot issues
sudo vgchange -ay storage_vg

# Repair corrupted logical volume
sudo fsck -f /dev/storage_vg/damaged_lv
Migration Strategies
Moving data between physical volumes enables maintenance without downtime:
# Move all data from specific physical volume
sudo pvmove /dev/sdb

# Move data to specific destination
sudo pvmove /dev/sdb /dev/sdc

# Move only specific logical volume
sudo pvmove -n web_data_lv /dev/sdb /dev/sdc
Security and Best Practices
Backup and Recovery
Implementing comprehensive backup strategies with LVM snapshots:
# Create consistent backup using snapshots
sudo lvcreate -L 10G -s -n backup_snap /dev/storage_vg/production_lv
sudo mount /dev/storage_vg/backup_snap /mnt/backup
tar czf /backup/production_$(date +%Y%m%d).tar.gz -C /mnt/backup .
sudo umount /mnt/backup
sudo lvremove -f /dev/storage_vg/backup_snap
Security Configurations
Enhance security through proper permissions and encryption:
# Set restrictive permissions on LVM devices
sudo chmod 660 /dev/storage_vg/*
sudo chgrp disk /dev/storage_vg/*

# Create encrypted logical volume using LUKS
sudo lvcreate -L 50G -n encrypted_lv storage_vg
sudo cryptsetup luksFormat /dev/storage_vg/encrypted_lv
sudo cryptsetup luksOpen /dev/storage_vg/encrypted_lv encrypted_fs
sudo mkfs.ext4 /dev/mapper/encrypted_fs
Storage virtualization through Logical Volume Management transforms traditional disk management into a flexible, scalable system. By abstracting physical storage devices into manageable logical units, LVM enables administrators to respond dynamically to changing storage requirements while maintaining system availability and data integrity. The combination of snapshots, dynamic resizing, and advanced features like striping makes LVM an essential tool for modern Linux system administration, providing the foundation for robust storage infrastructure that can adapt to evolving organizational needs.
Related Posts
lvm Command Linux: Complete Guide to Logical Volume Manager Operations
The Logical Volume Manager (LVM) is a powerful disk management tool in Linux that provides flexible storage management by abstracting...
lvcreate Command Linux: Complete Guide to Creating Logical Volumes with Examples
The lvcreate command is a fundamental tool in Linux Logical Volume Management (LVM) that allows you to create logical volumes...
vgcreate Command Linux: Complete Guide to Volume Group Creation
The vgcreate command is a fundamental tool in Linux Logical Volume Manager (LVM) that allows system administrators to create volume...
Storage Virtualization: Complete Guide to Abstract Storage Resources in Modern Computing
Storage virtualization represents one of the most critical technologies in modern computing infrastructure, enabling organizations to abstract physical storage resources...
vgdisplay Command Linux: Complete Guide to Display Volume Group Information
The vgdisplay command is an essential tool in Linux systems for displaying detailed information about Volume Groups (VGs) in Logical...
pvcreate Command Linux: Complete Guide to Creating Physical Volumes for LVM
The pvcreate command is a fundamental tool in Linux Logical Volume Management (LVM) that initializes storage devices as physical volumes....
pvdisplay Command Linux: Complete Guide to Physical Volume Information Display
The pvdisplay command is an essential tool in Linux for displaying detailed information about Physical Volumes (PVs) in Logical Volume...
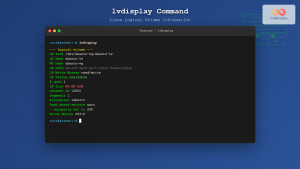
lvdisplay Command Linux: Complete Guide to Display Logical Volume Information
The lvdisplay command is an essential tool in Linux for displaying detailed information about logical volumes (LVs) in Logical Volume...
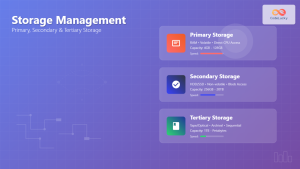
Storage Management: Complete Guide to Primary, Secondary and Tertiary Storage Systems
Storage management is one of the most critical components of an operating system, responsible for efficiently organizing, accessing, and maintaining...
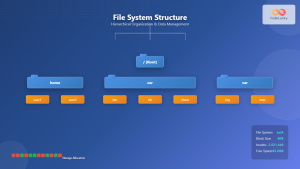
File System in Operating System: Complete Guide to Structure and Organization
Introduction to File Systems A file system is a fundamental component of any operating system that provides a structured way...
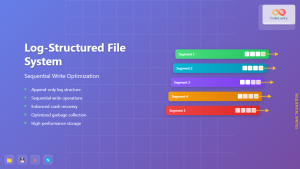
Log-structured File System: Sequential Write Optimization for High-Performance Storage
Log-structured File Systems (LFS) represent a revolutionary approach to data storage that fundamentally changes how operating systems handle file operations....
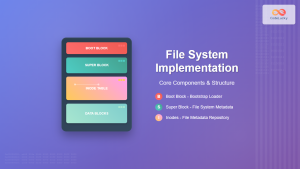
File System Implementation: Boot Block, Super Block and Inodes Explained
Understanding File System Implementation File system implementation is a critical component of operating systems that manages how data is stored,...


