
The ssh-copy-id command is an essential Linux utility that simplifies the process of copying your SSH public key to remote servers. This command automates the tedious task of manually copying keys and ensures proper file permissions, making it easier to set up passwordless SSH authentication.
What is ssh-copy-id?
ssh-copy-id is a script that uses SSH to log into a remote machine and append your public key to the ~/.ssh/authorized_keys file on the remote server. It automatically creates the necessary directories and sets appropriate permissions, eliminating common setup errors.
Basic Syntax
The basic syntax of ssh-copy-id is straightforward:
ssh-copy-id [options] user@hostnamePrerequisites
Before using ssh-copy-id, ensure you have:
- An SSH key pair generated on your local machine
- SSH access to the remote server (password authentication should be enabled initially)
- The
ssh-copy-idutility installed (comes with OpenSSH client package)
Generating SSH Keys
If you don’t have SSH keys, generate them first:
ssh-keygen -t rsa -b 4096 -C "[email protected]"Output:
Generating public/private rsa key pair.
Enter file in which to save the key (/home/user/.ssh/id_rsa):
Enter passphrase (empty for no passphrase):
Enter same passphrase again:
Your identification has been saved in /home/user/.ssh/id_rsa
Your public key has been saved in /home/user/.ssh/id_rsa.pub
Basic Usage Examples
Copy Default SSH Key
To copy your default SSH public key (usually ~/.ssh/id_rsa.pub) to a remote server:
ssh-copy-id [email protected]Sample Output:
/usr/bin/ssh-copy-id: INFO: Source of key(s) to be installed: "/home/localuser/.ssh/id_rsa.pub"
The authenticity of host '192.168.1.100 (192.168.1.100)' can't be established.
ECDSA key fingerprint is SHA256:abc123def456ghi789jkl012mno345pqr678stu901vwx234yz.
Are you sure you want to continue connecting (yes/no/[fingerprint])? yes
/usr/bin/ssh-copy-id: INFO: attempting to log in with the new key(s), to filter out any that are already installed
/usr/bin/ssh-copy-id: INFO: 1 key(s) remain to be installed -- if you are prompted now, it is to install the new keys
[email protected]'s password:

Number of key(s) added: 1

Now try logging into the machine, with:   "ssh '[email protected]'"
and check to make sure that only the key(s) you wanted were added.
Copy Specific SSH Key
To specify a particular key file:
ssh-copy-id -i ~/.ssh/id_ed25519.pub [email protected]Using Custom SSH Port
If your SSH server runs on a non-standard port:
ssh-copy-id -p 2222 [email protected]Command Options
| Option | Description |
|---|---|
-i |
Specify identity file (private key) |
-p |
Specify SSH port |
-o |
Pass SSH options |
-f |
Force mode (don’t check if keys are already installed) |
-n |
Dry run (show what would be done) |
Advanced Usage Examples
Dry Run to Preview Changes
Use the -n option to see what would happen without making changes:
ssh-copy-id -n [email protected]Output:
/usr/bin/ssh-copy-id: INFO: Source of key(s) to be installed: "/home/user/.ssh/id_rsa.pub"
/usr/bin/ssh-copy-id: INFO: attempting to log in with the new key(s), to filter out any that are already installed
/usr/bin/ssh-copy-id: INFO: Would have added the following key(s):

ssh-rsa AAAAB3NzaC1yc2EAAAADAQABAAACAQC7... user@hostname

/usr/bin/ssh-copy-id: INFO: ...but aborting because -n flag was given
Copy Multiple Keys
To copy multiple public keys at once:
ssh-copy-id -i ~/.ssh/id_rsa.pub -i ~/.ssh/id_ed25519.pub [email protected]Using SSH Options
Pass additional SSH options using -o:
ssh-copy-id -o "StrictHostKeyChecking=no" [email protected]Interactive Example: Complete Setup Process
Let’s walk through a complete example of setting up passwordless SSH authentication:
Step 1: Generate SSH Key Pair
$ ssh-keygen -t ed25519 -C "[email protected]"
Generating public/private ed25519 key pair.
Enter file in which to save the key (/home/admin/.ssh/id_ed25519):
Enter passphrase (empty for no passphrase):
Enter same passphrase again:
Your identification has been saved in /home/admin/.ssh/id_ed25519
Your public key has been saved in /home/admin/.ssh/id_ed25519.pub
Step 2: Copy Public Key to Remote Server
$ ssh-copy-id -i ~/.ssh/id_ed25519.pub [email protected]
/usr/bin/ssh-copy-id: INFO: Source of key(s) to be installed: "/home/admin/.ssh/id_ed25519.pub"
The authenticity of host 'webserver.example.com (203.0.113.1)' can't be established.
ED25519 key fingerprint is SHA256:K7hJBmPJrQj5w8sF7gL4nN8mM2xR6vT9cD1eA3bC5dE.
Are you sure you want to continue connecting (yes/no/[fingerprint])? yes
/usr/bin/ssh-copy-id: INFO: attempting to log in with the new key(s), to filter out any that are already installed
/usr/bin/ssh-copy-id: INFO: 1 key(s) remain to be installed -- if you are prompted now, it is to install the new keys
[email protected]'s password:

Number of key(s) added: 1

Now try logging into the machine, with:   "ssh '[email protected]'"
and check to make sure that only the key(s) you wanted were added.
Step 3: Test Passwordless Login
$ ssh [email protected]
Welcome to Ubuntu 22.04.3 LTS (GNU/Linux 5.15.0-72-generic x86_64)
Last login: Mon Aug 25 14:30:22 2025 from 192.168.1.50
admin@webserver:~$
What Happens Behind the Scenes
When you run ssh-copy-id, it performs these actions:
- Reads your public key from the specified file (default:
~/.ssh/id_rsa.pub) - Connects to the remote server using password authentication
- Creates the
.sshdirectory in the user’s home directory if it doesn’t exist - Sets proper permissions on the
.sshdirectory (700) - Appends the public key to
~/.ssh/authorized_keys - Sets correct permissions on
authorized_keysfile (600) - Tests the new key to ensure it works
File Permissions Set by ssh-copy-id
| File/Directory | Permissions | Octal |
|---|---|---|
~/.ssh/ |
drwx—— | 700 |
~/.ssh/authorized_keys |
-rw——- | 600 |
Troubleshooting Common Issues
Permission Denied (publickey)
If you encounter this error after copying keys:
Permission denied (publickey)Solutions:
- Verify SSH service allows public key authentication:
PubkeyAuthentication yesin/etc/ssh/sshd_config - Check file permissions on the remote server
- Ensure the correct username is being used
- Verify the key was copied correctly
ssh-copy-id: command not found
Install the OpenSSH client package:
# Ubuntu/Debian
sudo apt update && sudo apt install openssh-client

# RHEL/CentOS/Fedora
sudo yum install openssh-clients
# or
sudo dnf install openssh-clients
Host Key Verification Failed
If you get host key verification errors:
ssh-copy-id -o "StrictHostKeyChecking=no" [email protected]Note: Only use this option if you trust the network and host.
Multiple Keys with Same Comment
If you have multiple keys and need to specify which one:
ssh-copy-id -i ~/.ssh/specific_key.pub [email protected]Security Best Practices
Use Strong Key Types
Prefer modern key types like Ed25519:
ssh-keygen -t ed25519 -a 100Use Key Passphrases
Always protect your private keys with strong passphrases:
ssh-keygen -t ed25519 -a 100 -C "[email protected]"Disable Password Authentication
After setting up key-based authentication, disable password authentication in /etc/ssh/sshd_config:
PasswordAuthentication no
ChallengeResponseAuthentication no
UsePAM no
Restrict Key Usage
Add restrictions to keys in authorized_keys:
command="/usr/local/bin/backup-script",no-port-forwarding,no-X11-forwarding ssh-rsa AAAAB3...Alternative Methods
Manual Method
If ssh-copy-id is not available:
cat ~/.ssh/id_rsa.pub | ssh [email protected] "mkdir -p ~/.ssh && chmod 700 ~/.ssh && cat >> ~/.ssh/authorized_keys && chmod 600 ~/.ssh/authorized_keys"Using scp
Copy the key file and append manually:
scp ~/.ssh/id_rsa.pub [email protected]:~/
ssh [email protected] "cat ~/id_rsa.pub >> ~/.ssh/authorized_keys && rm ~/id_rsa.pub"
Automation and Scripting
For automating key deployment across multiple servers:
#!/bin/bash
servers=("server1.example.com" "server2.example.com" "server3.example.com")
key_file="~/.ssh/id_ed25519.pub"

for server in "${servers[@]}"; do
    echo "Copying key to $server..."
    ssh-copy-id -i "$key_file" "admin@$server"
    if [ $? -eq 0 ]; then
        echo "Successfully copied key to $server"
    else
        echo "Failed to copy key to $server"
    fi
    echo "---"
done
Verifying Key Installation
After using ssh-copy-id, verify the installation:
Check Authorized Keys
ssh [email protected] "cat ~/.ssh/authorized_keys"Test Key Authentication
ssh -v [email protected]Look for lines indicating successful key authentication:
debug1: Offering public key: /home/user/.ssh/id_ed25519 ED25519 SHA256:abc123...
debug1: Server accepts key: /home/user/.ssh/id_ed25519 ED25519 SHA256:abc123...
debug1: Authentication succeeded (publickey).
Managing Multiple Keys
For managing different keys for different servers, use SSH config:
# ~/.ssh/config
Host webserver
    HostName webserver.example.com
    User admin
    IdentityFile ~/.ssh/webserver_key

Host database
    HostName db.example.com
    User dbadmin
    IdentityFile ~/.ssh/database_key
Then copy specific keys:
ssh-copy-id -i ~/.ssh/webserver_key.pub [email protected]
ssh-copy-id -i ~/.ssh/database_key.pub [email protected]
Conclusion
The ssh-copy-id command is an invaluable tool for system administrators and developers who frequently work with remote servers. It simplifies the process of setting up passwordless SSH authentication while ensuring proper security configurations. By automating the key copying process and setting correct permissions, ssh-copy-id reduces the likelihood of configuration errors that could compromise security.
Remember to always follow security best practices: use strong key types, protect private keys with passphrases, and disable password authentication once key-based authentication is working. With proper implementation, SSH key authentication provides both enhanced security and improved workflow efficiency for remote server management.
Related Posts
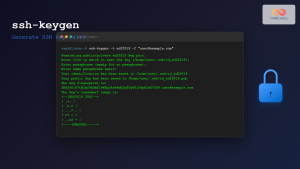
ssh-keygen Linux: Complete Guide to Generate SSH Key Pairs Securely
SSH key authentication is one of the most secure methods for connecting to remote servers. The ssh-keygen command is a...
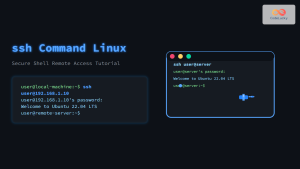
ssh Command Linux: Secure Shell Remote Access Tutorial with Examples
The ssh command in Linux, short for Secure Shell, is one of the most essential tools for system administrators, developers,...
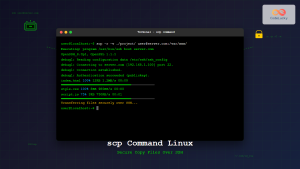
scp Command Linux: Complete Guide to Secure File Transfer Over SSH
The scp (Secure Copy Protocol) command is one of the most essential tools in Linux for securely transferring files between...

rsync Command Linux: Complete Guide to Sync Files and Directories Efficiently
The rsync command is one of the most powerful and versatile file synchronization utilities available in Linux systems. Whether you're...
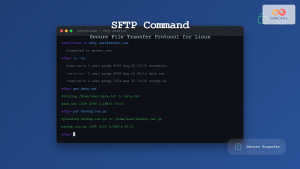
sftp Command Linux: Complete Guide to Secure File Transfer Protocol
The sftp command (Secure File Transfer Protocol) is a powerful Linux utility that provides secure file transfer capabilities over an...
id Command Linux: Complete Guide to Display User and Group IDs
The id command is a fundamental Linux utility that displays user and group identification information for the current user or...

ftp Command Linux: Complete Guide to File Transfer Protocol Client Operations
The ftp command in Linux is a powerful client utility for transferring files between local and remote systems using the...
curl Command Linux: Complete Guide to Transfer Data from Servers with Examples
The curl command is one of the most powerful and versatile tools in the Linux command-line arsenal for transferring data...

Ansible Linux: Complete Guide to IT Automation and Configuration Management
Ansible has revolutionized the way IT professionals manage infrastructure, making complex automation tasks simple and efficient. As an agentless automation...
denyhosts Linux: Complete SSH Brute Force Attack Prevention Guide
SSH brute force attacks are among the most common security threats facing Linux servers today. Attackers continuously attempt to gain...

cp Command Linux: Copy Files and Directories with Examples and Best Practices
The cp command is one of the most fundamental and frequently used commands in Linux systems. It allows you to...
su Command in Linux: Complete Guide to Switch User Accounts in Terminal
The su command (substitute user or switch user) is one of the most fundamental commands in Linux system administration. It...


