
The snmpwalk command is a powerful Linux utility that allows you to retrieve management information from SNMP-enabled devices on your network. Whether you’re monitoring servers, switches, routers, or other network equipment, mastering snmpwalk is essential for effective network management and troubleshooting.
What is SNMP and snmpwalk?
SNMP (Simple Network Management Protocol) is a protocol used for monitoring and managing network devices. It operates on a manager-agent model where:
- SNMP Manager: The system running snmpwalk commands
- SNMP Agent: The monitored device responding to requests
- MIB (Management Information Base): Database of manageable objects
The snmpwalk command performs a sequence of SNMP GETNEXT requests to retrieve a portion of the MIB tree from an SNMP-enabled device.
Installing snmpwalk
Before using snmpwalk, you need to install the SNMP utilities package:
Ubuntu/Debian:
sudo apt update
sudo apt install snmp-utils
CentOS/RHEL/Fedora:
sudo yum install net-snmp-utils
# or for newer versions
sudo dnf install net-snmp-utils
Basic snmpwalk Syntax
The basic syntax for snmpwalk is:
snmpwalk [OPTIONS] HOST [OID]Where:
- HOST: IP address or hostname of the target device
- OID: Object Identifier (optional, defaults to entire MIB tree)
- OPTIONS: Various command-line options
Essential snmpwalk Options
| Option | Description | Example |
|---|---|---|
| -v | SNMP version (1, 2c, 3) | -v2c |
| -c | Community string | -c public |
| -u | Username (SNMPv3) | -u admin |
| -l | Security level (noAuthNoPriv, authNoPriv, authPriv) | -l authPriv |
| -O | Output format options | -On (numeric OIDs) |
| -t | Timeout in seconds | -t 10 |
| -r | Number of retries | -r 3 |
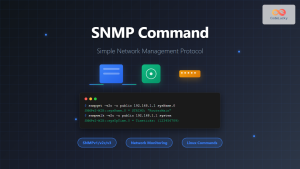
Basic Examples
1. Simple snmpwalk with SNMPv2c
snmpwalk -v2c -c public 192.168.1.1Expected Output:
SNMPv2-MIB::sysDescr.0 = STRING: Linux server01 5.4.0-74-generic
SNMPv2-MIB::sysObjectID.0 = OID: NET-SNMP-MIB::netSnmpAgentOIDs.10
DISMAN-EVENT-MIB::sysUpTimeInstance = Timeticks: (12345678) 1 day, 10:17:36.78
SNMPv2-MIB::sysContact.0 = STRING: [email protected]
SNMPv2-MIB::sysName.0 = STRING: server01.company.com
2. Walking a Specific OID
snmpwalk -v2c -c public 192.168.1.1 1.3.6.1.2.1.1This retrieves only the system information subtree.
3. Using Numeric OIDs
snmpwalk -v2c -c public -On 192.168.1.1 systemOutput with numeric OIDs:
.1.3.6.1.2.1.1.1.0 = STRING: Linux server01 5.4.0-74-generic
.1.3.6.1.2.1.1.2.0 = OID: .1.3.6.1.4.1.8072.3.2.10
.1.3.6.1.2.1.1.3.0 = Timeticks: (12345678) 1 day, 10:17:36.78
Advanced Usage Examples
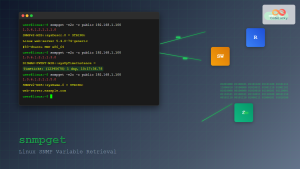
1. SNMPv3 with Authentication
snmpwalk -v3 -u admin -l authNoPriv -a MD5 -A password123 192.168.1.12. SNMPv3 with Authentication and Privacy
snmpwalk -v3 -u admin -l authPriv -a SHA -A authpass -x AES -X privpass 192.168.1.13. Interface Information
snmpwalk -v2c -c public 192.168.1.1 1.3.6.1.2.1.2.2.1.2Sample Output:
IF-MIB::ifDescr.1 = STRING: lo
IF-MIB::ifDescr.2 = STRING: eth0
IF-MIB::ifDescr.3 = STRING: wlan0
4. Memory Usage Information
snmpwalk -v2c -c public 192.168.1.1 1.3.6.1.4.1.2021.4Common OIDs for System Monitoring
| Information | OID | Description |
|---|---|---|
| System Description | 1.3.6.1.2.1.1.1 | System information |
| System Uptime | 1.3.6.1.2.1.1.3 | Time since last reboot |
| Interfaces | 1.3.6.1.2.1.2.2.1 | Network interface information |
| CPU Load | 1.3.6.1.4.1.2021.10.1.3 | CPU usage statistics |
| Memory Usage | 1.3.6.1.4.1.2021.4 | Memory statistics |
| Disk Usage | 1.3.6.1.4.1.2021.9 | Disk space information |
Output Formatting Options
1. Verbose Output
snmpwalk -v2c -c public -Of 192.168.1.1 system2. Concise Output
snmpwalk -v2c -c public -Oq 192.168.1.1 systemOutput:
sysDescr.0 Linux server01 5.4.0-74-generic
sysObjectID.0 .1.3.6.1.4.1.8072.3.2.10
sysUpTimeInstance 12345678
3. Value-only Output
snmpwalk -v2c -c public -Oqv 192.168.1.1 sysNameOutput:
server01.company.comPractical Monitoring Scripts
CPU Monitoring Script
#!/bin/bash
HOST="192.168.1.1"
COMMUNITY="public"

echo "CPU Load Information:"
snmpwalk -v2c -c $COMMUNITY -Oqv $HOST 1.3.6.1.4.1.2021.10.1.3 | while read load; do
    echo "Load: $load%"
done
Interface Status Script
#!/bin/bash
HOST="192.168.1.1"
COMMUNITY="public"

echo "Interface Status:"
snmpwalk -v2c -c $COMMUNITY -Oqv $HOST 1.3.6.1.2.1.2.2.1.8 | nl -w2 -s': '
Troubleshooting Common Issues
1. Timeout Errors
Problem: Request timeout
Solution:
snmpwalk -v2c -c public -t 10 -r 5 192.168.1.12. Authentication Failures
Problem: SNMPv3 authentication failed
Solutions:
- Verify username and passwords
- Check security level settings
- Ensure proper authentication protocol
3. No Response from Host
Troubleshooting Steps:
# Check network connectivity
ping 192.168.1.1

# Verify SNMP service is running
sudo netstat -unlp | grep 161

# Test with snmpget first
snmpget -v2c -c public 192.168.1.1 sysName.0
Performance Optimization
1. Limiting Results
For large MIB trees, limit the scope:
snmpwalk -v2c -c public 192.168.1.1 1.3.6.1.2.1.1.12. Using Bulk Operations
For SNMPv2c and v3, use snmpbulkwalk for better performance:
snmpbulkwalk -v2c -c public 192.168.1.1 systemSecurity Best Practices
- Use SNMPv3: Always prefer SNMPv3 over v1/v2c in production
- Strong Community Strings: Avoid default communities like “public”
- Access Control: Configure SNMP ACLs on target devices
- Network Segmentation: Restrict SNMP traffic to management networks
- Encryption: Use authentication and privacy for sensitive data
Integration with Monitoring Tools
Nagios Integration
#!/bin/bash
# check_snmp_custom.sh
HOST=$1
WARNING=$2
CRITICAL=$3

RESULT=$(snmpwalk -v2c -c public -Oqv $HOST 1.3.6.1.4.1.2021.10.1.3.1)
if [ $RESULT -gt $CRITICAL ]; then
    echo "CRITICAL - CPU Load: $RESULT%"
    exit 2
elif [ $RESULT -gt $WARNING ]; then
    echo "WARNING - CPU Load: $RESULT%"
    exit 1
else
    echo "OK - CPU Load: $RESULT%"
    exit 0
fi
Conclusion
The snmpwalk command is an indispensable tool for Linux system administrators and network engineers. By mastering its various options and understanding SNMP fundamentals, you can effectively monitor and manage network infrastructure. Start with basic commands and gradually explore advanced features like SNMPv3 security and custom monitoring scripts.
Remember to always test commands in a controlled environment before deploying them in production, and follow security best practices when implementing SNMP monitoring solutions.
Related Posts
SNMP Command Linux: Complete Guide to Simple Network Management Protocol Configuration and Usage
Introduction to SNMP Command in Linux Simple Network Management Protocol (SNMP) is a fundamental protocol used for monitoring and managing...
snmpget Command Linux: Complete Guide to Retrieving SNMP Variables
The snmpget command is a powerful Linux utility that allows network administrators to retrieve specific SNMP (Simple Network Management Protocol)...

snmpset Command Linux: Complete Guide to Setting SNMP Variables
The snmpset command is a powerful Linux utility that allows network administrators to modify SNMP (Simple Network Management Protocol) variables...

net-snmp Linux: Complete Guide to SNMP Implementation and Management
Simple Network Management Protocol (SNMP) is a cornerstone of network management, and net-snmp is the most widely used open-source implementation...

mibs Linux: Complete Guide to Management Information Base Files and SNMP Monitoring
Management Information Base (MIB) files are essential components in Linux system administration and network monitoring. These structured databases define the...

ManageEngine Linux: Complete Network Monitoring Solutions Guide
Network monitoring is crucial for maintaining optimal performance and security in Linux environments. ManageEngine provides powerful network monitoring solutions specifically...

SolarWinds Linux: Complete Network Performance Monitor Guide for System Administrators
SolarWinds Network Performance Monitor (NPM) is a powerful network monitoring solution that provides comprehensive visibility into network infrastructure performance. While...

LibreNMS Linux: Complete Network Monitoring System Setup and Configuration Guide
LibreNMS is a powerful, open-source network monitoring platform that provides comprehensive visibility into network infrastructure. Built on PHP and MySQL,...

intermapper Linux: Complete Network Monitoring and Mapping Guide
What is InterMapper for Linux? InterMapper is a powerful network monitoring and mapping tool that provides real-time visibility into network...

Paessler Linux: Complete Guide to Network Monitoring with PRTG on Linux Systems
Network monitoring is crucial for maintaining optimal performance and security in Linux environments. Paessler PRTG Network Monitor offers comprehensive monitoring...

Spiceworks Linux: Complete Network Monitoring and Management Guide
Spiceworks is a powerful, free IT network monitoring and management platform that has revolutionized how system administrators handle their infrastructure....

whatsup Linux: Complete Network Monitoring and System Administration Guide
whatsup is a powerful network monitoring and system administration tool for Linux that provides real-time insights into network connectivity, system...


