
The sar (System Activity Reporter) command is one of the most powerful and comprehensive system monitoring tools available in Linux. Part of the sysstat package, sar collects, reports, and saves system activity information including CPU usage, memory consumption, disk I/O, network statistics, and much more. Whether you’re a system administrator troubleshooting performance issues or a developer optimizing applications, mastering sar is essential for effective system monitoring.
What is the sar Command?
The sar command stands for System Activity Reporter and serves as a versatile performance monitoring utility that can display real-time system statistics or read historical data from log files. It’s particularly valuable for:
- Identifying system bottlenecks
- Monitoring resource utilization trends
- Generating performance reports
- Troubleshooting system issues
- Capacity planning and optimization
Installing sar Command
The sar command is part of the sysstat package. If it’s not already installed on your system, you can install it using your distribution’s package manager:
Ubuntu/Debian:
sudo apt update
sudo apt install sysstat
CentOS/RHEL/Fedora:
sudo yum install sysstat
# or for newer versions
sudo dnf install sysstat
Arch Linux:
sudo pacman -S sysstatBasic sar Command Syntax
The basic syntax of the sar command is:
sar [options] [interval] [count]Where:
- options: Specify what type of data to collect
- interval: Time interval between samples (in seconds)
- count: Number of samples to collect
Essential sar Command Options
Here are the most commonly used sar options for different types of system monitoring:
| Option | Description |
|---|---|
| -u | CPU utilization statistics |
| -r | Memory utilization statistics |
| -b | I/O and transfer rate statistics |
| -d | Block device activity |
| -n | Network statistics |
| -q | Queue length and load averages |
| -w | Task creation and system switching |
| -S | Swap space utilization |
Monitoring CPU Usage with sar
CPU monitoring is one of the most common uses of sar. The -u option displays CPU utilization statistics.
Basic CPU Monitoring:
sar -u 2 5This command displays CPU usage every 2 seconds for 5 iterations. The output will look like:
Linux 5.15.0-56-generic (hostname)    08/25/2025    _x86_64_    (4 CPU)

06:13:45 AM     CPU     %user     %nice   %system   %iowait    %steal     %idle
06:13:47 AM     all      2.51      0.00      1.25      0.25      0.00     95.99
06:13:49 AM     all      3.02      0.00      1.51      0.00      0.00     95.47
06:13:51 AM     all      2.76      0.00      1.38      0.13      0.00     95.73
06:13:53 AM     all      2.89      0.00      1.26      0.00      0.00     95.85
06:13:55 AM     all      2.64      0.00      1.39      0.25      0.00     95.72
Average:        all      2.76      0.00      1.36      0.13      0.00     95.75
Understanding the CPU metrics:
- %user: Time spent in user mode
- %nice: Time spent in user mode with nice priority
- %system: Time spent in kernel mode
- %iowait: Time spent waiting for I/O operations
- %steal: Time stolen by virtualization
- %idle: Time CPU was idle
Per-CPU Core Monitoring:
sar -u -P ALL 1 3This displays statistics for all CPU cores individually.
Memory Usage Monitoring
Use the -r option to monitor memory utilization:
sar -r 3 4Sample output:
Linux 5.15.0-56-generic (hostname)    08/25/2025    _x86_64_    (4 CPU)

06:14:00 AM kbmemfree kbmemused  %memused kbbuffers  kbcached  kbcommit   %commit  kbactive   kbinact   kbdirty
06:14:03 AM   2048576   6291456     75.42    524288   1572864   4718592     56.78   3145728   1048576      2048
06:14:06 AM   2015232   6324224     75.81    524288   1572864   4751360     57.17   3178496   1048576      2048
06:14:09 AM   1982976   6356480     76.20    524288   1572864   4784128     57.56   3211264   1048576      2048
Average:      2015595   6324053     75.81    524288   1572864   4751360     57.17   3178496   1048576      2048
Key memory metrics explained:
- kbmemfree: Free memory in KB
- kbmemused: Used memory in KB
- %memused: Percentage of memory used
- kbbuffers: Buffer cache in KB
- kbcached: Page cache in KB
- kbcommit: Committed memory in KB
Disk I/O Monitoring
Monitor disk activity using the -d option:
sar -d 2 3Example output:
Linux 5.15.0-56-generic (hostname)    08/25/2025    _x86_64_    (4 CPU)

06:14:15 AM       DEV       tps  rd_sec/s  wr_sec/s  avgrq-sz  avgqu-sz     await     svctm     %util
06:14:17 AM    dev8-0      5.50     44.00    112.00     28.36      0.15     27.45      8.18      4.50
06:14:19 AM    dev8-0      7.00     56.00    168.00     32.00      0.18     25.71      7.14      5.00
06:14:21 AM    dev8-0      6.50     48.00    156.00     31.38      0.17     26.15      7.69      5.00
Average:       dev8-0      6.33     49.33    145.33     30.58      0.17     26.44      7.67      4.83
Disk I/O metrics breakdown:
- tps: Transactions per second
- rd_sec/s: Sectors read per second
- wr_sec/s: Sectors written per second
- avgrq-sz: Average request size in sectors
- avgqu-sz: Average queue size
- await: Average wait time in milliseconds
- svctm: Average service time in milliseconds
- %util: Percentage of CPU time for I/O requests
Network Statistics Monitoring
Monitor network activity using the -n option with various keywords:
Network Device Statistics:
sar -n DEV 2 3Network Error Statistics:
sar -n EDEV 2 3TCP Statistics:
sar -n TCP 2 3Sample network device output:
Linux 5.15.0-56-generic (hostname)    08/25/2025    _x86_64_    (4 CPU)

06:14:30 AM     IFACE   rxpck/s   txpck/s    rxkB/s    txkB/s   rxcmp/s   txcmp/s  rxmcst/s   %ifutil
06:14:32 AM        lo      2.50      2.50      0.18      0.18      0.00      0.00      0.00      0.00
06:14:32 AM      eth0     45.50     32.00     52.34     28.45      0.00      0.00      0.50      0.12
Average:           lo      2.50      2.50      0.18      0.18      0.00      0.00      0.00      0.00
Average:         eth0     45.50     32.00     52.34     28.45      0.00      0.00      0.50      0.12
System Load and Queue Monitoring
Use the -q option to monitor system load averages and queue lengths:
sar -q 1 5Output example:
Linux 5.15.0-56-generic (hostname)    08/25/2025    _x86_64_    (4 CPU)

06:14:45 AM   runq-sz  plist-sz   ldavg-1   ldavg-5  ldavg-15   blocked
06:14:46 AM         2       185      0.45      0.52      0.48         0
06:14:47 AM         1       185      0.45      0.52      0.48         0
06:14:48 AM         1       185      0.43      0.51      0.48         0
06:14:49 AM         2       185      0.43      0.51      0.48         0
Average:            2       185      0.44      0.52      0.48         0
Working with Historical Data
One of sar’s powerful features is its ability to work with historical data stored in log files.
Reading Historical Data:
sar -u -f /var/log/sysstat/sa25This reads CPU usage data from the system activity file for the 25th day of the month.
Displaying Data for Specific Time Ranges:
sar -u -s 09:00:00 -e 17:00:00 -f /var/log/sysstat/sa25This shows CPU usage between 9 AM and 5 PM from the specified log file.
Saving Current Data to File:
sar -u 60 10 -o /tmp/system_activity.sarThis saves 10 samples (taken every 60 seconds) to a binary file for later analysis.
Advanced sar Usage Examples
Comprehensive System Monitoring:
sar -A 5 12This displays all available statistics every 5 seconds for 12 iterations, providing a comprehensive system overview.
Swap Usage Monitoring:
sar -S 2 5Output shows swap space utilization:
Linux 5.15.0-56-generic (hostname)    08/25/2025    _x86_64_    (4 CPU)

06:15:00 AM kbswpfree kbswpused  %swpused  kbswpcad   %swpcad
06:15:02 AM   2097152         0      0.00         0      0.00
06:15:04 AM   2097152         0      0.00         0      0.00
Average:      2097152         0      0.00         0      0.00
Task Creation and Context Switching:
sar -w 1 5This shows process creation and context switching activity:
Linux 5.15.0-56-generic (hostname)    08/25/2025    _x86_64_    (4 CPU)

06:15:10 AM    proc/s   cswch/s
06:15:11 AM      2.00    856.00
06:15:12 AM      1.00    823.00
06:15:13 AM      3.00    891.00
Average:         2.00    856.67
Practical Use Cases and Scenarios
1. Performance Troubleshooting Script:
#!/bin/bash
# Comprehensive system monitoring for troubleshooting
echo "Starting comprehensive system analysis..."
sar -u 2 10 > /tmp/cpu_analysis.txt
sar -r 2 10 > /tmp/memory_analysis.txt
sar -d 2 10 > /tmp/disk_analysis.txt
sar -n DEV 2 10 > /tmp/network_analysis.txt
echo "Analysis complete. Check /tmp/*_analysis.txt files"
2. Real-time Dashboard Monitoring:
watch -n 2 'sar -u 1 1 | tail -3; echo ""; sar -r 1 1 | tail -3'This creates a simple real-time dashboard showing CPU and memory usage updated every 2 seconds.
3. Automated Performance Alerts:
#!/bin/bash
# Check if CPU usage exceeds 80%
CPU_USAGE=$(sar -u 1 1 | tail -1 | awk '{print 100-$NF}')
if (( $(echo "$CPU_USAGE > 80" | bc -l) )); then
    echo "ALERT: CPU usage is ${CPU_USAGE}%"
fi
Best Practices and Tips
1. Choosing Appropriate Intervals
Select monitoring intervals based on your needs:
- Real-time troubleshooting: 1-5 seconds
- Regular monitoring: 10-60 seconds
- Historical analysis: 5-10 minutes
2. Combining Multiple Options
You can combine multiple sar options for comprehensive monitoring:
sar -u -r -d 5 20This monitors CPU, memory, and disk activity simultaneously.
3. Setting Up Automated Data Collection
Enable automatic data collection by ensuring the sysstat service is running:
sudo systemctl enable sysstat
sudo systemctl start sysstat
Configure collection intervals in /etc/cron.d/sysstat.
4. Interpreting High Resource Usage
- High %iowait: Indicates disk I/O bottlenecks
- High %system: Suggests kernel-level processing issues
- Low %idle consistently: CPU may be overloaded
- High memory usage: Check for memory leaks or insufficient RAM
Common sar Command Troubleshooting
Data Collection Issues
If sar reports “Cannot open data file,” ensure:
- The sysstat service is running
- Data collection is enabled in
/etc/default/sysstat - Sufficient disk space exists in
/var/log/sysstat/
Permission Problems
Run sar commands with appropriate permissions. Some system files may require sudo access for complete data collection.
Integration with Other Monitoring Tools
The sar command works excellently alongside other Linux monitoring tools:
- htop/top: For real-time process monitoring
- iostat: For detailed I/O statistics (also part of sysstat)
- vmstat: For virtual memory statistics
- netstat: For network connection details
You can create comprehensive monitoring scripts that combine sar with these tools for complete system visibility.
Conclusion
The sar command is an indispensable tool for Linux system administrators and developers who need comprehensive system performance monitoring capabilities. Its ability to collect real-time data, store historical information, and provide detailed insights into CPU, memory, disk, and network performance makes it essential for maintaining optimal system health.
Whether you’re troubleshooting performance issues, planning capacity upgrades, or monitoring system trends over time, mastering sar will significantly enhance your system administration capabilities. Start with basic CPU and memory monitoring, then gradually explore advanced features like network statistics and historical data analysis to become proficient in comprehensive Linux system monitoring.
Remember to regularly review sar data, set up automated monitoring where appropriate, and combine sar with other system tools to create a robust monitoring strategy that keeps your Linux systems running smoothly and efficiently.
Related Posts
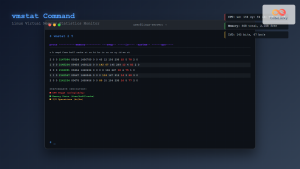
vmstat Command Linux: Monitor Virtual Memory and System Performance Statistics
The vmstat command is one of the most powerful and essential tools for Linux system administrators and developers to monitor...
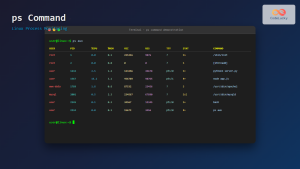
ps Command in Linux: Complete Guide to Process Monitoring and Management
The ps command is one of the most fundamental and powerful tools in Linux for displaying information about running processes....

top Command Linux: Complete Guide to Real-Time Process Monitoring
The top command is one of the most essential tools in a Linux system administrator's arsenal. It provides real-time information...
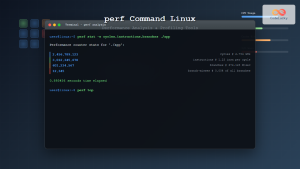
perf Command Linux: Complete Performance Analysis and Profiling Guide
The perf command is one of the most powerful performance analysis tools available in Linux, offering comprehensive insights into system...
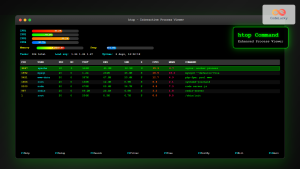
htop Command Linux: Complete Guide to Advanced Process Monitoring and Management
The htop command is an enhanced, interactive version of the traditional top command that provides real-time monitoring of system processes...
iostat Command Linux: Complete Guide to Monitor Input Output Statistics and System Performance
The iostat command is an essential Linux system monitoring tool that provides detailed input/output statistics for devices and partitions. As...
uptime Command Linux: Complete Guide to System Uptime and Load Average Monitoring
The uptime command is one of the most fundamental system monitoring tools in Linux, providing essential information about how long...
iotop Command Linux: Complete Guide to Monitor Disk IO Usage and Performance
The iotop command is an essential Linux utility that provides real-time monitoring of disk I/O usage by processes and threads....
Zenoss Linux: Complete Guide to IT Infrastructure Monitoring and Management
What is Zenoss and Why Use it on Linux? Zenoss is a powerful, open-source IT infrastructure monitoring platform that provides...
Groundwork Linux: Complete Guide to IT Infrastructure Monitoring and System Health Management
What is Groundwork Linux? Groundwork Linux is a comprehensive open-source IT infrastructure monitoring platform built specifically for Linux environments. It...
metricbeat Linux: Complete Guide to System and Service Metrics Monitoring
Metricbeat is a lightweight shipper that helps you monitor your systems and services by collecting metrics from the operating system...
Hyperic Linux: Complete Guide to Application Performance Monitoring and System Optimization
Hyperic is a powerful open-source application performance monitoring (APM) platform that provides comprehensive insights into your Linux systems and applications....


