
RealVNC is a powerful remote desktop software that enables users to control Linux systems remotely over a network connection. As one of the most reliable VNC (Virtual Network Computing) solutions available, RealVNC provides secure, cross-platform remote access capabilities essential for system administrators, developers, and remote workers.
What is RealVNC?
RealVNC is a remote access software suite that allows you to view and control a computer desktop from anywhere in the world. Originally developed by the team that created the VNC protocol, RealVNC offers both free and commercial versions with enhanced features for professional use.
Key Features of RealVNC
- Cross-platform compatibility – Works on Linux, Windows, macOS, and mobile devices
- High-performance streaming – Optimized for various network conditions
- Enterprise-grade security – End-to-end encryption and authentication
- File transfer capabilities – Seamless file sharing between systems
- Session recording – Track and audit remote sessions
- Chat functionality – Communicate during remote sessions
Installing RealVNC on Linux
Installation on Ubuntu/Debian
First, download the RealVNC Server package from the official website and install it:
# Download the latest RealVNC Server package
wget https://www.realvnc.com/download/file/vnc.files/VNC-Server-6.11.0-Linux-x64.deb

# Install the package
sudo dpkg -i VNC-Server-6.11.0-Linux-x64.deb

# Install any missing dependencies
sudo apt-get install -f
Installation on CentOS/RHEL/Fedora
# Download the RPM package
wget https://www.realvnc.com/download/file/vnc.files/VNC-Server-6.11.0-Linux-x64.rpm

# Install using yum/dnf
sudo yum install VNC-Server-6.11.0-Linux-x64.rpm
# OR for newer systems
sudo dnf install VNC-Server-6.11.0-Linux-x64.rpm
Generic Linux Installation
For other Linux distributions, use the generic installer:
# Download the generic installer
wget https://www.realvnc.com/download/file/vnc.files/VNC-Server-6.11.0-Linux-x64

# Make it executable
chmod +x VNC-Server-6.11.0-Linux-x64

# Run the installer
sudo ./VNC-Server-6.11.0-Linux-x64
Configuring RealVNC Server
Basic Server Setup
After installation, configure the VNC Server with these essential steps:
# Enable VNC Service Mode (runs at boot)
sudo systemctl enable vncserver-x11-serviced.service

# Start the service
sudo systemctl start vncserver-x11-serviced.service

# Check service status
sudo systemctl status vncserver-x11-serviced.service
Expected Output:
● vncserver-x11-serviced.service - VNC Server in Service Mode daemon
   Loaded: loaded (/usr/lib/systemd/system/vncserver-x11-serviced.service; enabled; vendor preset: disabled)
   Active: active (running) since Tue 2025-08-26 04:13:25 IST; 2min 15s ago
 Main PID: 1234 (vncserver-x11-s)
   CGroup: /system.slice/vncserver-x11-serviced.service
           └─1234 /usr/bin/vncserver-x11-serviced -fg
Setting VNC Password
Configure authentication for secure access:
# Set VNC password for the current user
vncpasswd

# Set system-wide VNC authentication
sudo vncpasswd -service
When prompted, enter a password (6-8 characters recommended) and optionally set a view-only password.
Advanced Configuration
Edit the VNC Server configuration file for custom settings:
# Edit system configuration
sudo nano /root/.vnc/config.d/vncserver-x11

# OR edit user-specific configuration
nano ~/.vnc/config.d/vncserver-x11
Common configuration options:
# Basic configuration example
Authentication=VncAuth
Encryption=PreferOn
IdleTimeout=3600
Log=*:file:0
RequireEncryption=1
SecurityTypes=VncAuth
Connecting to RealVNC Server
Using VNC Viewer (GUI Client)
Install and use the RealVNC Viewer:
# Install VNC Viewer on client machine
sudo apt install realvnc-vnc-viewer  # Ubuntu/Debian
sudo yum install realvnc-vnc-viewer   # CentOS/RHEL

# Launch VNC Viewer
vncviewer
In the VNC Viewer interface:
- Enter the server address:
192.168.1.100:5900 - Click “Connect”
- Enter the VNC password when prompted
- Access the remote desktop
Command Line Connection
Connect directly from the terminal:
# Connect to VNC server
vncviewer 192.168.1.100:5900

# Connect with specific options
vncviewer -fullscreen -viewonly 192.168.1.100:5900

# Connect through SSH tunnel (secure)
vncviewer -via [email protected] localhost:5900
Security Configuration
Enabling Encryption
Configure end-to-end encryption for secure connections:
# Enable encryption in service mode
sudo vncserver-x11-serviced -encryption PreferOn

# Or add to configuration file
echo "Encryption=AlwaysOn" | sudo tee -a /root/.vnc/config.d/vncserver-x11
Firewall Configuration
Open necessary ports for VNC connections:
# UFW (Ubuntu/Debian)
sudo ufw allow 5900/tcp
sudo ufw allow 5800/tcp  # For web interface

# Firewalld (CentOS/RHEL/Fedora)
sudo firewall-cmd --permanent --add-port=5900/tcp
sudo firewall-cmd --permanent --add-port=5800/tcp
sudo firewall-cmd --reload

# iptables (generic)
sudo iptables -A INPUT -p tcp --dport 5900 -j ACCEPT
sudo iptables -A INPUT -p tcp --dport 5800 -j ACCEPT
SSH Tunneling for Enhanced Security
Create secure tunnels for VNC connections:
# Create SSH tunnel from client
ssh -L 5900:localhost:5900 username@remote-server

# Then connect to localhost
vncviewer localhost:5900
Managing VNC Sessions
User Mode vs Service Mode
User Mode – Runs when user logs in:
# Start user mode VNC
vncserver-x11-standalone

# Stop user mode VNC
vncserver-x11-standalone -kill :1
Service Mode – Runs as system service:
# Manage service mode
sudo systemctl start vncserver-x11-serviced
sudo systemctl stop vncserver-x11-serviced
sudo systemctl restart vncserver-x11-serviced
Multiple Display Sessions
Configure multiple VNC displays:
# Start additional displays
vncserver-x11-standalone -display :2
vncserver-x11-standalone -display :3

# List active sessions
vncserver-x11-standalone -list
Expected Output:
TigerVNC server sessions:

X DISPLAY #    PROCESS ID
:1             1234
:2             1235
:3             1236
File Transfer and Clipboard
Enabling File Transfer
Configure file transfer capabilities:
# Enable file transfer in configuration
echo "EnableFileTransfers=1" | sudo tee -a /root/.vnc/config.d/vncserver-x11

# Restart service to apply changes
sudo systemctl restart vncserver-x11-serviced
Using File Transfer
Transfer files during VNC session:
- Right-click in VNC Viewer window
- Select “File Transfer”
- Navigate and transfer files between systems
- Use drag-and-drop functionality
Performance Optimization
Display Quality Settings
Optimize for network conditions:
# Configure quality settings
vncconfig -set ColorLevel=rgb222  # Lower color depth
vncconfig -set PreferredEncoding=ZRLE  # Efficient encoding
vncconfig -set CompressLevel=9  # Maximum compression
Network Bandwidth Optimization
# Low bandwidth configuration
echo "PreferredEncoding=Tight" | tee -a ~/.vnc/config.d/vncserver-x11
echo "CompressLevel=9" | tee -a ~/.vnc/config.d/vncserver-x11
echo "QualityLevel=6" | tee -a ~/.vnc/config.d/vncserver-x11
Troubleshooting Common Issues
Connection Refused Errors
Diagnose connection problems:
# Check if VNC server is running
sudo systemctl status vncserver-x11-serviced

# Verify listening ports
sudo netstat -tlnp | grep :590

# Check firewall rules
sudo ufw status  # Ubuntu/Debian
sudo firewall-cmd --list-all  # CentOS/RHEL
Display Issues
Resolve common display problems:
# Check X11 display
echo $DISPLAY

# Verify X11 forwarding
xhost +localhost

# Reset VNC desktop
vncserver-x11-standalone -kill :1
vncserver-x11-standalone -geometry 1920x1080 -depth 24
Authentication Problems
Fix authentication issues:
# Reset VNC password
vncpasswd

# Check VNC authentication files
ls -la ~/.vnc/
sudo ls -la /root/.vnc/

# Verify permissions
chmod 600 ~/.vnc/passwd
sudo chmod 600 /root/.vnc/passwd
Advanced Features
Session Recording
Enable session recording for audit purposes:
# Configure session recording
echo "EnableSessionRecording=1" | sudo tee -a /root/.vnc/config.d/vncserver-x11
echo "SessionRecordingPath=/var/log/vnc/" | sudo tee -a /root/.vnc/config.d/vncserver-x11

# Create recording directory
sudo mkdir -p /var/log/vnc/
sudo chmod 755 /var/log/vnc/
Custom Desktop Environments
Configure specific desktop environments:
# Create xstartup script
nano ~/.vnc/xstartup

# Example xstartup content
#!/bin/bash
unset SESSION_MANAGER
exec /etc/X11/xinit/xinitrc
gnome-session &
# OR for KDE
# startkde &
# OR for XFCE
# startxfce4 &
Web Browser Access
Enable web browser VNC access:
# Enable HTTP server
echo "HTTPPort=5800" | sudo tee -a /root/.vnc/config.d/vncserver-x11
echo "EnableHTTPServer=1" | sudo tee -a /root/.vnc/config.d/vncserver-x11

# Restart service
sudo systemctl restart vncserver-x11-serviced
Access via web browser: http://your-server-ip:5800
Monitoring and Logging
VNC Server Logs
Monitor VNC server activity:
# View system logs
sudo journalctl -u vncserver-x11-serviced -f

# Check VNC-specific logs
sudo tail -f /var/log/vncserver-x11-serviced.log

# User session logs
tail -f ~/.vnc/*.log
Connection Statistics
Monitor active connections:
# List active VNC connections
sudo netstat -an | grep :590

# Check connection details
vncserver-x11-standalone -list
Best Practices and Security
Security Recommendations
- Use strong passwords – Minimum 8 characters with mixed case
- Enable encryption – Always use encrypted connections
- Restrict network access – Use firewalls and IP restrictions
- Regular updates – Keep RealVNC software updated
- Monitor sessions – Enable logging and session recording
Network Security
# Restrict access to specific IPs
sudo iptables -A INPUT -p tcp --dport 5900 -s 192.168.1.0/24 -j ACCEPT
sudo iptables -A INPUT -p tcp --dport 5900 -j DROP

# Use fail2ban for brute force protection
sudo apt install fail2ban
sudo systemctl enable fail2ban
Conclusion
RealVNC provides a robust solution for remote desktop access on Linux systems. By following this comprehensive guide, you can successfully install, configure, and secure RealVNC for reliable remote access. Remember to implement proper security measures, optimize performance based on your network conditions, and regularly monitor your VNC connections for the best experience.
Whether you’re managing servers remotely, providing technical support, or accessing your desktop from different locations, RealVNC offers the features and reliability needed for professional remote desktop solutions on Linux platforms.
Related Posts
tightvncserver Linux: Complete Guide to TightVNC Server Setup and Configuration
TightVNC Server is a powerful remote desktop solution that allows you to access and control Linux systems remotely over a...
vncserver Command Linux: Complete Guide to VNC Server Setup and Management
The vncserver command is a powerful tool in Linux that enables remote desktop access by starting a Virtual Network Computing...
x11vnc Command Linux: Complete Guide to Remote Desktop Access via VNC Server
The x11vnc command is a powerful Linux utility that allows you to share your existing X11 desktop session via VNC...
TeamViewer Linux: Complete Guide to Remote Desktop Access and Support
TeamViewer is one of the most popular remote desktop solutions available today, offering cross-platform compatibility and robust features for remote...
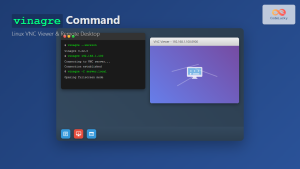
vinagre Command Linux: Complete Guide to VNC Viewer and Remote Desktop Access
The vinagre command is a powerful VNC (Virtual Network Computing) viewer for Linux systems that enables users to connect to...

xrdp Command Linux: Complete Guide to Remote Desktop Server Setup
The xrdp command is a powerful Linux utility that implements Microsoft's Remote Desktop Protocol (RDP) server functionality on Unix-like systems....
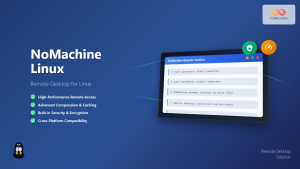
NoMachine Linux: Complete Guide to Remote Desktop Access and Configuration
NoMachine is a powerful remote desktop solution that enables secure access to Linux systems from anywhere in the world. Unlike...

xfreerdp Command Linux: Complete Guide to FreeRDP Remote Desktop Client
The xfreerdp command is a powerful Linux utility that serves as the primary client for the FreeRDP project, enabling users...
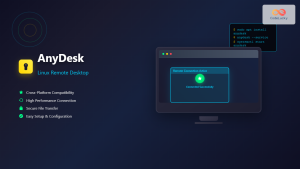
AnyDesk Linux: Complete Remote Desktop Solution Guide for Linux Users
AnyDesk is a powerful cross-platform remote desktop application that enables users to access computers remotely over the internet. For Linux...
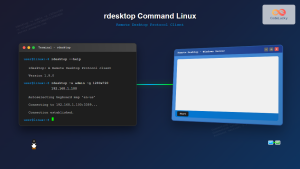
rdesktop Command Linux: Complete Guide to Remote Desktop Protocol Client
The rdesktop command is a powerful Remote Desktop Protocol (RDP) client for Linux systems that enables seamless connections to Windows...
Wireshark Command Linux: Complete Network Protocol Analyzer Guide
Wireshark is the world's most popular network protocol analyzer, providing deep visibility into network traffic and communication protocols. While most...
ssh Command Linux: Secure Shell Remote Access Tutorial with Examples
The ssh command in Linux, short for Secure Shell, is one of the most essential tools for system administrators, developers,...


