
The quotaon command is a powerful Linux utility that enables disk quota enforcement on file systems. It allows system administrators to control and monitor disk space usage by users and groups, preventing any single user from consuming excessive storage resources that could impact system performance or availability.
What is the quotaon Command?
The quotaon command activates disk quota checking and enforcement on specified file systems. When quotas are enabled, the kernel tracks disk usage for each user and group, enforcing the limits defined in quota files. This is essential for multi-user environments where resource management is critical.
Basic Syntax and Options
The basic syntax of the quotaon command is:
quotaon [options] filesystem
quotaon [options] -a
Common Options
| Option | Description |
|---|---|
-a |
Turn on quotas for all file systems in /etc/fstab |
-u |
Turn on user quotas (default) |
-g |
Turn on group quotas |
-p |
Print state of quotas |
-f |
Force quota enabling |
-v |
Verbose output |
Prerequisites for Using quotaon
Before using the quotaon command, several prerequisites must be met:
1. Quota Support in Kernel
Verify quota support is compiled into your kernel:
cat /proc/filesystems | grep quota2. Quota Tools Installation
Install quota tools on your system:
# Ubuntu/Debian
sudo apt-get install quota

# CentOS/RHEL/Fedora
sudo yum install quota
# or for newer versions
sudo dnf install quota
3. File System Configuration
The file system must be mounted with quota options. Edit /etc/fstab:
# Example fstab entry
/dev/sda2 /home ext4 defaults,usrquota,grpquota 0 2
Setting Up Disk Quotas
Step 1: Remount File System
After modifying fstab, remount the file system:
sudo mount -o remount /homeStep 2: Create Quota Files
Generate quota files for the file system:
sudo quotacheck -cum /homeThis creates:
aquota.user– User quota fileaquota.group– Group quota file
Step 3: Enable Quotas
Now activate quotas using quotaon:
sudo quotaon /homePractical Examples
Example 1: Enable User Quotas on Specific File System
sudo quotaon -u /homeOutput:
quotaon: /home: quotas turned onExample 2: Enable Group Quotas
sudo quotaon -g /homeOutput:
quotaon: /home: group quotas turned onExample 3: Enable All Quotas System-wide
sudo quotaon -aOutput:
/dev/sda2 [/home]: group quotas turned on
/dev/sda2 [/home]: user quotas turned on
Example 4: Verbose Output
sudo quotaon -v /homeOutput:
/dev/sda2 [/home]: user quotas turned on
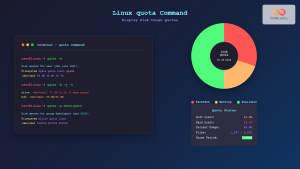
/dev/sda2 [/home]: group quotas turned onExample 5: Check Quota Status
sudo quotaon -p /homeOutput:
user quota on /home (/dev/sda2) is on
group quota on /home (/dev/sda2) is on
Setting User and Group Limits
After enabling quotas, set limits using the edquota command:
Setting User Limits
sudo edquota -u usernameThis opens an editor where you can set:
- Soft limit – Warning threshold
- Hard limit – Maximum allowed usage
- Grace period – Time before soft limit becomes hard limit
Setting Group Limits
sudo edquota -g groupnameMonitoring Quota Usage
Check User Quota Usage
quota -u usernameSample Output:
Disk quotas for user john (uid 1001):
Filesystem  blocks   quota   limit   grace   files   quota   limit   grace
/dev/sda2      156    5000   10000              28     100     200
System-wide Quota Report
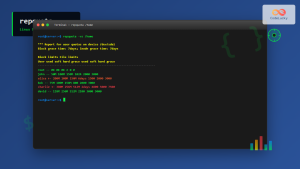
sudo repquota /homeSample Output:
*** Report for user quotas on device /dev/sda2
Block grace time: 7days; Inode grace time: 7days
                        Block limits                File limits
User            used    soft    hard  grace    used  soft  hard  grace
----------------------------------------------------------------------
root      --       0       0       0              3     0     0
john      --     156    5000   10000             28   100   200
mary      --     892    3000    5000             45    80   120
Advanced quotaon Usage
Force Enable Quotas
Sometimes you may need to force quota enabling:
sudo quotaon -f /homeEnable Quotas for Multiple File Systems
sudo quotaon /home /var /tmpTroubleshooting Common Issues
Issue 1: “quotaon: cannot find //aquota.user”
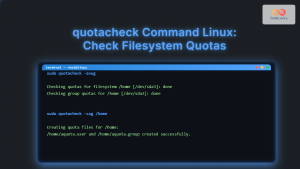
Solution: Run quotacheck to create quota files:
sudo quotacheck -cug /homeIssue 2: “quotaon: using //quota.user on //dev/sda2: No such file or directory”
Solution: Ensure the file system is mounted with quota options and quota files exist.
Issue 3: Permission Denied
Solution: Ensure you have root privileges:
sudo quotaon /homeBest Practices
1. Regular Monitoring
Set up automated scripts to monitor quota usage:
#!/bin/bash
# Check quota usage daily
repquota -a | mail -s "Daily Quota Report" [email protected]
2. Grace Period Configuration
Set appropriate grace periods:
sudo edquota -t3. Backup Quota Files
Regularly backup quota databases:
sudo cp /home/aquota.user /backup/Integration with System Services
Automatic Quota Enabling at Boot
Create a systemd service to enable quotas at startup:
# /etc/systemd/system/quota.service
[Unit]
Description=Enable disk quotas
After=local-fs.target

[Service]
Type=oneshot
ExecStart=/usr/sbin/quotaon -a
RemainAfterExit=yes

[Install]
WantedBy=multi-user.target
Enable the service:
sudo systemctl enable quota.serviceSecurity Considerations
- File Permissions: Quota files should be readable only by root
- Regular Audits: Monitor quota violations and adjust limits accordingly
- Backup Strategy: Include quota files in system backups
Related Commands
quotaoff– Disable disk quotasquotacheck– Check and repair quota filesedquota– Edit user/group quotasrepquota– Display quota usage reportquota– Display user quota information
Conclusion
The quotaon command is an essential tool for Linux system administrators managing multi-user environments. By properly implementing disk quotas, you can prevent resource abuse, ensure fair usage, and maintain system stability. Regular monitoring and appropriate limit setting are key to effective quota management.
Remember to always test quota implementations in a non-production environment first, and maintain regular backups of your quota configuration files. With proper setup and monitoring, disk quotas become a powerful tool for system resource management.
Related Posts
quota Command Linux: Complete Guide to Display and Manage Disk Usage Quotas
The quota command is an essential Linux system administration tool that displays disk usage and quota information for users and...
quotaoff Command Linux: Complete Guide to Disable Disk Quotas Safely
The quotaoff command is a crucial Linux system administration tool used to disable disk quotas on file systems. When you...
quotacheck Command Linux: Check Filesystem Quotas Explained with Examples
In Linux system administration, maintaining and monitoring disk usage is critical. Without proper checks, uncontrolled disk consumption can lead to...
repquota Command Linux: Complete Guide to Disk Quota Reporting and Management
The repquota command is an essential Linux system administration tool used to report disk quota usage for users and groups...
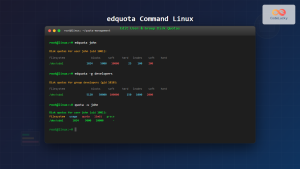
edquota Command Linux: Complete Guide to Manage User Disk Quotas
The edquota command is a powerful Linux system administration tool that allows you to edit user and group disk quotas...

ulimit Command Linux: Complete Guide to Setting User Resource Limits
The ulimit command is a powerful built-in shell utility in Linux that allows users and system administrators to control the...
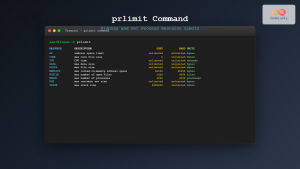
prlimit Command Linux: Complete Guide to Display and Set Process Resource Limits
The prlimit command is a powerful Linux utility that allows system administrators and users to view and modify resource limits...
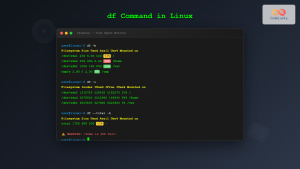
df Command in Linux: Complete Guide to Check Disk Space Usage
The df command is one of the most essential tools in a Linux system administrator's toolkit. Standing for "disk free,"...

du Command Linux: Display Directory Size and Disk Usage Explained with Examples
The du (disk usage) command in Linux is a powerful tool that allows users to measure directory size, analyze disk...
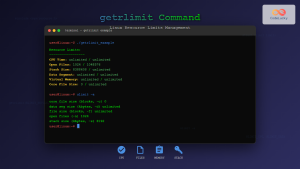
getrlimit Command Linux: Complete Guide to System Resource Limits Management
The getrlimit system call in Linux is a fundamental tool for retrieving information about resource limits imposed on processes. Understanding...

stat Command Linux: Complete Guide to Display File and Filesystem Status Information
The stat command is a powerful Linux utility that displays detailed information about files and filesystems. Unlike basic commands like...

File System Types: FAT32, NTFS, ext4 and Modern Linux Filesystems Explained
Understanding File Systems: The Foundation of Data Storage A file system is the method and data structure that an operating...


