
The pvdisplay command is an essential tool in Linux for displaying detailed information about Physical Volumes (PVs) in Logical Volume Manager (LVM) configurations. This comprehensive guide will walk you through everything you need to know about using pvdisplay effectively for storage management and system administration.
What is pvdisplay Command?
The pvdisplay command displays attributes of one or more physical volumes in an LVM setup. Physical volumes are the underlying storage devices (like hard drives or partitions) that LVM uses to create volume groups and logical volumes. This command provides crucial information about disk usage, allocation, and configuration details.
Basic Syntax
pvdisplay [options] [physical_volume_path]When executed without any arguments, pvdisplay shows information for all physical volumes on the system.
Common Options and Parameters
Essential Options
| Option | Description |
|---|---|
-c, --colon |
Display output in colon-separated format |
-s, --short |
Show brief output format |
-m, --maps |
Display mapping of physical extents |
-v, --verbose |
Show verbose output |
-C, --columns |
Display output in columns format |
Basic Usage Examples
Display All Physical Volumes
sudo pvdisplaySample Output:
  --- Physical volume ---
  PV Name               /dev/sda2
  VG Name               ubuntu-vg
  PV Size               <19.00 GiB / not usable 0
  Allocatable           yes
  PE Size               4.00 MiB
  Total PE              4863
  Free PE               1279
  Allocated PE          3584
  PV UUID               abc123-def4-5678-90ab-cdef12345678

  --- Physical volume ---
  PV Name               /dev/sdb1
  VG Name               data-vg
  PV Size               <50.00 GiB / not usable 0
  Allocatable           yes
  PE Size               4.00 MiB
  Total PE              12799
  Free PE               8000
  Allocated PE          4799
  PV UUID               xyz987-uvw6-5432-10zy-xwvu98765432
Display Specific Physical Volume
sudo pvdisplay /dev/sda2Sample Output:
  --- Physical volume ---
  PV Name               /dev/sda2
  VG Name               ubuntu-vg
  PV Size               <19.00 GiB / not usable 0
  Allocatable           yes (but full)
  PE Size               4.00 MiB
  Total PE              4863
  Free PE               0
  Allocated PE          4863
  PV UUID               abc123-def4-5678-90ab-cdef12345678
Advanced Usage Examples
Short Format Display
sudo pvdisplay -sSample Output:
  "/dev/sda2" is a new physical volume of "<19.00 GiB"
  "/dev/sdb1" is a new physical volume of "<50.00 GiB"
Colon-Separated Format
sudo pvdisplay -cSample Output:
  /dev/sda2:ubuntu-vg:19922944:-1:8:8:-1:4096:4863:3584:1279:abc123-def4-5678-90ab-cdef12345678
  /dev/sdb1:data-vg:52428800:-1:8:8:-1:4096:12799:4799:8000:xyz987-uvw6-5432-10zy-xwvu98765432
Display Physical Extent Maps
sudo pvdisplay -m /dev/sda2Sample Output:
  --- Physical volume ---
  PV Name               /dev/sda2
  VG Name               ubuntu-vg
  PV Size               <19.00 GiB / not usable 0
  Allocatable           yes (but full)
  PE Size               4.00 MiB
  Total PE              4863
  Free PE               0
  Allocated PE          4863
  PV UUID               abc123-def4-5678-90ab-cdef12345678

  --- Physical Segments ---
  Physical extent 0 to 2047:
    Logical volume      /dev/ubuntu-vg/ubuntu-lv
    Logical extent      0 to 2047
  Physical extent 2048 to 4862:
    Logical volume      /dev/ubuntu-vg/swap_1
    Logical extent      0 to 2814
Column Format Display
Basic Column Output
sudo pvdisplay -CSample Output:
  PV         VG        Fmt  Attr PSize  PFree
  /dev/sda2  ubuntu-vg lvm2 a--  <19.00g    0
  /dev/sdb1  data-vg   lvm2 a--  <50.00g <31.25g
Custom Column Selection
sudo pvdisplay -C -o pv_name,vg_name,pv_size,pv_free,pv_usedSample Output:
  PV         VG        PSize  PFree  PUsed
  /dev/sda2  ubuntu-vg <19.00g    0  <19.00g
  /dev/sdb1  data-vg   <50.00g <31.25g <18.75g
Understanding Output Fields
Key Information Fields
- PV Name: The device path of the physical volume
- VG Name: Volume group the PV belongs to
- PV Size: Total size of the physical volume
- Allocatable: Whether the PV can be used for allocation
- PE Size: Physical extent size (default 4MB)
- Total PE: Total number of physical extents
- Free PE: Number of unallocated physical extents
- Allocated PE: Number of allocated physical extents
- PV UUID: Unique identifier for the physical volume
Practical Use Cases
Monitoring Disk Usage
# Check available space on all PVs
sudo pvdisplay -C -o pv_name,pv_size,pv_free,pv_used --units g
Identifying Full Physical Volumes
# Find PVs with no free space
sudo pvdisplay -C | awk '$6 == 0 {print $1}'
Generating Reports
# Create a detailed report of all PVs
sudo pvdisplay -v > /tmp/pv_report.txt
Troubleshooting Common Issues
Permission Denied
Always run pvdisplay with sudo privileges:
sudo pvdisplayNo Physical Volumes Found
If no output appears, check if LVM is properly configured:
# Check if LVM tools are installed
which lvm

# Scan for physical volumes
sudo pvscan
Incomplete Information
Use verbose mode for detailed troubleshooting:
sudo pvdisplay -vvIntegration with Other LVM Commands
Combined Workflow
# Complete LVM status check
sudo pvdisplay -s        # Quick PV overview
sudo vgdisplay -s        # Volume group summary
sudo lvdisplay -C        # Logical volume details
Scripting Integration
#!/bin/bash
# Simple PV monitoring script

echo "Physical Volume Status Report"
echo "============================="
sudo pvdisplay -C --units g
echo ""
echo "PVs with less than 10% free space:"
sudo pvdisplay -C --units g | awk 'NR>1 && $6/$5*100 < 10 {print $1, $6, $5}'
Best Practices
- Regular Monitoring: Use
pvdisplayin monitoring scripts to track disk usage - Document Configuration: Save PV layouts using
pvdisplay > backup.txt - Use Appropriate Format: Choose column format for scripting, detailed format for manual inspection
- Combine with Other Tools: Use alongside
df,lsblk, and other storage commands - Automate Reports: Create scheduled reports for capacity planning
Security Considerations
The pvdisplay command requires root privileges to access low-level disk information. Always:
- Use sudo instead of switching to root user
- Limit access to storage management commands
- Log administrative activities for audit trails
- Be cautious when sharing output as it may contain sensitive system information
Conclusion
The pvdisplay command is an invaluable tool for Linux system administrators managing LVM configurations. Whether you’re monitoring disk usage, troubleshooting storage issues, or planning capacity expansion, mastering this command will significantly enhance your storage management capabilities. Regular use of pvdisplay helps maintain healthy storage systems and prevents unexpected disk space shortages.
Remember to combine pvdisplay with other LVM commands like vgdisplay and lvdisplay for comprehensive storage management. Practice using different output formats and options to find the most efficient workflow for your specific administrative needs.
Related Posts
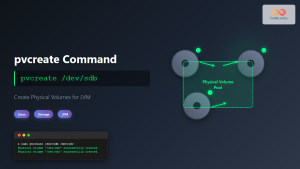
pvcreate Command Linux: Complete Guide to Creating Physical Volumes for LVM
The pvcreate command is a fundamental tool in Linux Logical Volume Management (LVM) that initializes storage devices as physical volumes....
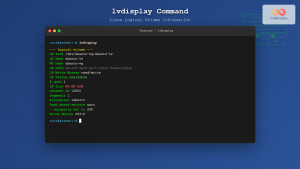
lvdisplay Command Linux: Complete Guide to Display Logical Volume Information
The lvdisplay command is an essential tool in Linux for displaying detailed information about logical volumes (LVs) in Logical Volume...
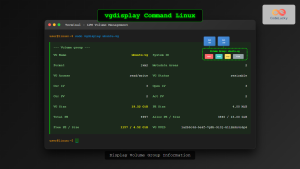
vgdisplay Command Linux: Complete Guide to Display Volume Group Information
The vgdisplay command is an essential tool in Linux systems for displaying detailed information about Volume Groups (VGs) in Logical...
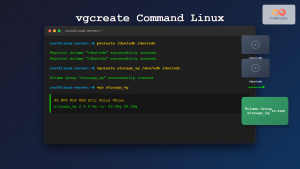
vgcreate Command Linux: Complete Guide to Volume Group Creation
The vgcreate command is a fundamental tool in Linux Logical Volume Manager (LVM) that allows system administrators to create volume...
lvm Command Linux: Complete Guide to Logical Volume Manager Operations
The Logical Volume Manager (LVM) is a powerful disk management tool in Linux that provides flexible storage management by abstracting...
lvcreate Command Linux: Complete Guide to Creating Logical Volumes with Examples
The lvcreate command is a fundamental tool in Linux Logical Volume Management (LVM) that allows you to create logical volumes...

Storage Virtualization: Complete Guide to Logical Volume Management in Linux
Storage virtualization through Logical Volume Management (LVM) represents one of the most powerful features in modern Linux systems, providing administrators...
lsblk Command Linux: Complete Guide to List and Manage Block Devices
The lsblk command is an essential Linux utility that displays information about block devices in a tree-like format. Whether you're...
df Command in Linux: Complete Guide to Check Disk Space Usage
The df command is one of the most essential tools in a Linux system administrator's toolkit. Standing for "disk free,"...
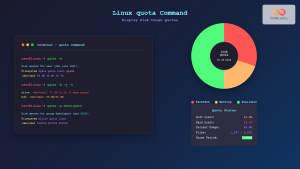
quota Command Linux: Complete Guide to Display and Manage Disk Usage Quotas
The quota command is an essential Linux system administration tool that displays disk usage and quota information for users and...
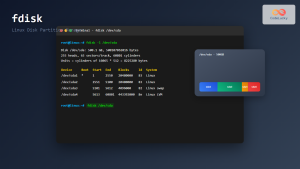
fdisk Command Linux: Complete Guide to Disk Partition Management
The fdisk command is one of the most powerful and essential tools for disk partition management in Linux systems. Whether...

du Command Linux: Display Directory Size and Disk Usage Explained with Examples
The du (disk usage) command in Linux is a powerful tool that allows users to measure directory size, analyze disk...


