The ping command is one of the most fundamental network troubleshooting tools in Linux systems. It sends Internet Control Message Protocol (ICMP) echo request packets to network hosts and measures the time it takes to receive echo replies, helping administrators diagnose network connectivity issues and measure network performance.
What is the ping Command?
The ping command operates by sending ICMP Echo Request packets to a destination host and listening for ICMP Echo Reply packets in return. This simple mechanism provides valuable information about network reachability, packet loss, and round-trip time (RTT). The name “ping” comes from sonar terminology, where a sound pulse is sent and the echo is measured to determine distance.
Basic ping Syntax
The basic syntax of the ping command is:
ping [options] destinationWhere destination can be:
- An IP address (e.g., 192.168.1.1)
- A hostname (e.g., google.com)
- A fully qualified domain name (FQDN)
Basic ping Examples
Ping by IP Address
$ ping 8.8.8.8Output:
PING 8.8.8.8 (8.8.8.8) 56(84) bytes of data.
64 bytes from 8.8.8.8: icmp_seq=1 ttl=118 time=12.4 ms
64 bytes from 8.8.8.8: icmp_seq=2 ttl=118 time=11.8 ms
64 bytes from 8.8.8.8: icmp_seq=3 ttl=118 time=12.1 ms
64 bytes from 8.8.8.8: icmp_seq=4 ttl=118 time=11.9 ms
^C
--- 8.8.8.8 ping statistics ---
4 packets transmitted, 4 received, 0% packet loss
round-trip min/avg/max/mdev = 11.8/12.0/12.4/0.2 ms
Ping by Hostname
$ ping google.comOutput:
PING google.com (142.250.185.78) 56(84) bytes of data.
64 bytes from lhr25s32-in-f14.1e100.net (142.250.185.78): icmp_seq=1 ttl=118 time=15.2 ms
64 bytes from lhr25s32-in-f14.1e100.net (142.250.185.78): icmp_seq=2 ttl=118 time=14.8 ms
Essential ping Command Options
-c (Count)
Specify the number of packets to send:
$ ping -c 5 google.comThis sends exactly 5 packets and then stops automatically.
-i (Interval)
Set the interval between packets in seconds:
$ ping -i 2 google.comThis sends packets every 2 seconds instead of the default 1 second.
-s (Packet Size)
Specify the packet size in bytes:
$ ping -s 1000 google.comOutput:
PING google.com (142.250.185.78) 1000(1028) bytes of data.
1008 bytes from lhr25s32-in-f14.1e100.net (142.250.185.78): icmp_seq=1 ttl=118 time=18.3 ms
-W (Timeout)
Set timeout for each ping in seconds:
$ ping -W 3 192.168.1.100This waits maximum 3 seconds for each reply before timing out.
Advanced ping Options
-f (Flood Ping)
Note: Requires root privileges and should be used carefully.
$ sudo ping -f google.comFlood ping sends packets as fast as possible, useful for stress testing networks.
-t (TTL – Time To Live)
Set the Time To Live value:
$ ping -t 10 google.comOutput:
PING google.com (142.250.185.78) 56(84) bytes of data.
From 192.168.1.1 icmp_seq=1 Time to live exceeded
-v (Verbose Output)
Enable verbose output for detailed information:
$ ping -v google.com-q (Quiet Mode)
Show only summary statistics:
$ ping -q -c 5 google.comOutput:
PING google.com (142.250.185.78) 56(84) bytes of data.

--- google.com ping statistics ---
5 packets transmitted, 5 received, 0% packet loss
round-trip min/avg/max/mdev = 14.2/15.1/16.8/0.9 ms
IPv6 Ping (ping6)
For IPv6 networks, use the ping6 command or ping -6:
$ ping6 ipv6.google.comOr:
$ ping -6 google.comUnderstanding ping Output
Let’s analyze a typical ping output:
64 bytes from 8.8.8.8: icmp_seq=1 ttl=118 time=12.4 ms- 64 bytes: Size of the ICMP packet received
- from 8.8.8.8: Source IP address of the reply
- icmp_seq=1: Sequence number of the packet
- ttl=118: Time To Live value
- time=12.4 ms: Round-trip time in milliseconds
Statistics Summary
--- 8.8.8.8 ping statistics ---
4 packets transmitted, 4 received, 0% packet loss
round-trip min/avg/max/mdev = 11.8/12.0/12.4/0.2 ms- Packets transmitted: Total packets sent
- Received: Packets successfully received
- Packet loss: Percentage of lost packets
- min/avg/max/mdev: Minimum, average, maximum, and standard deviation of round-trip times
Practical ping Use Cases
1. Testing Local Network Connectivity
Test your default gateway:
$ ping $(ip route | grep default | awk '{print $3}')2. Testing DNS Resolution
Compare ping by IP vs. hostname to test DNS:
$ ping -c 3 8.8.8.8
$ ping -c 3 google.com
3. Continuous Monitoring
Monitor network stability over time:
$ ping -i 5 google.com | while read pong; do echo "$(date): $pong"; done4. Testing Network Performance
Test with different packet sizes:
$ ping -c 10 -s 64 google.com
$ ping -c 10 -s 1024 google.com
$ ping -c 10 -s 1472 google.com
Common ping Error Messages
Destination Host Unreachable
From 192.168.1.1 icmp_seq=1 Destination Host UnreachableThis indicates the target host cannot be reached through the network path.
Request Timeout
Request timeout for icmp_seq 1The packet was sent but no reply was received within the timeout period.
Network Unreachable
Network is unreachableNo route exists to reach the destination network.
Troubleshooting with ping
Step-by-Step Network Diagnosis
- Test loopback interface:
$ ping 127.0.0.1 - Test local IP address:
$ ping $(hostname -I | awk '{print $1}') - Test default gateway:
$ ping $(ip route | grep default | awk '{print $3}') - Test external DNS:
$ ping 8.8.8.8 - Test external hostname:
$ ping google.com
Security Considerations
Some important security aspects to consider:
- ICMP Filtering: Many firewalls block ICMP packets
- Rate Limiting: Networks may limit ping response rates
- Information Disclosure: Ping responses can reveal network topology
- DDoS Attacks: Ping floods can be used maliciously
Alternative Tools
While ping is essential, consider these alternatives for specific scenarios:
- traceroute: Shows the network path to destination
- mtr: Combines ping and traceroute functionality
- hping3: Advanced packet crafting and testing
- nping: Network packet generation and analysis
Best Practices
- Use appropriate packet counts: Use
-coption to avoid infinite pinging - Respect network policies: Some networks prohibit continuous pinging
- Monitor packet loss: High packet loss indicates network issues
- Consider RTT values: Consistently high RTT suggests network congestion
- Test multiple destinations: Isolate network vs. host-specific issues
Automating ping Tests
Create a simple script to monitor multiple hosts:
#!/bin/bash
hosts=("google.com" "github.com" "stackoverflow.com")

for host in "${hosts[@]}"; do
    echo "Testing $host..."
    ping -c 3 -W 2 "$host" > /dev/null 2>&1
    if [ $? -eq 0 ]; then
        echo "✓ $host is reachable"
    else
        echo "✗ $host is unreachable"
    fi
done
Conclusion
The ping command is an indispensable tool for network troubleshooting and monitoring in Linux environments. By understanding its various options and interpreting its output correctly, system administrators and network engineers can quickly diagnose connectivity issues, measure network performance, and ensure reliable network operations.
Master these ping techniques to become more effective at network troubleshooting, and remember that ping is often the first step in a comprehensive network diagnostic process. Combined with other networking tools and a systematic approach, ping helps maintain robust and reliable network infrastructure.
Related Posts
traceroute Command Linux: Complete Network Route Tracing Guide
The traceroute command is an essential network diagnostic tool in Linux that traces the path packets take from your computer...
ip Command Linux: Complete Guide to Advanced Network Configuration and Management
The ip command is one of the most powerful and versatile networking tools in Linux, serving as the modern replacement...

intermapper Linux: Complete Network Monitoring and Mapping Guide
What is InterMapper for Linux? InterMapper is a powerful network monitoring and mapping tool that provides real-time visibility into network...

whatsup Linux: Complete Network Monitoring and System Administration Guide
whatsup is a powerful network monitoring and system administration tool for Linux that provides real-time insights into network connectivity, system...
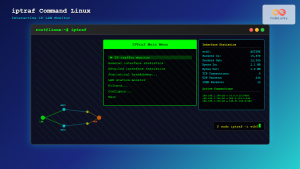
iptraf Command Linux: Complete Interactive Network Monitoring Guide
The iptraf command is a powerful console-based network monitoring utility for Linux systems that provides real-time IP LAN monitoring capabilities....
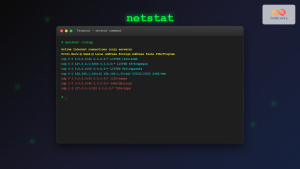
netstat Command Linux: Complete Guide to Network Connection Monitoring
The netstat command is one of the most essential network monitoring tools in Linux systems. It provides comprehensive information about...

Paessler Linux: Complete Guide to Network Monitoring with PRTG on Linux Systems
Network monitoring is crucial for maintaining optimal performance and security in Linux environments. Paessler PRTG Network Monitor offers comprehensive monitoring...

packetbeat Linux: Complete Network Packet Analysis Tool Guide
Network packet analysis is crucial for system administrators, security professionals, and developers who need to monitor, troubleshoot, and secure network...
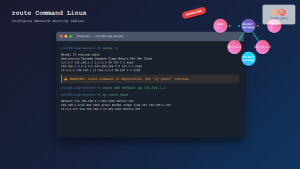
route Command Linux: Configure Network Routing Tables (Deprecated Guide)
The route command in Linux has been a fundamental tool for network administrators to view and manipulate the kernel's IP...
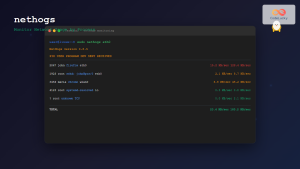
nethogs Command Linux: Monitor Real-Time Network Usage by Process
Network monitoring is a crucial aspect of system administration, especially when you need to identify which processes are consuming bandwidth...
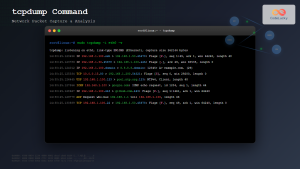
tcpdump Command Linux: Complete Guide to Network Packet Capture and Analysis
The tcpdump command is one of the most powerful network analysis tools available in Linux systems. It allows system administrators...
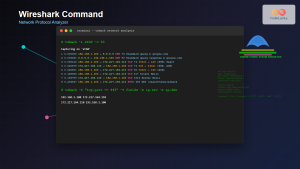
Wireshark Command Linux: Complete Network Protocol Analyzer Guide
Wireshark is the world's most popular network protocol analyzer, providing deep visibility into network traffic and communication protocols. While most...