
What is OSSEC Linux?
OSSEC (Open Source Security Event Correlator) is a powerful, open-source Host-based Intrusion Detection System (HIDS) that provides comprehensive security monitoring for Linux systems. It performs log analysis, file integrity checking, policy monitoring, rootkit detection, real-time alerting, and active response capabilities.
Unlike network-based intrusion detection systems that monitor network traffic, OSSEC focuses on individual hosts, making it an essential component of a layered security approach. It’s particularly effective for monitoring critical servers, workstations, and cloud instances.
Key Features of OSSEC
- Log Analysis: Real-time analysis of system and application logs
- File Integrity Monitoring: Detects unauthorized changes to critical files
- Rootkit Detection: Identifies hidden processes and files
- Policy Monitoring: Ensures compliance with security policies
- Active Response: Automatically responds to detected threats
- Centralized Management: Manages multiple agents from a single server
- Real-time Alerting: Immediate notifications via email, syslog, or database
OSSEC Architecture Components
Server Architecture
OSSEC operates using a server-agent architecture:
- OSSEC Server: Central manager that receives and analyzes data from agents
- OSSEC Agent: Lightweight component installed on monitored systems
- Local Installation: Standalone installation for single-host monitoring
- Hybrid Installation: Server with local monitoring capabilities
Installing OSSEC on Linux
Prerequisites
Before installing OSSEC, ensure your system meets these requirements:
# Check system requirements
uname -a
free -h
df -h /var/ossec
Expected Output:
Linux server01 5.4.0-74-generic #83-Ubuntu SMP Sat May 8 02:35:39 UTC 2021 x86_64 x86_64 x86_64 GNU/Linux
              total        used        free      shared  buff/cache   available
Mem:           7.8G        2.1G        3.2G        180M        2.5G        5.3G
Swap:          2.0G          0B        2.0G
Filesystem      Size  Used Avail Use% Mounted on
/dev/sda1        98G   15G   78G  17% /
Download and Install OSSEC Server
# Download OSSEC latest version
wget https://github.com/ossec/ossec-hids/archive/3.7.0.tar.gz
tar -xzf 3.7.0.tar.gz
cd ossec-hids-3.7.0

# Install dependencies (Ubuntu/Debian)
sudo apt-get update
sudo apt-get install build-essential gcc make libevent-dev zlib1g-dev libssl-dev libpcre2-dev

# Install dependencies (CentOS/RHEL)
sudo yum groupinstall "Development Tools"
sudo yum install libevent-devel zlib-devel openssl-devel pcre-devel

# Run installation script
sudo ./install.sh
Interactive Installation Process
During installation, you’ll see prompts like these:
** Para instalação em Português, escolha [br].
** 要使用中文安装,请选择 [cn].
** Für eine deutsche Installation wählen Sie [de].
** Pour une installation en français, choisissez [fr]
** Para instalar en Español , eliga [es].
** Per l'installazione in Italiano, scegli [it].
** Voor installatie in het Nederlands, kies [nl].
** Для русской установки выберите [ru].
** Na instalação em Português, escolha [br].
** For installation in English, choose [en].
** Choose your language [en]:

  OSSEC HIDS v3.7.0 Installation Script - http://www.ossec.net

 You are about to start the installation process of the OSSEC HIDS.
 You must have a C compiler pre-installed in your system.

  - System: Linux server01 5.4.0-74-generic
  - User: root
  - Host: server01

  -- Press ENTER to continue or Ctrl-C to abort --

1- What kind of installation do you want (server, agent, local, hybrid or help)? server

2- Setting up the installation environment.

 - Choose where to install the OSSEC HIDS [/var/ossec]:

3- Configuring the OSSEC HIDS.

  3.1- Do you want e-mail notification? (y/n) [y]: y
   - What's your e-mail address? [email protected]
   - What's your SMTP server ip/host? localhost

  3.2- Do you want to run the integrity check daemon? (y/n) [y]: y

   - Do you want to run the rootkit detection engine? (y/n) [y]: y

   - Active response allows OSSEC to execute a specific
     command based on the events received. For example,
     it can block an IP address or disable access for
     a specific user.
     More information at:
     http://www.ossec.net/en/manual.html#active-response

   - Do you want to enable active response? (y/n) [y]: y

   - By default, we can enable the host-deny and the
     firewall-drop responses. The first one will add
     a host to the /etc/hosts.deny and the second one
     will block the host on iptables (if linux)

   - They can be used to stop DDOS, bruteforce and port
     scanning attacks.

   - Do you want to enable the firewall-drop response? (y/n) [y]: y

  3.3- Do you want to add more IPs to the white list? (y/n)? [n]: y
   - IPs (space separated): 192.168.1.0/24 10.0.0.0/8

4- Installing the system
 - Running the Makefile
OSSEC Configuration
Main Configuration File
The primary configuration file is located at /var/ossec/etc/ossec.conf:
# View current configuration
sudo cat /var/ossec/etc/ossec.conf

# Edit configuration
sudo nano /var/ossec/etc/ossec.conf
Basic Configuration Example
<ossec_config>
  <global>
    <email_notification>yes</email_notification>
    <email_to>[email protected]</email_to>
    <smtp_server>localhost</smtp_server>
    <email_from>[email protected]</email_from>
    <email_maxperhour>12</email_maxperhour>
  </global>

  <rules>
    <include>rules_config.xml</include>
    <include>pam_rules.xml</include>
    <include>sshd_rules.xml</include>
    <include>telnetd_rules.xml</include>
    <include>syslog_rules.xml</include>
  </rules>

  <syscheck>
    <frequency>79200</frequency>
    <directories check_all="yes">/etc,/usr/bin,/usr/sbin</directories>
    <directories check_all="yes">/bin,/sbin</directories>
    <ignore>/etc/mtab</ignore>
    <ignore>/etc/hosts.deny</ignore>
    <ignore>/etc/mail/statistics</ignore>
  </syscheck>

  <rootcheck>
    <rootkit_files>/var/ossec/etc/rootcheck/rootkit_files.txt</rootkit_files>
    <rootkit_trojans>/var/ossec/etc/rootcheck/rootkit_trojans.txt</rootkit_trojans>
  </rootcheck>

  <localfile>
    <log_format>syslog</log_format>
    <location>/var/log/messages</location>
  </localfile>

  <localfile>
    <log_format>syslog</log_format>
    <location>/var/log/secure</location>
  </localfile>
</ossec_config>
Managing OSSEC Services
Starting and Stopping OSSEC
# Start OSSEC
sudo /var/ossec/bin/ossec-control start

# Stop OSSEC
sudo /var/ossec/bin/ossec-control stop

# Restart OSSEC
sudo /var/ossec/bin/ossec-control restart

# Check OSSEC status
sudo /var/ossec/bin/ossec-control status
Expected Output for Status Check:
ossec-monitord is running...
ossec-logcollector is running...
ossec-remoted is running...
ossec-syscheckd is running...
ossec-analysisd is running...
ossec-maild is running...
ossec-execd is running...
Creating Systemd Service
# Create systemd service file
sudo nano /etc/systemd/system/ossec.service

# Add the following content:
[Unit]
Description=OSSEC Host Intrusion Detection System
After=network.target

[Service]
Type=forking
User=root
ExecStart=/var/ossec/bin/ossec-control start
ExecStop=/var/ossec/bin/ossec-control stop
ExecReload=/var/ossec/bin/ossec-control restart

[Install]
WantedBy=multi-user.target

# Enable and start service
sudo systemctl daemon-reload
sudo systemctl enable ossec
sudo systemctl start ossec
sudo systemctl status ossec
OSSEC Agent Configuration
Adding Agents to OSSEC Server
# Add new agent
sudo /var/ossec/bin/manage_agents

# Interactive menu will appear:
****************************************
* OSSEC HIDS v3.7.0 Agent manager.     *
* The following options are available: *
****************************************
   (A)dd an agent (A).
   (E)xtract key for an agent (E).
   (L)ist already added agents (L).
   (R)emove an agent (R).
   (Q)uit.
Choose your action: A,E,L,R or Q: A

- Adding a new agent (use quit to go back).

* Name for the new agent: web-server-01
* IP Address of the new agent: 192.168.1.100
* An ID for the new agent[001]: 001
Agent information:
   ID:001
   Name:web-server-01
   IP Address:192.168.1.100

Confirm adding it?(y/n): y
Agent added with ID 001.
Extracting Agent Keys
# Extract key for agent
Choose your action: A,E,L,R or Q: E

Available agents:
   ID: 001, Name: web-server-01, IP: 192.168.1.100
Provide the ID of the agent to extract the key (or 'quit'): 001

Agent key information for '001' is:
MDAxIHdlYi1zZXJ2ZXItMDEgMTkyLjE2OC4xLjEwMCA3Zjg0NWNkZjFiMzQ5OTJiNGVmZTAzM2NkOTc4NTBiYzJkZGM2ZmVjMzA5NzEyMzQ1Njc4OTBhYmNkZWYxMjM0

** Press ENTER to return to the main menu.
Log Analysis and Monitoring
Viewing OSSEC Alerts
# View recent alerts
sudo tail -f /var/ossec/logs/alerts/alerts.log

# View formatted alerts
sudo /var/ossec/bin/ossec-logtest
Sample Alert Output:
** Alert 1629982345.12345: - syslog,sshd,authentication_success,pci_dss_10.2.5,gpg13_7.1,gdpr_IV_32.2,hipaa_164.312.b,nist_800_53_AU.14,nist_800_53_AC.7,
2021 Aug 26 15:32:25 web-server-01->/var/log/secure
Rule: 5715 (level 3) -> 'SSHD authentication success.'
Src IP: 192.168.1.50
User: admin
Aug 26 15:32:25 web-server-01 sshd[12345]: Accepted publickey for admin from 192.168.1.50 port 52341 ssh2: RSA SHA256:abcd1234

** Alert 1629982456.67890: - syslog,attack,
2021 Aug 26 15:34:16 web-server-01->/var/log/secure
Rule: 5710 (level 5) -> 'Multiple SSHD authentication failures.'
Src IP: 203.0.113.45
User: root
Aug 26 15:34:16 web-server-01 sshd[12567]: Failed password for root from 203.0.113.45 port 48291 ssh2
Custom Rule Creation
# Create custom rules file
sudo nano /var/ossec/rules/local_rules.xml

# Example custom rule:
<group name="custom,syslog,sshd,">
  <rule id="100001" level="10">
    <if_sid>5710</if_sid>
    <srcip>!192.168.1.0/24</srcip>
    <description>Multiple SSH failures from external IP</description>
    <group>authentication_failures,pci_dss_11.4,</group>
  </rule>
</group>

# Test rule syntax
sudo /var/ossec/bin/ossec-logtest
File Integrity Monitoring
Configuring Syscheck
# Edit syscheck configuration
sudo nano /var/ossec/etc/ossec.conf

# Add monitored directories:
<syscheck>
  <frequency>7200</frequency>
  <directories check_all="yes">/etc</directories>
  <directories check_all="yes">/usr/bin</directories>
  <directories check_all="yes" realtime="yes">/var/www</directories>
  <directories check_sum="yes" check_md5="yes">/home/secure</directories>

  <ignore>/etc/mtab</ignore>
  <ignore>/etc/hosts.deny</ignore>
  <ignore>/var/www/logs</ignore>

  <nodiff>/etc/ssl/private.key</nodiff>
</syscheck>
Manual Integrity Check
# Run immediate integrity check
sudo /var/ossec/bin/agent_control -r -a

# View integrity check database
sudo /var/ossec/bin/syscheck_control -l

# View changes for specific file
sudo /var/ossec/bin/syscheck_control -f /etc/passwd
Sample Integrity Check Output:
File: /etc/passwd
Date: 2021-08-26 15:45:32
Changes: 2
+user1:x:1001:1001:Regular User:/home/user1:/bin/bash
+user2:x:1002:1002:Test User:/home/user2:/bin/bash

File size changed from '1834' to '1923'
File permissions changed from '644' to '644'
File ownership changed from 'root:root' to 'root:root'
File modification time changed from '2021-08-25 10:30:15' to '2021-08-26 15:45:30'
Active Response Configuration
Setting Up Firewall Response
# Configure active response in ossec.conf
<active-response>
  <disabled>no</disabled>
  <command>firewall-drop</command>
  <location>local</location>
  <rules_id>5710,5711</rules_id>
  <timeout>600</timeout>
</active-response>

<active-response>
  <disabled>no</disabled>
  <command>host-deny</command>
  <location>local</location>
  <rules_id>5710,5711</rules_id>
  <timeout>3600</timeout>
</active-response>
Creating Custom Response Scripts
# Create custom response script
sudo nano /var/ossec/active-response/bin/custom-block.sh

#!/bin/bash
# Custom blocking script
ACTION=$1
USER=$2
IP=$3

LOCAL=`dirname $0`;
cd $LOCAL
cd ../
PWD=`pwd`

if [ "x${ACTION}" = "xadd" ]; then
   # Block IP using iptables
   /sbin/iptables -I INPUT -s ${IP} -j DROP
   echo "Blocked IP: ${IP}" >> ${PWD}/../logs/active-responses.log
elif [ "x${ACTION}" = "xdelete" ]; then
   # Unblock IP
   /sbin/iptables -D INPUT -s ${IP} -j DROP
   echo "Unblocked IP: ${IP}" >> ${PWD}/../logs/active-responses.log
fi

exit 1;

# Make script executable
sudo chmod 750 /var/ossec/active-response/bin/custom-block.sh
sudo chown root:ossec /var/ossec/active-response/bin/custom-block.sh
Monitoring and Troubleshooting
OSSEC Statistics and Reports
# View OSSEC statistics
sudo /var/ossec/bin/ossec-reportd

# Check agent status
sudo /var/ossec/bin/agent_control -l

# View detailed agent information
sudo /var/ossec/bin/agent_control -i 001
Agent Status Output:
OSSEC HIDS agent_control. Agent information:
   Agent ID:   001
   Agent Name: web-server-01
   IP address: 192.168.1.100
   Status:     Active

   Last keep alive:  2021-08-26 15:50:23
   Last event:       2021-08-26 15:49:45
   Event count:      2456
   Integrity check:  Completed
   Last rootcheck:   2021-08-26 14:30:15
Common Issues and Solutions
Agent Not Connecting
# Check network connectivity
telnet server-ip 1514

# Verify agent key
sudo /var/ossec/bin/manage_agents -l

# Check agent logs
sudo tail -f /var/ossec/logs/ossec.log
High CPU Usage
# Check process usage
ps aux | grep ossec

# Optimize log analysis frequency
sudo nano /var/ossec/etc/ossec.conf
# Increase frequency values in localfile sections

# Exclude unnecessary log files
<localfile>
  <log_format>syslog</log_format>
  <location>/var/log/messages</location>
  <ignore_binaries>yes</ignore_binaries>
</localfile>
Best Practices for OSSEC Implementation
Security Hardening
- Use dedicated OSSEC user with minimal privileges
- Encrypt communication between agents and server
- Regularly update OSSEC rules database
- Implement log rotation to prevent disk space issues
- Monitor OSSEC itself for tampering attempts
Performance Optimization
- Tune log analysis frequency based on system load
- Use specific log formats instead of generic ones
- Implement intelligent alerting to reduce noise
- Regular cleanup of old alerts and logs
- Use database storage for large environments
Maintenance Tasks
# Weekly integrity check
sudo /var/ossec/bin/syscheck_control -u all

# Monthly rules update
sudo wget https://www.ossec.net/files/ossec-rules-update.tar.gz
sudo tar -xzf ossec-rules-update.tar.gz -C /var/ossec/rules/

# Log rotation script
#!/bin/bash
find /var/ossec/logs -name "*.log" -mtime +30 -delete
find /var/ossec/logs/alerts -name "*.log" -mtime +90 -delete
Integration with External Systems
SIEM Integration
Configure OSSEC to send alerts to SIEM systems:
# Configure syslog output
<syslog_output>
  <server>192.168.1.200</server>
  <port>514</port>
  <level>7</level>
  <format>splunk</format>
</syslog_output>

# Database output for centralized storage
<database_output>
  <hostname>mysql-server</hostname>
  <username>ossec</username>
  <password>secure_password</password>
  <database>ossec</database>
  <type>mysql</type>
</database_output>
Conclusion
OSSEC provides comprehensive host-based intrusion detection capabilities for Linux systems, offering real-time monitoring, log analysis, and automated response features. Proper configuration and maintenance ensure effective security monitoring while minimizing false positives.
Regular updates, rule customization, and integration with existing security infrastructure maximize OSSEC’s effectiveness in detecting and responding to security threats. The system’s flexibility allows adaptation to various environments, from small single-server setups to large enterprise deployments.
Implementing OSSEC as part of a layered security strategy significantly enhances your ability to detect, analyze, and respond to security incidents on Linux systems, providing valuable insights into system behavior and potential threats.
Related Posts
Intrusion Detection System: Complete Guide to OS-Level Security Monitoring
Understanding Intrusion Detection Systems An Intrusion Detection System (IDS) is a critical security tool that monitors network traffic and system...
samhain Linux: Complete Guide to Host-based Intrusion Detection System
Samhain is a powerful host-based intrusion detection system (HIDS) designed specifically for Linux and Unix-like systems. This comprehensive security tool...
ManageEngine Linux: Complete Network Monitoring Solutions Guide
Network monitoring is crucial for maintaining optimal performance and security in Linux environments. ManageEngine provides powerful network monitoring solutions specifically...
tiger Command Linux: Complete Security Audit and Intrusion Detection Guide
The tiger command is a powerful security auditing tool designed specifically for Unix-like systems, including Linux distributions. This comprehensive security...
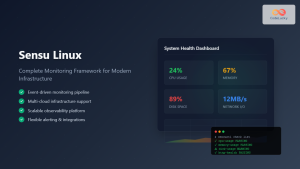
Sensu Linux: Complete Monitoring Framework Guide for System Administrators
Sensu is a powerful, open-source monitoring framework designed to monitor servers, services, application health, and business KPIs. Built with modern...
chkrootkit Command Linux: Complete Guide to Rootkit Detection and System Security
System security is paramount in Linux administration, and rootkits pose one of the most serious threats to system integrity. The...

whatsup Linux: Complete Network Monitoring and System Administration Guide
whatsup is a powerful network monitoring and system administration tool for Linux that provides real-time insights into network connectivity, system...
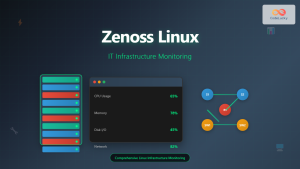
Zenoss Linux: Complete Guide to IT Infrastructure Monitoring and Management
What is Zenoss and Why Use it on Linux? Zenoss is a powerful, open-source IT infrastructure monitoring platform that provides...
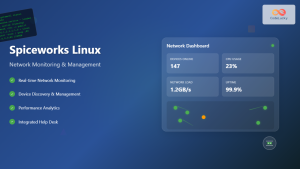
Spiceworks Linux: Complete Network Monitoring and Management Guide
Spiceworks is a powerful, free IT network monitoring and management platform that has revolutionized how system administrators handle their infrastructure....
Groundwork Linux: Complete Guide to IT Infrastructure Monitoring and System Health Management
What is Groundwork Linux? Groundwork Linux is a comprehensive open-source IT infrastructure monitoring platform built specifically for Linux environments. It...
aide Command Linux: Complete Guide to Advanced Intrusion Detection Environment
The AIDE (Advanced Intrusion Detection Environment) command is a powerful security tool for Linux systems that monitors file and directory...
rkhunter Command Linux: Complete Guide to Rootkit Detection and System Security
The rkhunter (Rootkit Hunter) is a powerful Unix-based security scanner designed to detect rootkits, backdoors, and local exploits on Linux...


