
NoMachine is a powerful remote desktop solution that enables secure access to Linux systems from anywhere in the world. Unlike traditional VNC solutions, NoMachine provides superior performance, better compression, and enhanced security features that make it ideal for both personal and enterprise use.
What is NoMachine?
NoMachine is a cross-platform remote desktop software that allows users to access their Linux desktop environments from remote locations. It uses the NX protocol, which provides excellent performance even over slow network connections through advanced compression algorithms and caching techniques.
Key Features of NoMachine
- High Performance: Superior compression and caching for smooth remote sessions
- Cross-Platform: Available for Linux, Windows, macOS, iOS, and Android
- Security: Built-in encryption and authentication mechanisms
- Multi-User Support: Multiple simultaneous connections
- Session Recording: Built-in session recording capabilities
- File Transfer: Easy drag-and-drop file sharing
System Requirements
Before installing NoMachine, ensure your Linux system meets the following requirements:
Minimum Requirements
- OS: Any modern Linux distribution (Ubuntu, CentOS, Fedora, SUSE, etc.)
- RAM: 512 MB (2 GB recommended)
- Storage: 200 MB free disk space
- Network: TCP/IP connection
- Graphics: X11 server running
Supported Linux Distributions
Ubuntu 18.04 LTS and newer
CentOS 7 and newer
Red Hat Enterprise Linux 7+
Fedora 30+
SUSE Linux Enterprise 12+
Debian 9+
Arch Linux
Mint 19+
Installing NoMachine on Linux
Method 1: Using Official Packages (Recommended)
Download the appropriate package from NoMachine’s official website based on your architecture:
For Debian/Ubuntu Systems (64-bit)
# Download the package
wget https://download.nomachine.com/download/8.9/Linux/nomachine_8.9.1_1_amd64.deb

# Install the package
sudo dpkg -i nomachine_8.9.1_1_amd64.deb

# Fix any dependency issues
sudo apt-get install -f
For Red Hat/CentOS/Fedora Systems (64-bit)
# Download the package
wget https://download.nomachine.com/download/8.9/Linux/nomachine_8.9.1_1_x86_64.rpm

# Install the package
sudo rpm -ivh nomachine_8.9.1_1_x86_64.rpm

# Or use dnf on newer systems
sudo dnf install nomachine_8.9.1_1_x86_64.rpm
Method 2: Using Package Managers
Some distributions include NoMachine in their repositories:
# Ubuntu/Debian (from universe repository)
sudo apt update
sudo apt install nomachine

# Arch Linux (from AUR)
yay -S nomachine

# Fedora (from RPM Fusion)
sudo dnf install nomachine
Initial Configuration
Starting NoMachine Service
After installation, start and enable the NoMachine service:
# Start the service
sudo systemctl start nxserver

# Enable automatic startup
sudo systemctl enable nxserver

# Check service status
sudo systemctl status nxserver
Expected output:
● nxserver.service - NoMachine NX Server
   Loaded: loaded (/etc/systemd/system/nxserver.service; enabled; vendor preset: enabled)
   Active: active (running) since Tue 2025-08-26 04:26:00 IST; 1min ago
 Main PID: 1234 (nxserver)
    Tasks: 12 (limit: 4915)
   Memory: 45.2M
   CGroup: /system.slice/nxserver.service
           └─1234 /usr/NX/bin/nxserver --daemon
Basic Server Configuration
Configure basic server settings using the command line:
# Set server name
sudo /usr/NX/bin/nxserver --serverconfig --set "ServerName=MyLinuxServer"

# Enable file transfer
sudo /usr/NX/bin/nxserver --serverconfig --set "EnableFileTransfer=1"

# Set maximum number of sessions
sudo /usr/NX/bin/nxserver --serverconfig --set "SessionLimit=10"

# Restart server to apply changes
sudo systemctl restart nxserver
User Management
Creating NoMachine Users
NoMachine can use system users or create dedicated NoMachine users:
Using Existing System Users
# Enable a system user for NoMachine
sudo /usr/NX/bin/nxserver --useradd myuser

# Set password for NoMachine user
sudo /usr/NX/bin/nxserver --passwd myuser
Creating Dedicated NoMachine Users
# Create a new system user first
sudo useradd -m -s /bin/bash nomachine_user

# Set system password
sudo passwd nomachine_user

# Add to NoMachine
sudo /usr/NX/bin/nxserver --useradd nomachine_user

# Set NoMachine password
sudo /usr/NX/bin/nxserver --passwd nomachine_user
Managing User Permissions
# List all NoMachine users
sudo /usr/NX/bin/nxserver --userlist

# Remove a user from NoMachine
sudo /usr/NX/bin/nxserver --userdel username

# Enable/disable a user
sudo /usr/NX/bin/nxserver --userenable username
sudo /usr/NX/bin/nxserver --userdisable username
Client Installation and Connection
Installing NoMachine Client
Download and install the NoMachine client on your local machine:
# For Ubuntu/Debian client
wget https://download.nomachine.com/download/8.9/Linux/nomachine_8.9.1_1_amd64.deb
sudo dpkg -i nomachine_8.9.1_1_amd64.deb
Creating a Connection
To connect to your NoMachine server:
- Launch the NoMachine client application
- Click “New” to create a new connection
- Enter the server details:
Protocol: NX
Host: your-server-ip or hostname
Port: 4000 (default)
Authentication: Password
Connection Configuration Options
# Connection settings example
Host: 192.168.1.100
Port: 4000
Quality: High
Display: Physical desktop
Keyboard: Client keyboard
Advanced Configuration
Security Configuration
Changing Default Port
# Edit the server configuration
sudo nano /usr/NX/etc/server.cfg

# Change the port
NXPort=4001

# Restart the service
sudo systemctl restart nxserver
Enabling SSL Encryption
# Generate SSL certificate
sudo /usr/NX/bin/nxserver --keygen

# Enable SSL
sudo /usr/NX/bin/nxserver --serverconfig --set "EnableSSL=1"

# Restart server
sudo systemctl restart nxserver
Performance Optimization
Network Optimization
# Configure compression level (1-9, 9 = maximum)
sudo /usr/NX/bin/nxserver --serverconfig --set "CompressionLevel=6"

# Enable/disable image compression
sudo /usr/NX/bin/nxserver --serverconfig --set "EnableJPEGCompression=1"

# Set JPEG quality (0-100)
sudo /usr/NX/bin/nxserver --serverconfig --set "JPEGQuality=80"
Resource Management
# Limit CPU usage per session
sudo /usr/NX/bin/nxserver --serverconfig --set "SessionCPULimit=80"

# Set memory limits
sudo /usr/NX/bin/nxserver --serverconfig --set "SessionMemoryLimit=512MB"

# Configure idle timeout (in seconds)
sudo /usr/NX/bin/nxserver --serverconfig --set "IdleTimeout=3600"
Firewall Configuration
Configure your firewall to allow NoMachine connections:
UFW (Ubuntu Firewall)
# Allow NoMachine port
sudo ufw allow 4000/tcp

# Allow specific IP range
sudo ufw allow from 192.168.1.0/24 to any port 4000

# Check status
sudo ufw status
Firewalld (CentOS/RHEL)
# Add service to firewall
sudo firewall-cmd --permanent --add-service=nx

# Or add port directly
sudo firewall-cmd --permanent --add-port=4000/tcp

# Reload firewall
sudo firewall-cmd --reload

# Check configuration
sudo firewall-cmd --list-all
IPTables
# Allow incoming connections on port 4000
sudo iptables -A INPUT -p tcp --dport 4000 -j ACCEPT

# Save rules (Ubuntu/Debian)
sudo iptables-save > /etc/iptables/rules.v4
Session Management
Monitoring Active Sessions
# List all active sessions
sudo /usr/NX/bin/nxserver --list

# Detailed session information
sudo /usr/NX/bin/nxserver --status
Example output:
NX> 200 Service status:
NX> 710 Session list:
Display :1000: session running (PID: 2345) for user: john on :1000.0
Display :1001: session running (PID: 2346) for user: jane on :1001.0
NX> 999 Bye
Session Control Commands
# Terminate a specific session
sudo /usr/NX/bin/nxserver --terminate session_id

# Suspend a session
sudo /usr/NX/bin/nxserver --suspend session_id

# Resume a session
sudo /usr/NX/bin/nxserver --resume session_id

# Kill all sessions for a user
sudo /usr/NX/bin/nxserver --killuser username
File Transfer and Sharing
Enabling File Transfer
# Enable file transfer globally
sudo /usr/NX/bin/nxserver --serverconfig --set "EnableFileTransfer=1"

# Set upload/download paths
sudo /usr/NX/bin/nxserver --serverconfig --set "DefaultFileTransferPath=/home/%u/Downloads"

# Restart server
sudo systemctl restart nxserver
Directory Sharing
Configure shared directories accessible to remote users:
# Create shared directory
sudo mkdir -p /opt/nomachine/shared

# Set permissions
sudo chmod 755 /opt/nomachine/shared
sudo chown -R nobody:nogroup /opt/nomachine/shared

# Configure in server settings
sudo /usr/NX/bin/nxserver --serverconfig --set "SharedFolders=/opt/nomachine/shared"
Logging and Monitoring
Log File Locations
# Main server logs
/usr/NX/var/log/nxserver.log

# Session logs
/usr/NX/var/log/nxserver/

# Error logs
/usr/NX/var/log/nxerror.log

# Access logs
/usr/NX/var/log/nxaccess.log
Monitoring Commands
# Check server statistics
sudo /usr/NX/bin/nxserver --stats

# Monitor real-time logs
sudo tail -f /usr/NX/var/log/nxserver.log

# Check connection history
sudo /usr/NX/bin/nxserver --history
Troubleshooting Common Issues
Connection Problems
Issue: Cannot Connect to Server
# Check if service is running
sudo systemctl status nxserver

# Verify port is listening
sudo netstat -tlnp | grep :4000

# Check firewall settings
sudo ufw status
sudo firewall-cmd --list-all
Issue: Authentication Failed
# Reset user password
sudo /usr/NX/bin/nxserver --passwd username

# Check user status
sudo /usr/NX/bin/nxserver --userlist

# Verify user exists
id username
Performance Issues
Issue: Slow Connection
# Reduce image quality
sudo /usr/NX/bin/nxserver --serverconfig --set "JPEGQuality=60"

# Increase compression
sudo /usr/NX/bin/nxserver --serverconfig --set "CompressionLevel=9"

# Disable unnecessary features
sudo /usr/NX/bin/nxserver --serverconfig --set "EnableMultimedia=0"
Issue: High CPU Usage
# Limit CPU per session
sudo /usr/NX/bin/nxserver --serverconfig --set "SessionCPULimit=50"

# Reduce session limit
sudo /usr/NX/bin/nxserver --serverconfig --set "SessionLimit=5"

# Monitor resource usage
htop
sudo /usr/NX/bin/nxserver --stats
Display Issues
Issue: Black Screen or No Display
# Check X11 server
ps aux | grep X
echo $DISPLAY

# Restart X11 if needed
sudo systemctl restart gdm3  # or lightdm, sddm

# Check NoMachine display configuration
sudo /usr/NX/bin/nxserver --serverconfig --show | grep Display
Maintenance and Updates
Regular Maintenance Tasks
# Clear old log files
sudo find /usr/NX/var/log -name "*.log.*" -mtime +30 -delete

# Clean temporary files
sudo rm -rf /tmp/.nx-*

# Backup configuration
sudo cp -r /usr/NX/etc /backup/nomachine-config-$(date +%Y%m%d)
Updating NoMachine
# Download latest version
wget https://download.nomachine.com/download/latest/Linux/nomachine_latest_amd64.deb

# Stop service before update
sudo systemctl stop nxserver

# Install update
sudo dpkg -i nomachine_latest_amd64.deb

# Start service
sudo systemctl start nxserver

# Verify update
/usr/NX/bin/nxserver --version
Security Best Practices
Access Control
- Use strong passwords: Enforce complex password policies
- Limit user access: Only grant access to necessary users
- Network restrictions: Use firewall rules to limit access by IP
- Regular audits: Monitor access logs regularly
Network Security
# Change default port
sudo /usr/NX/bin/nxserver --serverconfig --set "NXPort=4321"

# Enable fail2ban for NoMachine
sudo nano /etc/fail2ban/jail.local

[nomachine]
enabled = true
port = 4000
filter = nomachine
logpath = /usr/NX/var/log/nxserver.log
maxretry = 3
bantime = 3600
Backup and Recovery
# Create backup script
#!/bin/bash
BACKUP_DIR="/backup/nomachine/$(date +%Y%m%d)"
mkdir -p $BACKUP_DIR

# Backup configuration
cp -r /usr/NX/etc $BACKUP_DIR/
cp -r /usr/NX/var/db $BACKUP_DIR/

# Backup user data
/usr/NX/bin/nxserver --userlist > $BACKUP_DIR/users.txt

echo "Backup completed: $BACKUP_DIR"
Comparison with Other Remote Desktop Solutions
| Feature | NoMachine | VNC | RDP | SSH X11 |
|---|---|---|---|---|
| Performance | Excellent | Good | Good | Poor |
| Compression | Advanced | Basic | Good | None |
| Security | Built-in encryption | Optional | Good | SSH encryption |
| File Transfer | Built-in | Limited | Yes | SCP/SFTP |
| Multi-platform | Yes | Yes | Windows-focused | Limited |
Conclusion
NoMachine provides a robust, high-performance solution for Linux remote desktop access. Its superior compression algorithms, built-in security features, and cross-platform compatibility make it an excellent choice for both personal and enterprise environments. By following this comprehensive guide, you can successfully deploy, configure, and maintain a secure NoMachine installation that meets your remote access needs.
Whether you’re managing servers, providing remote support, or accessing your desktop from anywhere, NoMachine’s feature-rich platform ensures a smooth and secure remote desktop experience on Linux systems.
Related Posts
tightvncserver Linux: Complete Guide to TightVNC Server Setup and Configuration
TightVNC Server is a powerful remote desktop solution that allows you to access and control Linux systems remotely over a...

xrdp Command Linux: Complete Guide to Remote Desktop Server Setup
The xrdp command is a powerful Linux utility that implements Microsoft's Remote Desktop Protocol (RDP) server functionality on Unix-like systems....

xfreerdp Command Linux: Complete Guide to FreeRDP Remote Desktop Client
The xfreerdp command is a powerful Linux utility that serves as the primary client for the FreeRDP project, enabling users...
RealVNC Linux: Complete Guide to Remote Desktop Access and Control
RealVNC is a powerful remote desktop software that enables users to control Linux systems remotely over a network connection. As...
AnyDesk Linux: Complete Remote Desktop Solution Guide for Linux Users
AnyDesk is a powerful cross-platform remote desktop application that enables users to access computers remotely over the internet. For Linux...
x11vnc Command Linux: Complete Guide to Remote Desktop Access via VNC Server
The x11vnc command is a powerful Linux utility that allows you to share your existing X11 desktop session via VNC...
vncserver Command Linux: Complete Guide to VNC Server Setup and Management
The vncserver command is a powerful tool in Linux that enables remote desktop access by starting a Virtual Network Computing...
TeamViewer Linux: Complete Guide to Remote Desktop Access and Support
TeamViewer is one of the most popular remote desktop solutions available today, offering cross-platform compatibility and robust features for remote...
vinagre Command Linux: Complete Guide to VNC Viewer and Remote Desktop Access
The vinagre command is a powerful VNC (Virtual Network Computing) viewer for Linux systems that enables users to connect to...
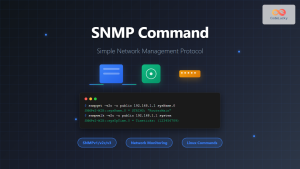
SNMP Command Linux: Complete Guide to Simple Network Management Protocol Configuration and Usage
Introduction to SNMP Command in Linux Simple Network Management Protocol (SNMP) is a fundamental protocol used for monitoring and managing...
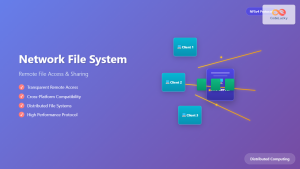
Network File System: Complete Guide to Remote File Access and Sharing
What is Network File System (NFS)? Network File System (NFS) is a distributed file system protocol that allows users to...
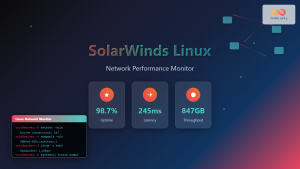
SolarWinds Linux: Complete Network Performance Monitor Guide for System Administrators
SolarWinds Network Performance Monitor (NPM) is a powerful network monitoring solution that provides comprehensive visibility into network infrastructure performance. While...


