
The nmtui (NetworkManager Text User Interface) command is a powerful, menu-driven tool that provides an intuitive way to configure network connections in Linux systems. Unlike command-line tools that require memorizing complex syntax, nmtui offers a user-friendly text-based interface for managing NetworkManager settings, making network configuration accessible to both beginners and experienced administrators.
What is nmtui?
nmtui is part of the NetworkManager package and serves as a text-based user interface for configuring network connections. It’s particularly useful on servers without graphical interfaces or when you prefer working in the terminal. The tool provides a ncurses-based interface that allows you to navigate through menus using keyboard shortcuts.
Key Features of nmtui
- Interactive Menu System: Navigate through options using arrow keys
- Connection Management: Create, edit, and delete network connections
- Multiple Network Types: Support for Ethernet, WiFi, VPN, and more
- Real-time Status: View current network status and activate/deactivate connections
- No Root Required: Most operations can be performed by regular users
Installing nmtui
On most modern Linux distributions, nmtui comes pre-installed as part of the NetworkManager package. However, if it’s missing, you can install it using your distribution’s package manager:
Ubuntu/Debian
sudo apt update
sudo apt install network-manager
CentOS/RHEL/Fedora
# For CentOS/RHEL
sudo yum install NetworkManager-tui

# For Fedora
sudo dnf install NetworkManager-tui
Arch Linux
sudo pacman -S networkmanagerBasic nmtui Syntax and Usage
The basic syntax for nmtui is straightforward:
nmtui [OPTION]Available Options
| Option | Description |
|---|---|
nmtui |
Launch the main menu interface |
nmtui edit |
Go directly to the connection editor |
nmtui connect |
Go directly to the connection activation menu |
nmtui hostname |
Go directly to the hostname setting |
nmtui --help |
Display help information |
Navigating the nmtui Interface
When you launch nmtui, you’ll see a main menu with three primary options:
- Edit a connection – Create, modify, or delete network connections
- Activate a connection – Enable or disable existing connections
- Set system hostname – Change the system’s hostname
Navigation Controls
- Arrow Keys: Navigate between menu items and fields
- Tab/Shift+Tab: Move between interface elements
- Enter: Select or activate an option
- Space: Toggle checkboxes or select items
- Esc: Go back or cancel current operation
- F10 or Ctrl+X: Exit nmtui
Managing Network Connections
Creating a New Ethernet Connection
To create a new wired Ethernet connection:
- Launch nmtui:
nmtui - Select “Edit a connection”
- Choose “Add” and select “Ethernet”
- Configure the connection parameters
Example Configuration
Profile name: Work-Ethernet
Device: eth0 (enp0s3)
□ Automatically connect
□ Available to all users

ETHERNET
Device: eth0 (enp0s3)
Cloned MAC address: _______________
MTU: _______ (automatic)

IPv4 CONFIGURATION
Addresses: <Show>
DNS servers: _______________
Search domains: _______________
□ Require IPv4 addressing for this connection

IPv6 CONFIGURATION
Addresses: <Show>
DNS servers: _______________
Search domains: _______________
□ Require IPv6 addressing for this connection
Configuring Static IP Address
To set up a static IP address instead of DHCP:
- In the connection editor, change IPv4 Configuration from “Automatic” to “Manual”
- Click “Show” next to Addresses
- Add your static IP configuration
Static IP Example
IPv4 CONFIGURATION
Addresses: 192.168.1.100/24
Gateway: 192.168.1.1
DNS servers: 8.8.8.8, 8.8.4.4
Search domains: example.com
Setting Up WiFi Connection
To configure a wireless connection:
- Select “Edit a connection” from the main menu
- Choose “Add” and select “Wi-Fi”
- Enter the network details
WiFi Configuration Example
Profile name: Home-WiFi
Device: wlan0 (wlp2s0)
☑ Automatically connect
☑ Available to all users

WI-FI
SSID: MyHomeNetwork
Mode: Client
BSSID: _______________
Device: wlp2s0 (wlan0)
Cloned MAC address: _______________
MTU: _______ (automatic)

WI-FI SECURITY
Security: WPA & WPA2 Personal
Password: **************
☑ Show password
Activating and Deactivating Connections
The “Activate a connection” menu allows you to enable or disable network connections without editing their configuration.
Connection Status Display
Activate a connection

Ethernet
  Work-Ethernet

Wi-Fi
  Home-WiFi
  * Office-Guest

VPN
  Company-VPN
In this display:
- Active connections show a “Deactivate” button
- Inactive connections show an “Activate” button
- Asterisk (*) indicates the currently connected WiFi network
Advanced Configuration Options
VPN Configuration
nmtui supports various VPN types including OpenVPN, PPTP, and L2TP. To set up a VPN:
- Go to “Edit a connection”
- Select “Add” and choose your VPN type
- Configure the VPN parameters
OpenVPN Example
Profile name: Company-VPN
☑ Automatically connect
☑ Available to all users

VPN
VPN type: OpenVPN
Gateway: vpn.company.com
☑ Set virtual device type
Device type: TUN
☑ Set virtual device name
Device name: tun0

Authentication:
Type: Certificates (TLS)
User Certificate: /path/to/client.crt
CA Certificate: /path/to/ca.crt
Private Key: /path/to/client.key
Bond and Bridge Connections
For advanced networking scenarios, nmtui supports creating bond and bridge connections:
Creating a Network Bond
Profile name: bond0
Device: bond0
☑ Automatically connect

BOND
Slaves: eth0, eth1
Mode: Active backup (active-backup)
Primary: eth0
Link monitoring: MII (recommended)
Monitoring frequency: 100
Hostname Configuration
The hostname setting feature allows you to change your system’s hostname directly from nmtui:
- Select “Set system hostname” from the main menu
- Enter the new hostname
- Press OK to apply changes
Set Hostname

Hostname: mylinuxserver.local

                    <OK>     <Cancel>
Troubleshooting Common Issues
Permission Denied Errors
If you encounter permission issues, ensure your user is in the appropriate groups:
# Add user to network group
sudo usermod -a -G network $USER

# For some distributions, use netdev group
sudo usermod -a -G netdev $USER
NetworkManager Not Running
If nmtui fails to start, check if NetworkManager service is running:
# Check service status
systemctl status NetworkManager

# Start the service if stopped
sudo systemctl start NetworkManager

# Enable service to start on boot
sudo systemctl enable NetworkManager
Interface Not Appearing
If network interfaces don’t appear in nmtui:
- Verify the interface exists:
ip link show - Check if NetworkManager manages the interface:
nmcli device status - Restart NetworkManager:
sudo systemctl restart NetworkManager
nmtui vs Other Network Tools
Comparison with nmcli
| Feature | nmtui | nmcli |
|---|---|---|
| Interface | Text-based menu | Command-line |
| Learning Curve | Easy | Steep |
| Scripting | Not suitable | Excellent |
| Real-time feedback | Good | Limited |
| Advanced features | Most features | All features |
When to Use nmtui
- Interactive configuration: When you need a guided interface
- Server administration: On headless servers without GUI
- Learning: Understanding NetworkManager concepts
- Quick changes: Making temporary network adjustments
Best Practices and Tips
Configuration Best Practices
- Use descriptive names: Name connections clearly (e.g., “Office-WiFi”, “Home-Ethernet”)
- Document settings: Keep notes of custom configurations
- Test connections: Always verify connectivity after changes
- Backup configurations: Save important network profiles
Security Considerations
- WiFi passwords: Use strong passwords for wireless networks
- VPN certificates: Secure VPN credential files properly
- User permissions: Limit network configuration access when necessary
- Connection availability: Consider whether connections should be “Available to all users”
Performance Optimization
# For high-performance networks, consider adjusting MTU
# Ethernet: Usually 1500 (default)
# Jumbo frames: 9000 (for supported networks)

# For WiFi, consider setting specific channels
# Use 'iwlist scan' to check available networks first
Integration with System Services
Systemd Integration
nmtui configurations integrate seamlessly with systemd services:
# View NetworkManager logs
journalctl -u NetworkManager

# Monitor network changes in real-time
journalctl -u NetworkManager -f
Firewall Considerations
When configuring networks through nmtui, remember that firewall rules may need adjustment:
# Check firewall status
sudo ufw status

# Allow connections on new network interfaces
sudo ufw allow in on eth1
Conclusion
The nmtui command provides an excellent balance between the simplicity of graphical network managers and the power of command-line tools. Its intuitive interface makes network configuration accessible while maintaining the flexibility needed for complex networking scenarios. Whether you’re managing a single desktop system or configuring servers in a data center, nmtui offers a reliable and user-friendly approach to NetworkManager configuration.
By mastering nmtui, you’ll be able to efficiently manage network connections, troubleshoot connectivity issues, and maintain robust network configurations across various Linux environments. The tool’s integration with NetworkManager ensures that your configurations are persistent and compatible with other network management utilities in the Linux ecosystem.
Related Posts
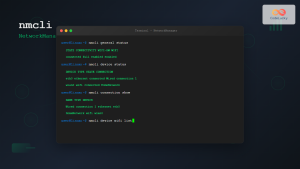
nmcli Command Linux: Complete Guide to NetworkManager Command Line Tool
The nmcli (NetworkManager Command Line Interface) is a powerful command-line tool that allows you to control NetworkManager and configure network...
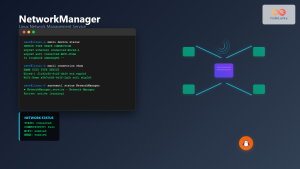
NetworkManager Linux: Complete Guide to Network Management Service
NetworkManager is a powerful network management service that provides automatic network detection and configuration for Linux systems. It simplifies network...
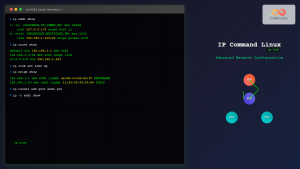
ip Command Linux: Complete Guide to Advanced Network Configuration and Management
The ip command is one of the most powerful and versatile networking tools in Linux, serving as the modern replacement...
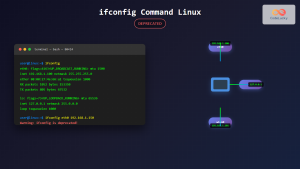
ifconfig Command Linux: Complete Guide to Network Interface Configuration (Deprecated)
The ifconfig (interface configuration) command has been a cornerstone of Linux network administration for decades. While officially deprecated in favor...
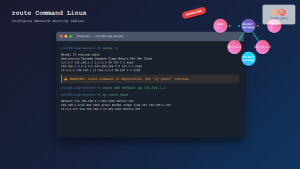
route Command Linux: Configure Network Routing Tables (Deprecated Guide)
The route command in Linux has been a fundamental tool for network administrators to view and manipulate the kernel's IP...

snmpset Command Linux: Complete Guide to Setting SNMP Variables
The snmpset command is a powerful Linux utility that allows network administrators to modify SNMP (Simple Network Management Protocol) variables...
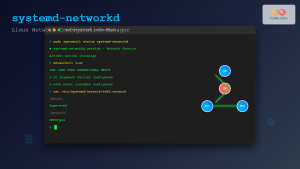
systemd-networkd Linux: Complete Network Configuration Manager Guide
systemd-networkd is a powerful system daemon that manages network configurations on Linux systems. As part of the systemd ecosystem, it...
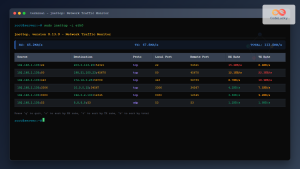
jnettop Command Linux: Monitor Real-Time Network Traffic by Connection
The jnettop command is a powerful Linux network monitoring tool that provides real-time visibility into network traffic organized by individual...
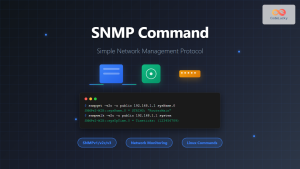
SNMP Command Linux: Complete Guide to Simple Network Management Protocol Configuration and Usage
Introduction to SNMP Command in Linux Simple Network Management Protocol (SNMP) is a fundamental protocol used for monitoring and managing...
netstat Command Linux: Complete Guide to Network Connection Monitoring
The netstat command is one of the most essential network monitoring tools in Linux systems. It provides comprehensive information about...

iwconfig Command Linux: Complete Guide to Wireless Network Configuration
The iwconfig command is a powerful Linux utility that allows you to configure and manage wireless network interfaces from the...
iptraf Command Linux: Complete Interactive Network Monitoring Guide
The iptraf command is a powerful console-based network monitoring utility for Linux systems that provides real-time IP LAN monitoring capabilities....
- What is nmtui?
- Installing nmtui
- Basic nmtui Syntax and Usage
- Navigating the nmtui Interface
- Managing Network Connections
- Activating and Deactivating Connections
- Advanced Configuration Options
- Hostname Configuration
- Troubleshooting Common Issues
- nmtui vs Other Network Tools
- Best Practices and Tips
- Integration with System Services
- Conclusion


