
The nice command in Linux is a powerful system administration tool that allows you to control the priority of processes, determining how much CPU time they receive relative to other processes. Understanding and effectively using the nice command is crucial for system optimization and resource management.
What is the Nice Command?
The nice command modifies the scheduling priority of processes in Linux systems. It assigns a “niceness” value to processes, which influences how the kernel’s scheduler allocates CPU time. The name “nice” comes from the concept of being “nice” to other processes by yielding CPU time when necessary.
Nice Values Range
Nice values range from -20 to +19:
- -20: Highest priority (least nice)
- 0: Default priority
- +19: Lowest priority (most nice)
Important: Lower nice values mean higher priority, while higher nice values mean lower priority.
Nice Command Syntax
nice [OPTIONS] [COMMAND [ARGUMENTS]]Common Options
| Option | Description |
|---|---|
-n VALUE |
Set nice value (default: 10) |
--adjustment=VALUE |
Synonym for -n |
--help |
Display help message |
--version |
Show version information |
Basic Nice Command Examples
1. Running a Command with Default Nice Value
nice sleep 60Output: This runs the sleep command with a nice value of +10 (default increment).
2. Setting Specific Nice Value
nice -n 15 find / -name "*.log" 2>/dev/nullOutput: Executes the find command with nice value +15, giving it lower priority.
3. High Priority Process (Requires Root)
sudo nice -n -10 backup_script.shOutput: Runs backup script with higher priority (nice value -10).
Checking Process Nice Values
You can view process nice values using various commands:
Using ps Command
ps -eo pid,ppid,ni,commSample Output:
  PID  PPID  NI COMMAND
    1     0   0 systemd
    2     0   0 kthreadd
 1234  1000  10 sleep
 1235  1000 -5 important_task
Using top Command
top -o %CPUIn top, the NI column shows the nice value for each process.
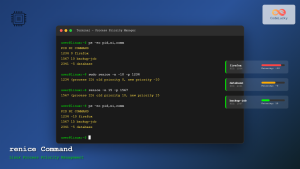
The renice Command
While nice sets priority when starting a process, renice changes the priority of running processes.
Renice Syntax
renice [OPTIONS] PRIORITY PID...Renice Examples
Change Priority by PID
renice 5 1234Output:
1234 (process ID) old priority 0, new priority 5Change Priority for All Processes of a User
renice 10 -u usernameChange Priority by Process Group
renice -5 -g processgroupPractical Use Cases
1. Background Compilation
nice -n 19 make -j4This runs compilation with lowest priority, preventing it from interfering with interactive tasks.
2. Database Backup
nice -n 10 mysqldump database_name > backup.sqlPerforms database backup with reduced priority to maintain system responsiveness.
3. File Compression
nice -n 15 tar czf archive.tar.gz large_directory/Compresses files with low priority to avoid system slowdown.
4. Critical System Process
sudo nice -n -15 critical_monitoring_script.shRuns monitoring script with high priority for system reliability.
Interactive Example: Process Priority Monitoring
Let’s create a practical example to demonstrate nice values in action:
Step 1: Create Test Scripts
# Create CPU-intensive script
cat > cpu_intensive.sh << 'EOF'
#!/bin/bash
while true; do
    echo "Processing..." > /dev/null
done
EOF

chmod +x cpu_intensive.sh
Step 2: Run with Different Priorities
# Terminal 1: High priority process
nice -n -10 ./cpu_intensive.sh &

# Terminal 2: Normal priority process
./cpu_intensive.sh &

# Terminal 3: Low priority process
nice -n 19 ./cpu_intensive.sh &
Step 3: Monitor with htop
htop -d 1You’ll observe different CPU usage patterns based on nice values.
Permission Requirements
Regular Users
- Can only increase nice values (decrease priority)
- Cannot set nice values below 0
- Cannot make processes more important than default
Root User
- Can set any nice value (-20 to +19)
- Can increase or decrease process priority
- Can modify nice values of any process
Best Practices
1. Resource Management
- Use high nice values (+10 to +19) for background tasks
- Reserve low nice values (-20 to -10) for critical processes
- Monitor system load when adjusting priorities
2. System Stability
- Avoid setting too many processes to extreme priorities
- Test priority changes in non-production environments
- Document priority assignments for system maintenance
3. Performance Optimization
- Use nice for batch jobs and data processing
- Prioritize interactive applications over background tasks
- Consider system resources when setting priorities
Common Scenarios and Solutions
CPU-Bound Tasks
# Video encoding with low priority
nice -n 18 ffmpeg -i input.mp4 output.mp4

# Data analysis with medium-low priority
nice -n 12 python analyze_data.py
I/O Intensive Operations
# File synchronization with low priority
nice -n 15 rsync -av source/ destination/

# Log rotation with minimal impact
nice -n 19 logrotate /etc/logrotate.conf
Monitoring and Troubleshooting
Check System Load
uptime
# Output: 10:30:01 up 5 days, 2:15, 3 users, load average: 1.25, 1.50, 1.75
Identify High Priority Processes
ps -eo pid,ppid,ni,comm --sort=-ni | head -20Monitor CPU Usage by Priority
top -o %CPU -n 1 | grep -E "PID|nice"Advanced Nice Command Usage
Combining with Other Commands
# Pipeline with nice
nice -n 10 grep pattern largefile.txt | nice -n 15 sort | uniq

# Using with nohup for background processing
nohup nice -n 19 long_running_script.sh > output.log 2>&1 &
Scripting with Nice
#!/bin/bash
# Adaptive priority script

if [ $(uptime | cut -d',' -f4 | cut -d':' -f2 | cut -d' ' -f2 | cut -d'.' -f1) -gt 2 ]; then
    NICE_VAL=19
else
    NICE_VAL=10
fi

nice -n $NICE_VAL "$@"
Limitations and Considerations
- Nice values affect CPU scheduling only, not I/O or memory priority
- Modern multi-core systems may show different behavior than single-core systems
- System load significantly impacts the effectiveness of nice values
- Real-time processes always have higher priority than nice processes
Conclusion
The nice command is an essential tool for Linux system administrators and power users. By understanding how to control process priorities, you can optimize system performance, ensure critical processes receive adequate resources, and maintain system responsiveness during heavy workloads.
Regular monitoring and thoughtful application of nice values can significantly improve your Linux system’s efficiency and user experience. Remember to start with conservative adjustments and monitor system behavior before implementing major priority changes in production environments.
Related Posts
renice Command Linux: Complete Guide to Changing Process Priority
The renice command in Linux is a powerful system administration tool that allows you to modify the scheduling priority of...

Priority Scheduling Algorithm: Complete Implementation Guide with Examples
What is Priority Scheduling Algorithm? Priority scheduling is a CPU scheduling algorithm where each process is assigned a priority value,...

Completely Fair Scheduler: Linux CFS Algorithm Deep Dive
The Linux Completely Fair Scheduler (CFS) revolutionized process scheduling in the Linux kernel when it was introduced in version 2.6.23....

top Command Linux: Complete Guide to Real-Time Process Monitoring
The top command is one of the most essential tools in a Linux system administrator's arsenal. It provides real-time information...

Process Scheduling in Operating System: Algorithms, Types & Implementation Guide
Process scheduling is one of the most critical components of an operating system that determines how the CPU time is...

taskset Command Linux: Master CPU Affinity for Optimal Process Performance
The taskset command is a powerful Linux utility that allows system administrators and developers to control which CPU cores or...
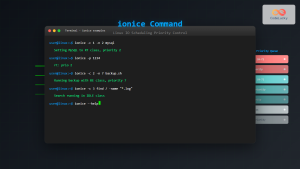
ionice Command Linux: Master IO Scheduling Priority for Optimal System Performance
The ionice command is a powerful Linux utility that allows system administrators and developers to control the Input/Output (IO) scheduling...

Multilevel Queue Scheduling: Multiple Priority Levels in Operating Systems
Introduction to Multilevel Queue Scheduling Multilevel queue scheduling is a sophisticated CPU scheduling algorithm used in operating systems to manage...

Fair Share Scheduling: Resource Allocation by User Groups in Operating Systems
Introduction to Fair Share Scheduling Fair Share Scheduling (FSS) is a sophisticated CPU scheduling algorithm designed to allocate computing resources...
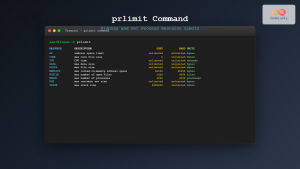
prlimit Command Linux: Complete Guide to Display and Set Process Resource Limits
The prlimit command is a powerful Linux utility that allows system administrators and users to view and modify resource limits...

Shortest Job First Scheduling: SJF Algorithm Explained with Examples and Implementation
What is Shortest Job First (SJF) Scheduling? Shortest Job First (SJF) scheduling is a CPU scheduling algorithm that selects the...

Lottery Scheduling: Fair CPU Allocation Through Proportional Sharing
Introduction to Lottery Scheduling Lottery scheduling is a probabilistic CPU scheduling algorithm that provides proportional share resource allocation by assigning...
- What is the Nice Command?
- Nice Command Syntax
- Basic Nice Command Examples
- Checking Process Nice Values
- The renice Command
- Practical Use Cases
- Interactive Example: Process Priority Monitoring
- Permission Requirements
- Best Practices
- Common Scenarios and Solutions
- Monitoring and Troubleshooting
- Advanced Nice Command Usage
- Limitations and Considerations
- Conclusion


