
The mount command is one of the most fundamental tools in Linux system administration, allowing you to attach filesystems from various storage devices to your directory tree. Whether you’re working with hard drives, USB devices, network shares, or virtual filesystems, understanding the mount command is essential for effective Linux system management.
What is the mount Command?
The mount command in Linux is used to attach a filesystem from a storage device to a specific directory (called a mount point) in your system’s directory tree. This process makes the files and directories on the storage device accessible through the Linux filesystem hierarchy.
When you mount a filesystem, you’re essentially telling the operating system where to find the data on a particular device and where users should access it within the directory structure.
Basic Syntax and Usage
The basic syntax of the mount command follows this pattern:
mount [options] device mountpoint
mount [options] device
mount [options] mountpoint
Simple Mount Example
Let’s start with a basic example of mounting a USB drive:
sudo mount /dev/sdb1 /mnt/usbThis command mounts the first partition of the second SCSI/SATA/USB device (/dev/sdb1) to the directory /mnt/usb.
Viewing Currently Mounted Filesystems
To see all currently mounted filesystems, simply run the mount command without any arguments:
mountSample output:
/dev/sda1 on / type ext4 (rw,relatime,errors=remount-ro)
/dev/sda2 on /home type ext4 (rw,relatime)
tmpfs on /tmp type tmpfs (rw,nosuid,nodev,noexec)
/dev/sdb1 on /mnt/usb type vfat (rw,relatime,fmask=0022,dmask=0022,codepage=437,iocharset=iso8859-1,shortname=mixed,errors=remount-ro)
For a more readable format, you can use:
mount | column -tCommon Mount Options
Mount options control how the filesystem behaves after mounting. Here are the most commonly used options:
Access Control Options
- rw: Mount read-write (default)
- ro: Mount read-only
- exec: Allow execution of binaries (default)
- noexec: Prevent execution of binaries
- suid: Allow set-user-ID and set-group-ID bits (default)
- nosuid: Ignore set-user-ID and set-group-ID bits
Example with Options
sudo mount -o ro,noexec,nosuid /dev/sdb1 /mnt/secure-usbThis mounts the USB drive with enhanced security: read-only, no execution of binaries, and ignoring SUID bits.
Filesystem Types
Linux supports numerous filesystem types. You can specify the filesystem type using the -t option:
sudo mount -t ext4 /dev/sdb1 /mnt/data
sudo mount -t ntfs /dev/sdc1 /mnt/windows
sudo mount -t vfat /dev/sdd1 /mnt/fat32
Common Filesystem Types
- ext4: Default Linux filesystem
- ext3/ext2: Older Linux filesystems
- ntfs: Windows NTFS filesystem
- vfat: FAT32 filesystem
- xfs: High-performance filesystem
- btrfs: Modern copy-on-write filesystem
Mounting Different Types of Storage
Mounting USB Drives
First, identify your USB device:
lsblkSample output:
NAME   MAJ:MIN RM   SIZE RO TYPE MOUNTPOINT
sda      8:0    0 465.8G  0 disk
├─sda1   8:1    0   512M  0 part /boot/efi
├─sda2   8:2    0     1G  0 part /boot
└─sda3   8:3    0 464.3G  0 part /
sdb      8:16   1  14.9G  0 disk
└─sdb1   8:17   1  14.9G  0 part
Mount the USB drive:
sudo mkdir -p /mnt/usb
sudo mount /dev/sdb1 /mnt/usb
Mounting ISO Files
You can mount ISO files as loop devices:
sudo mount -o loop /path/to/image.iso /mnt/isoFor read-only mounting:
sudo mount -o loop,ro /path/to/image.iso /mnt/isoMounting Network Shares
NFS Shares
sudo mount -t nfs 192.168.1.100:/shared/folder /mnt/nfsSMB/CIFS Shares
sudo mount -t cifs //192.168.1.100/shared /mnt/smb -o username=user,password=passFor security, use a credentials file:
sudo mount -t cifs //192.168.1.100/shared /mnt/smb -o credentials=/etc/cifs-credentialsAdvanced Mount Techniques
Bind Mounts
Bind mounts allow you to mount a directory to another location:
sudo mount --bind /original/path /new/pathExample:
sudo mount --bind /home/user/documents /mnt/docsTemporary Filesystems (tmpfs)
Create a RAM-based filesystem:
sudo mount -t tmpfs -o size=1G tmpfs /mnt/ramdiskMounting with Specific User Permissions
For NTFS and FAT filesystems, you can specify user and group ownership:
sudo mount -t ntfs /dev/sdb1 /mnt/windows -o uid=1000,gid=1000,umask=022Using /etc/fstab for Permanent Mounts
The /etc/fstab file contains information about filesystems that should be mounted automatically at boot time.
fstab Format
Each line in /etc/fstab contains six fields:
device mountpoint filesystem options dump passExample fstab Entries
# Static filesystem table
UUID=12345678-1234-1234-1234-123456789012 / ext4 defaults 0 1
UUID=87654321-4321-4321-4321-210987654321 /home ext4 defaults 0 2
/dev/sdb1 /mnt/backup ext4 defaults,noauto 0 0
tmpfs /tmp tmpfs defaults,size=2G 0 0
Testing fstab Entries
Before rebooting, test your fstab entries:
sudo mount -aUnmounting Filesystems
To unmount a filesystem, use the umount command:
sudo umount /mnt/usbYou can unmount by device or mount point:
sudo umount /dev/sdb1
sudo umount /mnt/usb
Forcing Unmount
If a filesystem is busy, you can force unmount (use with caution):
sudo umount -f /mnt/usbFor network filesystems, use lazy unmount:
sudo umount -l /mnt/nfsTroubleshooting Common Issues
Device or Resource Busy
When you can’t unmount because the filesystem is busy:
# Find processes using the mount point
sudo lsof /mnt/usb
# Or use fuser
sudo fuser -v /mnt/usb
Finding Block Device Information
Use these commands to identify devices:
# List all block devices
lsblk

# Show device UUIDs
sudo blkid

# Show partition information
sudo fdisk -l
Permission Issues
For permission problems with mounted filesystems:
# Mount with specific permissions
sudo mount -o uid=1000,gid=1000,umask=002 /dev/sdb1 /mnt/usb

# Change ownership after mounting (for some filesystems)
sudo chown user:group /mnt/usb
Security Considerations
Secure Mount Options
For removable media, consider these security options:
sudo mount -o ro,noexec,nosuid,nodev /dev/sdb1 /mnt/secureUser Mounts
Allow users to mount specific devices by adding the user option in /etc/fstab:
/dev/sdb1 /mnt/usb vfat user,noauto,rw 0 0Then users can mount with:
mount /mnt/usbPerformance Optimization
Mount Options for Performance
For better performance, consider these options:
# For SSD drives
sudo mount -o defaults,noatime,discard /dev/sdb1 /mnt/ssd

# For network filesystems
sudo mount -t nfs -o rsize=8192,wsize=8192,timeo=14 server:/path /mnt/nfs
Monitoring and Maintenance
Checking Mount Status
Monitor mount points and usage:
# Show disk usage for mounted filesystems
df -h

# Show mount points in tree format
findmnt

# Monitor filesystem activity
sudo iotop
Best Practices
- Always create mount points before mounting:
sudo mkdir -p /mnt/device-name - Use UUIDs in fstab for reliability:
UUID=12345678-1234-1234-1234-123456789012 /home ext4 defaults 0 2 - Test fstab changes before rebooting:
sudo mount -a - Use appropriate security options for different use cases
- Keep mount points organized under /mnt or /media
- Always unmount properly before removing devices
Conclusion
The mount command is a powerful and essential tool for Linux system administration. From basic filesystem mounting to complex network shares and security configurations, mastering the mount command enables you to effectively manage storage resources in your Linux environment.
Whether you’re mounting USB drives for data transfer, setting up network shares for collaboration, or configuring automatic mounts for system boot, the mount command provides the flexibility and control needed for modern Linux systems. Remember to always follow security best practices and test your configurations thoroughly before implementing them in production environments.
With the knowledge and examples provided in this guide, you’re well-equipped to handle various mounting scenarios and troubleshoot common issues that may arise in your Linux journey.
Related Posts
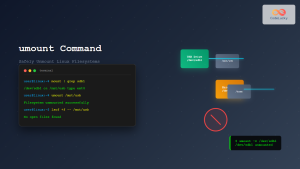
umount Command Linux: Complete Guide to Safely Unmounting Filesystems
The umount command is an essential Linux utility that allows you to safely disconnect filesystems from the directory tree. Whether...
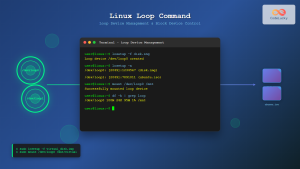
loop Command Linux: Complete Guide to Loop Device Management and Block Device Control
The loop command in Linux is a powerful utility for managing loop devices, which are virtual block devices that allow...
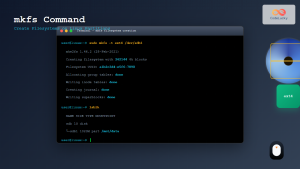
mkfs Command Linux: Complete Guide to Creating Filesystems on Partitions
The mkfs command in Linux is a fundamental tool for creating filesystems on disk partitions. Whether you're setting up a...

File System Types: FAT32, NTFS, ext4 and Modern Linux Filesystems Explained
Understanding File Systems: The Foundation of Data Storage A file system is the method and data structure that an operating...

Directory Structure: Single-level, Two-level, and Tree Structure in Operating Systems
Understanding Directory Structures in Operating Systems Directory structures are fundamental components of file systems that organize and manage files in...
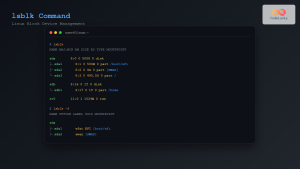
lsblk Command Linux: Complete Guide to List and Manage Block Devices
The lsblk command is an essential Linux utility that displays information about block devices in a tree-like format. Whether you're...

xfs_info Command Linux: Complete Guide to Display XFS Filesystem Information
The xfs_info command is a powerful utility in Linux systems that provides comprehensive information about XFS filesystems. This command is...
devfs Linux: Complete Guide to Device Filesystem Management
The Device Filesystem (devfs) represents a revolutionary approach to device management in Linux systems, providing dynamic creation and removal of...
losetup Command Linux: Complete Guide to Setup and Manage Loop Devices
The losetup command is a powerful Linux utility that allows you to associate loop devices with regular files, enabling you...

ls Command in Linux: Complete Guide to List Files and Directories with Examples
The ls command is one of the most fundamental and frequently used commands in Linux and Unix-like operating systems. It...

dumpe2fs Command Linux: Complete Guide to Display Ext2/3/4 Filesystem Information
The dumpe2fs command is a powerful Linux utility that displays detailed information about ext2, ext3, and ext4 filesystems. This essential...
cd Command Linux: Complete Guide to Directory Navigation in Terminal
The cd command is one of the most fundamental and frequently used commands in Linux and Unix-like operating systems. Standing...


