
The mdadm (Multiple Device Administrator) command is a powerful Linux utility for managing software RAID arrays. It provides comprehensive functionality for creating, assembling, monitoring, and managing RAID configurations without requiring specialized hardware controllers.
Understanding mdadm and Software RAID
Software RAID uses the operating system and CPU to manage redundancy and performance across multiple storage devices. The mdadm command serves as the primary interface for Linux’s MD (Multiple Device) driver, enabling administrators to implement various RAID levels including RAID 0, 1, 4, 5, 6, and 10.
Installation and Prerequisites
Most Linux distributions include mdadm by default. If not installed, use your package manager:
# Ubuntu/Debian
sudo apt update && sudo apt install mdadm

# CentOS/RHEL/Fedora
sudo yum install mdadm
# or
sudo dnf install mdadm
Basic mdadm Syntax
The general syntax for mdadm follows this pattern:
mdadm [mode] [options] <device> [component-devices...]Common modes include:
--create– Create a new RAID array--assemble– Assemble existing RAID components--manage– Manage existing arrays--monitor– Monitor RAID arrays--detail– Display array information
Creating RAID Arrays
RAID 0 (Striping)
RAID 0 combines multiple drives for improved performance but offers no redundancy:
sudo mdadm --create /dev/md0 --level=0 --raid-devices=2 /dev/sdb /dev/sdcExpected Output:
mdadm: Defaulting to version 1.2 metadata
mdadm: array /dev/md0 started.
RAID 1 (Mirroring)
RAID 1 mirrors data across drives for redundancy:
sudo mdadm --create /dev/md1 --level=1 --raid-devices=2 /dev/sdd /dev/sdeExpected Output:
mdadm: Note: this array has metadata at the start of the device.
mdadm: largest drive (/dev/sdd) exceeds size (1953383424K) by more than 1%
mdadm: continuing anyway.
mdadm: Defaulting to version 1.2 metadata
mdadm: array /dev/md1 started.
RAID 5 (Striping with Parity)
RAID 5 requires at least three drives and provides both performance and redundancy:
sudo mdadm --create /dev/md2 --level=5 --raid-devices=3 /dev/sdf /dev/sdg /dev/sdhExpected Output:
mdadm: Defaulting to version 1.2 metadata
mdadm: array /dev/md2 started.
RAID 10 (Nested RAID)
RAID 10 combines mirroring and striping, requiring at least four drives:
sudo mdadm --create /dev/md3 --level=10 --raid-devices=4 /dev/sdi /dev/sdj /dev/sdk /dev/sdlManaging Existing RAID Arrays
Viewing Array Status
Check the status of all RAID arrays:
cat /proc/mdstatSample Output:
Personalities : [raid1] [raid6] [raid5] [raid4] [raid10]
md1 : active raid1 sde[1] sdd[0]
      1953383424 blocks super 1.2 [2/2] [UU]

md0 : active raid0 sdc[1] sdb[0]
      3906766848 blocks super 1.2 512k chunks

unused devices: <none>
Detailed Array Information
Get comprehensive information about a specific array:
sudo mdadm --detail /dev/md1Sample Output:
/dev/md1:
           Version : 1.2
     Creation Time : Mon Aug 25 10:15:32 2025
        Raid Level : raid1
        Array Size : 1953383424 (1.8 TiB 2.00 TB)
     Used Dev Size : 1953383424 (1.8 TiB 2.00 TB)
      Raid Devices : 2
     Total Devices : 2
       Persistence : Superblock is persistent

       Update Time : Mon Aug 25 10:20:15 2025
             State : clean
    Active Devices : 2
   Working Devices : 2
    Failed Devices : 0
     Spare Devices : 0

Consistency Policy : resync

              Name : server:1
              UUID : 12345678:90abcdef:12345678:90abcdef
            Events : 17

    Number   Major   Minor   RaidDevice State
       0       8       48        0      active sync   /dev/sdd
       1       8       64        1      active sync   /dev/sde
Adding Spare Drives
Add a spare drive to an existing array:
sudo mdadm --manage /dev/md1 --add /dev/sdzExpected Output:
mdadm: added /dev/sdzRemoving Failed Drives
Mark a drive as failed and remove it:
sudo mdadm --manage /dev/md1 --fail /dev/sde --remove /dev/sdeExpected Output:
mdadm: set /dev/sde faulty in /dev/md1
mdadm: hot removed /dev/sde from /dev/md1
Array Assembly and Auto-Start
Manual Assembly
Assemble an existing RAID array:
sudo mdadm --assemble /dev/md1 /dev/sdd /dev/sdeAuto-Assembly Configuration
Create a configuration file for automatic assembly:
sudo mdadm --detail --scan >> /etc/mdadm/mdadm.confSample Configuration Entry:
ARRAY /dev/md1 metadata=1.2 name=server:1 UUID=12345678:90abcdef:12345678:90abcdefMonitoring and Maintenance
Real-time Monitoring
Monitor arrays for events and send email notifications:
sudo mdadm --monitor [email protected] --delay=1800 /dev/md1Checking Array Health
Perform a consistency check on a RAID array:
echo check > /sys/block/md1/md/sync_actionMonitor the progress:
cat /sys/block/md1/md/sync_completedRepair Operations
Initiate a repair operation:
echo repair > /sys/block/md1/md/sync_actionAdvanced mdadm Operations
Growing Arrays
Add devices to expand an existing RAID 5 array:
sudo mdadm --grow /dev/md2 --raid-devices=4 --add /dev/sdnReshaping Arrays
Change the chunk size of a RAID array:
sudo mdadm --grow /dev/md0 --chunk=128Converting RAID Levels
Convert RAID 1 to RAID 5 (requires adding devices first):
sudo mdadm --grow /dev/md1 --level=5 --raid-devices=3 --add /dev/sdxStopping and Removing Arrays
Stopping an Array
Unmount and stop a RAID array:
sudo umount /dev/md1
sudo mdadm --stop /dev/md1
Complete Removal
Zero the superblock to completely remove RAID metadata:
sudo mdadm --zero-superblock /dev/sdd /dev/sdeTroubleshooting Common Issues
Recovering from Boot Issues
If the system fails to boot due to RAID issues, use a rescue environment:
# Scan for arrays
sudo mdadm --assemble --scan

# Force assembly if degraded
sudo mdadm --assemble --force /dev/md1 /dev/sdd
Handling Dirty Arrays
Force assembly of a “dirty” array that wasn’t cleanly unmounted:
sudo mdadm --assemble --force /dev/md1Replacing Failed Drives
Complete process for replacing a failed drive in RAID 1:
# Mark as failed and remove
sudo mdadm --manage /dev/md1 --fail /dev/sde --remove /dev/sde

# Add replacement drive
sudo mdadm --manage /dev/md1 --add /dev/sdx

# Monitor rebuild progress
watch cat /proc/mdstat
Performance Optimization
Chunk Size Considerations
Choose appropriate chunk sizes based on usage patterns:
- 64KB-128KB for database workloads
- 256KB-512KB for general file storage
- 1MB+ for large sequential files
Read-ahead Settings
Optimize read-ahead for better performance:
sudo blockdev --setra 4096 /dev/md1Best Practices and Security
Regular Monitoring
Set up automated monitoring with cron jobs:
# Add to crontab
0 2 * * 0 /sbin/mdadm --monitor --oneshot --scan
Backup Configuration
Always maintain backups of your mdadm configuration:
sudo cp /etc/mdadm/mdadm.conf /etc/mdadm/mdadm.conf.backupTesting Procedures
Regular testing ensures RAID reliability:
# Simulate drive failure
sudo mdadm --manage /dev/md1 --set-faulty /dev/sde

# Verify array continues operating
df -h /mount/point

# Replace and verify rebuild
sudo mdadm --manage /dev/md1 --remove /dev/sde --add /dev/sdx
Integration with File Systems
Creating File Systems
Format RAID arrays with appropriate file systems:
# For general use
sudo mkfs.ext4 /dev/md1

# For high-performance applications
sudo mkfs.xfs /dev/md1
Mount Configuration
Add RAID arrays to /etc/fstab for automatic mounting:
/dev/md1 /data ext4 defaults,noatime 0 2The mdadm command provides robust software RAID functionality for Linux systems, offering enterprise-level storage management capabilities. Regular monitoring, proper configuration, and understanding of RAID principles ensure reliable data protection and optimal performance. Whether implementing simple mirroring or complex multi-level arrays, mdadm delivers the tools necessary for comprehensive storage management in Linux environments.
Related Posts

mdev Command Linux: Complete Guide to Minimal Device Manager Configuration
The mdev command is a lightweight device manager for Linux systems, particularly popular in embedded environments and minimal distributions. As...
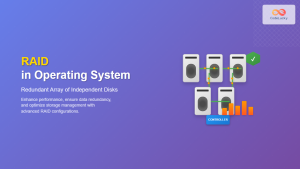
RAID in Operating System: Complete Guide to Redundant Array of Independent Disks
RAID (Redundant Array of Independent Disks) is a fundamental storage technology that combines multiple physical disk drives into a single...

udevadm Command Linux: Complete Guide to Device Management and Udev Administration
The udevadm command is a powerful administrative tool in Linux systems that manages the udev device manager. It serves as...
udev Command Linux: Complete Guide to Dynamic Device Management
The udev (userspace device manager) is a crucial component of modern Linux systems that handles dynamic device management. Unlike traditional...
pvcreate Command Linux: Complete Guide to Creating Physical Volumes for LVM
The pvcreate command is a fundamental tool in Linux Logical Volume Management (LVM) that initializes storage devices as physical volumes....
lsblk Command Linux: Complete Guide to List and Manage Block Devices
The lsblk command is an essential Linux utility that displays information about block devices in a tree-like format. Whether you're...
lvm Command Linux: Complete Guide to Logical Volume Manager Operations
The Logical Volume Manager (LVM) is a powerful disk management tool in Linux that provides flexible storage management by abstracting...
pvdisplay Command Linux: Complete Guide to Physical Volume Information Display
The pvdisplay command is an essential tool in Linux for displaying detailed information about Physical Volumes (PVs) in Logical Volume...
kpartx Command Linux: Create and Manage Partition Maps with Complete Examples
The kpartx command is a powerful Linux utility that creates device maps from partition tables, enabling you to access partitions...
Excel MDETERM Function: Complete Matrix Determinant Formula Guide
What is the Excel MDETERM Function? The MDETERM function in Microsoft Excel calculates the determinant of a square matrix. This...
vgdisplay Command Linux: Complete Guide to Display Volume Group Information
The vgdisplay command is an essential tool in Linux systems for displaying detailed information about Volume Groups (VGs) in Logical...
parted Command Linux: Complete Guide to Disk Partition Management
The parted command is a powerful disk partition manipulation program in Linux that allows you to create, resize, move, and...


