
The Logical Volume Manager (LVM) is a powerful disk management tool in Linux that provides flexible storage management by abstracting physical storage devices into logical volumes. Unlike traditional partitioning, LVM allows dynamic resizing, snapshotting, and advanced storage operations without downtime.
What is LVM and Why Use It?
LVM creates a layer of abstraction between your operating system and physical storage devices. It combines multiple physical volumes (PVs) into volume groups (VGs), which are then divided into logical volumes (LVs). This approach offers several advantages:
- Dynamic Resizing: Expand or shrink volumes without unmounting
- Snapshots: Create point-in-time copies for backups
- Storage Pooling: Combine multiple drives into single logical units
- Striping and Mirroring: Improve performance and redundancy
- Easy Migration: Move data between physical devices seamlessly
LVM Architecture Overview
Understanding LVM’s three-tier architecture is crucial for effective management:
- Physical Volume (PV): Raw storage devices or partitions
- Volume Group (VG): Collection of physical volumes
- Logical Volume (LV): Virtual partitions created from volume groups
Essential LVM Commands
Physical Volume Management
Creating Physical Volumes
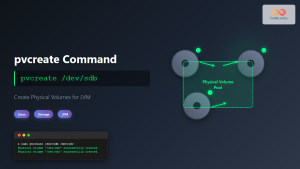
Before using storage devices with LVM, you must initialize them as physical volumes:
# Initialize a disk as physical volume
sudo pvcreate /dev/sdb1

# Initialize multiple disks
sudo pvcreate /dev/sdb1 /dev/sdc1 /dev/sdd1
Example Output:
Physical volume "/dev/sdb1" successfully created.
Physical volume "/dev/sdc1" successfully created.
Physical volume "/dev/sdd1" successfully created.
Viewing Physical Volume Information
# Display all physical volumes
sudo pvdisplay
# Show summary of physical volumes
sudo pvs
# Detailed scan of physical volumes
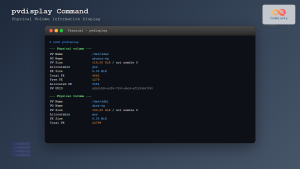
sudo pvscanSample pvdisplay Output:
--- Physical volume ---
PV Name               /dev/sdb1
VG Name               my_vg
PV Size               1.82 TiB / not usable 3.00 MiB
Allocatable           yes
PE Size               4.00 MiB
Total PE              476932
Free PE               238466
Allocated PE          238466
PV UUID               k5H7Vm-pQP6-Af6D-5i0B-85CQ-cVF6-MlOJ21
Volume Group Management
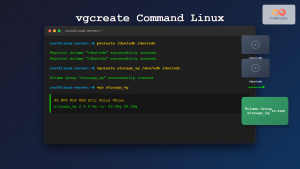
Creating Volume Groups
Volume groups combine one or more physical volumes into a storage pool:
# Create volume group with single PV
sudo vgcreate my_vg /dev/sdb1

# Create volume group with multiple PVs
sudo vgcreate my_vg /dev/sdb1 /dev/sdc1

# Create VG with specific extent size
sudo vgcreate -s 8M my_vg /dev/sdb1
Extending Volume Groups
# Add physical volume to existing VG
sudo vgextend my_vg /dev/sdd1

# Remove PV from VG (must be empty)
sudo vgreduce my_vg /dev/sdd1
Volume Group Information
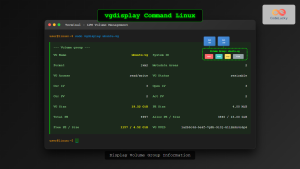
# Display detailed VG information
sudo vgdisplay my_vg

# Show VG summary
sudo vgs

# Scan for volume groups
sudo vgscan
Sample vgs Output:
VG    #PV #LV #SN Attr   VSize   VFree
my_vg   2   3   0 wz--n- <1.82t <930.00g
Logical Volume Management
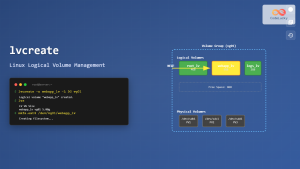
Creating Logical Volumes
Logical volumes are the final layer where you create filesystems:
# Create LV with specific size
sudo lvcreate -L 10G -n my_lv my_vg

# Create LV using percentage of VG
sudo lvcreate -l 50%VG -n data_lv my_vg

# Create LV using all free space
sudo lvcreate -l 100%FREE -n backup_lv my_vg

# Create striped LV for performance
sudo lvcreate -L 20G -i 2 -n striped_lv my_vg
Command Breakdown:
-L: Size in bytes (K, M, G, T suffixes)-l: Size in logical extents or percentages-n: Name of the logical volume-i: Number of stripes
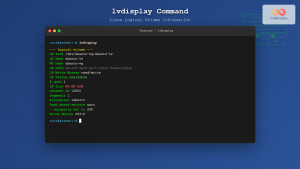
Logical Volume Information
# Display detailed LV information
sudo lvdisplay /dev/my_vg/my_lv

# Show LV summary
sudo lvs

# Scan for logical volumes
sudo lvscan
Sample lvs Output:
LV        VG    Attr       LSize   Pool Origin Data%  Meta%  Move Log Cpy%Sync Convert
my_lv     my_vg -wi-ao---- 10.00g
data_lv   my_vg -wi-a----- 465.63g
backup_lv my_vg -wi-a----- 465.63g
Advanced LVM Operations
Resizing Logical Volumes
One of LVM’s most powerful features is dynamic resizing:
Extending Logical Volumes
# Extend LV by 5GB
sudo lvextend -L +5G /dev/my_vg/my_lv

# Extend LV to 20GB total
sudo lvextend -L 20G /dev/my_vg/my_lv

# Extend and resize filesystem simultaneously
sudo lvextend -L +5G -r /dev/my_vg/my_lv
Shrinking Logical Volumes
⚠️ Warning: Always backup data before shrinking volumes. Shrinking can cause data loss if not done properly.
# First, unmount the filesystem
sudo umount /dev/my_vg/my_lv

# Check filesystem
sudo e2fsck -f /dev/my_vg/my_lv

# Shrink filesystem first
sudo resize2fs /dev/my_vg/my_lv 8G

# Then shrink the LV
sudo lvreduce -L 8G /dev/my_vg/my_lv

# Remount
sudo mount /dev/my_vg/my_lv /mnt/my_mount
LVM Snapshots
Snapshots create point-in-time copies of logical volumes, perfect for backups or testing:
# Create snapshot (10% of original LV size)
sudo lvcreate -L 2G -s -n my_lv_snapshot /dev/my_vg/my_lv

# Create snapshot with specific size
sudo lvcreate -L 5G -s -n backup_snapshot /dev/my_vg/data_lv

# Mount snapshot for backup
sudo mkdir /mnt/snapshot
sudo mount /dev/my_vg/my_lv_snapshot /mnt/snapshot
Managing Snapshots
# View snapshot information
sudo lvs -o +snap_percent

# Remove snapshot
sudo lvremove /dev/my_vg/my_lv_snapshot

# Merge snapshot back to origin
sudo lvconvert --merge /dev/my_vg/my_lv_snapshot
Complete LVM Setup Example
Here’s a comprehensive example showing the complete LVM setup process:
# Step 1: Prepare disks
sudo fdisk /dev/sdb
# Create partition and set type to 'Linux LVM' (8e)

# Step 2: Create physical volumes
sudo pvcreate /dev/sdb1 /dev/sdc1

# Step 3: Create volume group
sudo vgcreate production_vg /dev/sdb1 /dev/sdc1

# Step 4: Create logical volumes
sudo lvcreate -L 50G -n web_lv production_vg
sudo lvcreate -L 30G -n db_lv production_vg
sudo lvcreate -l 100%FREE -n logs_lv production_vg

# Step 5: Create filesystems
sudo mkfs.ext4 /dev/production_vg/web_lv
sudo mkfs.ext4 /dev/production_vg/db_lv
sudo mkfs.ext4 /dev/production_vg/logs_lv

# Step 6: Mount filesystems
sudo mkdir -p /var/www /var/lib/mysql /var/log/apps
sudo mount /dev/production_vg/web_lv /var/www
sudo mount /dev/production_vg/db_lv /var/lib/mysql
sudo mount /dev/production_vg/logs_lv /var/log/apps
LVM Troubleshooting
Common Issues and Solutions
LV Won’t Activate
# Manually activate logical volume
sudo lvchange -ay /dev/my_vg/my_lv

# Activate all LVs in VG
sudo vgchange -ay my_vg

# Check LVM configuration
sudo lvmdiskscan
Missing Physical Volume
# Display missing PVs
sudo vgdisplay -v my_vg

# Remove missing PV (if data is backed up)
sudo vgreduce --removemissing my_vg

# Force removal if necessary
sudo vgreduce --removemissing --force my_vg
Recovery Operations
# Backup LVM metadata
sudo vgcfgbackup

# Restore from backup
sudo vgcfgrestore my_vg

# Scan and rebuild cache
sudo pvscan --cache
sudo vgscan --mknodes
Performance Optimization
Striping for Performance
# Create striped LV across multiple PVs
sudo lvcreate -L 100G -i 3 -I 64k -n fast_lv my_vg

# Parameters:
# -i 3: Stripe across 3 devices
# -I 64k: 64KB stripe size
Monitoring LVM Performance
# Monitor I/O statistics
sudo iostat -x 1

# LVM-specific monitoring
sudo dmsetup info
sudo dmsetup status
Best Practices
Planning and Design
- Naming Convention: Use descriptive names for VGs and LVs
- Extent Size: Use larger extent sizes for better performance with large volumes
- Reserve Space: Keep 15-20% free space in VGs for snapshots and growth
- Backup Strategy: Regular LVM metadata backups are crucial
Monitoring Commands
# Check system-wide LVM status
sudo lvs -a -o +devices
sudo vgs -o +pv_count,lv_count
sudo pvs -o +pv_used,pv_free

# Monitor space usage
df -h /dev/mapper/*
Conclusion
LVM provides tremendous flexibility for Linux storage management. Its layered approach allows for dynamic operations that would be impossible with traditional partitioning. Key benefits include easy resizing, snapshot capabilities, and the ability to span multiple physical devices.
Start with simple configurations and gradually explore advanced features like striping, mirroring, and thin provisioning. Always maintain regular backups of both your data and LVM metadata to ensure quick recovery from any issues.
The commands covered in this guide form the foundation of LVM administration. Practice these operations in a test environment before implementing them in production systems, and always follow the principle of backing up critical data before making structural changes to your storage layout.
Related Posts

Storage Virtualization: Complete Guide to Logical Volume Management in Linux
Storage virtualization through Logical Volume Management (LVM) represents one of the most powerful features in modern Linux systems, providing administrators...
lvcreate Command Linux: Complete Guide to Creating Logical Volumes with Examples
The lvcreate command is a fundamental tool in Linux Logical Volume Management (LVM) that allows you to create logical volumes...
vgcreate Command Linux: Complete Guide to Volume Group Creation
The vgcreate command is a fundamental tool in Linux Logical Volume Manager (LVM) that allows system administrators to create volume...
pvcreate Command Linux: Complete Guide to Creating Physical Volumes for LVM
The pvcreate command is a fundamental tool in Linux Logical Volume Management (LVM) that initializes storage devices as physical volumes....
vgdisplay Command Linux: Complete Guide to Display Volume Group Information
The vgdisplay command is an essential tool in Linux systems for displaying detailed information about Volume Groups (VGs) in Logical...
pvdisplay Command Linux: Complete Guide to Physical Volume Information Display
The pvdisplay command is an essential tool in Linux for displaying detailed information about Physical Volumes (PVs) in Logical Volume...
lvdisplay Command Linux: Complete Guide to Display Logical Volume Information
The lvdisplay command is an essential tool in Linux for displaying detailed information about logical volumes (LVs) in Logical Volume...
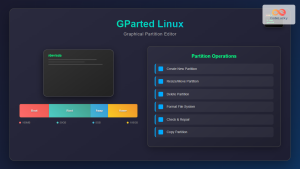
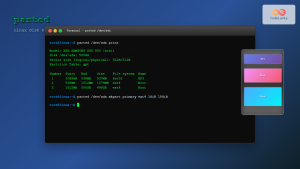
gparted Command Linux: Complete Guide to Graphical Partition Management
The gparted command in Linux provides access to one of the most powerful and user-friendly graphical partition editors available for...
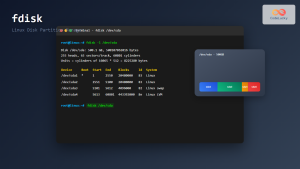
fdisk Command Linux: Complete Guide to Disk Partition Management
The fdisk command is one of the most powerful and essential tools for disk partition management in Linux systems. Whether...
parted Command Linux: Complete Guide to Disk Partition Management
The parted command is a powerful disk partition manipulation program in Linux that allows you to create, resize, move, and...
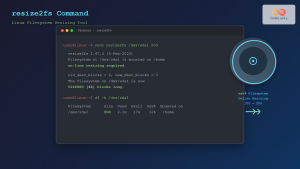
resize2fs Command Linux: Complete Guide to Resize Ext2/3/4 Filesystems Safely
The resize2fs command is a powerful Linux utility designed to resize ext2, ext3, and ext4 filesystems. Whether you need to...
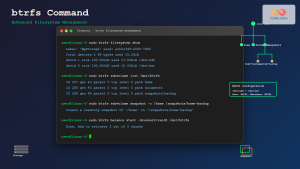
btrfs Command Linux: Complete Guide to Advanced Filesystem Management
The btrfs command is a powerful utility for managing the B-tree filesystem (Btrfs) in Linux, offering advanced features like snapshots,...


