
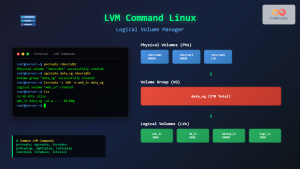
The lvcreate command is a fundamental tool in Linux Logical Volume Management (LVM) that allows you to create logical volumes from available space in volume groups. This powerful command provides flexibility in storage management, enabling dynamic allocation and resizing of storage volumes without the constraints of traditional partitioning.
What is lvcreate Command?
The lvcreate command creates logical volumes within a volume group in the Linux LVM system. Logical volumes act as virtual partitions that can span across multiple physical drives, providing enhanced flexibility compared to traditional disk partitioning schemes.
Key Benefits: Dynamic resizing, snapshots creation, improved fault tolerance, and efficient space utilization across multiple physical devices.
Basic Syntax
lvcreate [OPTIONS] -n LOGICAL_VOLUME_NAME -L SIZE VOLUME_GROUP_NAMEEssential Parameters
-nor--name: Specifies the logical volume name-Lor--size: Sets the size in bytes, KB, MB, GB, TB-lor--extents: Specifies size in logical extents-sor--snapshot: Creates a snapshot volume-mor--mirrors: Creates mirrored logical volume
Prerequisites and Setup
Before using lvcreate, ensure you have:
- Root or sudo privileges
- LVM2 package installed
- Existing volume group with available space
- Physical volumes already added to the volume group
Checking System Requirements
# Check if LVM is installed
which lvcreate

# Display available volume groups
vgdisplay

# Show volume group summary
vgs
Creating Your First Logical Volume
Example 1: Basic Logical Volume Creation
# Create a 5GB logical volume named 'data_lv' in volume group 'vg01'
sudo lvcreate -n data_lv -L 5G vg01
Expected Output:
Logical volume "data_lv" created.Example 2: Using Extent-Based Sizing
# Create logical volume using 100% of free extents
sudo lvcreate -n backup_lv -l 100%FREE vg01

# Create logical volume using 50% of volume group
sudo lvcreate -n logs_lv -l 50%VG vg01
Advanced lvcreate Options
Specifying Physical Volumes
You can control which physical volumes the logical volume uses:
# Create logical volume on specific physical volumes
sudo lvcreate -n web_lv -L 2G vg01 /dev/sdb1 /dev/sdc1

# Create striped logical volume across multiple PVs
sudo lvcreate -n striped_lv -L 4G -i2 -I64 vg01
Creating Mirrored Volumes
# Create mirrored logical volume for redundancy
sudo lvcreate -n mirror_lv -L 3G -m1 vg01

# Create mirrored volume with specific log device
sudo lvcreate -n mirror_lv -L 3G -m1 --mirrorlog disk vg01
Snapshot Creation
Snapshots are crucial for backup and testing purposes:
Creating Read-Write Snapshots
# Create snapshot of existing logical volume
sudo lvcreate -n data_lv_snap -L 1G -s /dev/vg01/data_lv
Creating Read-Only Snapshots
# Create read-only snapshot
sudo lvcreate -n readonly_snap -L 500M -s -p r /dev/vg01/data_lv
Size Specification Methods
Absolute Size Examples
| Command | Description |
|---|---|
-L 500M |
500 Megabytes |
-L 2G |
2 Gigabytes |
-L 1T |
1 Terabyte |
-L 1024 |
1024 MB (default unit) |
Relative Size Examples
| Command | Description |
|---|---|
-l 100%FREE |
All available free space |
-l 50%VG |
50% of volume group |
-l 25%PVS |
25% of physical volumes |
-l 200 |
200 logical extents |
Practical Examples with Output
Complete Workflow Example
# Step 1: Check available space
$ sudo vgs
  VG   #PV #LV #SN Attr   VSize  VFree
  vg01   2   1   0 wz--n- 19.99g 15.99g

# Step 2: Create logical volume
$ sudo lvcreate -n webapp_lv -L 8G vg01
  Logical volume "webapp_lv" created.

# Step 3: Verify creation
$ sudo lvs
  LV        VG   Attr       LSize Pool Origin Data%  Meta%  Move Log Cpy%Sync Convert
  root      vg01 -wi-ao---- 4.00g
  webapp_lv vg01 -wi-a----- 8.00g

# Step 4: Create filesystem
$ sudo mkfs.ext4 /dev/vg01/webapp_lv
mke2fs 1.45.5 (07-Jan-2020)
Creating filesystem with 2097152 4k blocks and 524288 inodes
Filesystem UUID: a1b2c3d4-e5f6-7890-abcd-ef1234567890
Superblock backups stored on blocks:
	32768, 98304, 163840, 229376, 294912, 819200, 884736, 1605632

Allocating group tables: done
Writing inode tables: done
Creating journal (16384 blocks): done
Writing superblocks and filesystem accounting information: done
Error Handling and Troubleshooting
Common Errors and Solutions
Insufficient Space Error
$ sudo lvcreate -n large_lv -L 20G vg01
  Volume group "vg01" has insufficient free space (3839 extents): 5120 required.
Solution: Check available space with vgdisplay and adjust the size accordingly.
Name Conflict Error
$ sudo lvcreate -n existing_lv -L 2G vg01
  Logical Volume "existing_lv" already exists in volume group "vg01"
Solution: Use a different name or remove the existing logical volume if not needed.
Validation Commands
# Check logical volume details
sudo lvdisplay /dev/vg01/webapp_lv

# Monitor logical volume status
sudo lvs -o +lv_size,lv_free

# Check volume group free space
sudo vgdisplay vg01 | grep "Free"
Performance Optimization
Striped Logical Volumes
Improve I/O performance by striping data across multiple physical volumes:
# Create striped volume across 3 PVs with 64KB stripe size
sudo lvcreate -n performance_lv -L 6G -i3 -I64 vg01

# Verify striping configuration
sudo lvdisplay -m /dev/vg01/performance_lv
Thin Provisioning
Create thin logical volumes for efficient space utilization:
# Create thin pool
sudo lvcreate -n thin_pool -L 10G --thinpool vg01

# Create thin logical volume
sudo lvcreate -n thin_lv -V 20G --thin vg01/thin_pool
Best Practices
- Naming Convention: Use descriptive names that indicate the volume’s purpose
- Size Planning: Leave 10-20% free space in volume groups for snapshots and growth
- Monitoring: Regularly check logical volume usage with
lvsanddfcommands - Backup Strategy: Create snapshots before major system changes
- Documentation: Maintain records of logical volume purposes and configurations
Integration with File Systems
Mounting Logical Volumes
# Create mount point
sudo mkdir /mnt/webapp

# Mount the logical volume
sudo mount /dev/vg01/webapp_lv /mnt/webapp

# Add to fstab for persistent mounting
echo '/dev/vg01/webapp_lv /mnt/webapp ext4 defaults 0 2' | sudo tee -a /etc/fstab
Security Considerations
Setting Permissions
# Create logical volume with specific permissions
sudo lvcreate -n secure_lv -L 5G vg01
sudo mkfs.ext4 /dev/vg01/secure_lv
sudo mkdir /mnt/secure
sudo mount /dev/vg01/secure_lv /mnt/secure
sudo chmod 700 /mnt/secure
sudo chown user:group /mnt/secure
Cleanup and Maintenance
Removing Logical Volumes
# Unmount the volume
sudo umount /mnt/webapp

# Remove the logical volume
sudo lvremove /dev/vg01/webapp_lv
Monitoring and Maintenance Commands
# Check logical volume health
sudo lvs --all

# Display detailed information
sudo lvdisplay --verbose

# Check for errors
sudo dmesg | grep -i lvm
The lvcreate command is an essential tool for Linux system administrators managing storage with LVM. By mastering its various options and understanding best practices, you can create flexible, scalable storage solutions that adapt to changing requirements while maintaining data integrity and performance.
Related Posts
lvm Command Linux: Complete Guide to Logical Volume Manager Operations
The Logical Volume Manager (LVM) is a powerful disk management tool in Linux that provides flexible storage management by abstracting...
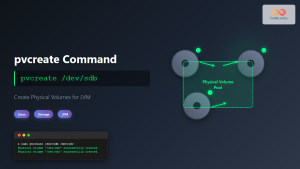
pvcreate Command Linux: Complete Guide to Creating Physical Volumes for LVM
The pvcreate command is a fundamental tool in Linux Logical Volume Management (LVM) that initializes storage devices as physical volumes....
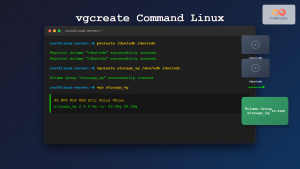
vgcreate Command Linux: Complete Guide to Volume Group Creation
The vgcreate command is a fundamental tool in Linux Logical Volume Manager (LVM) that allows system administrators to create volume...

Storage Virtualization: Complete Guide to Logical Volume Management in Linux
Storage virtualization through Logical Volume Management (LVM) represents one of the most powerful features in modern Linux systems, providing administrators...
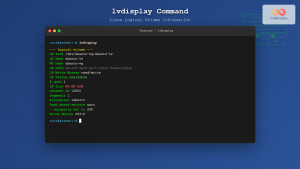
lvdisplay Command Linux: Complete Guide to Display Logical Volume Information
The lvdisplay command is an essential tool in Linux for displaying detailed information about logical volumes (LVs) in Logical Volume...
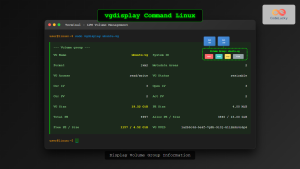
vgdisplay Command Linux: Complete Guide to Display Volume Group Information
The vgdisplay command is an essential tool in Linux systems for displaying detailed information about Volume Groups (VGs) in Logical...
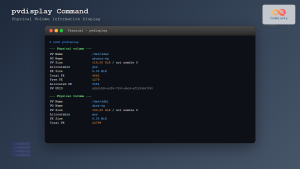
pvdisplay Command Linux: Complete Guide to Physical Volume Information Display
The pvdisplay command is an essential tool in Linux for displaying detailed information about Physical Volumes (PVs) in Logical Volume...
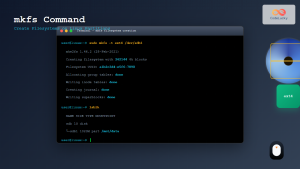
mkfs Command Linux: Complete Guide to Creating Filesystems on Partitions
The mkfs command in Linux is a fundamental tool for creating filesystems on disk partitions. Whether you're setting up a...
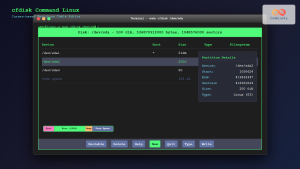
cfdisk Command Linux: Complete Guide to Curses-based Partition Management
The cfdisk command is a powerful, user-friendly partition table editor for Linux systems that provides a curses-based interface for managing...
kpartx Command Linux: Create and Manage Partition Maps with Complete Examples
The kpartx command is a powerful Linux utility that creates device maps from partition tables, enabling you to access partitions...
lsblk Command Linux: Complete Guide to List and Manage Block Devices
The lsblk command is an essential Linux utility that displays information about block devices in a tree-like format. Whether you're...
resize2fs Command Linux: Complete Guide to Resize Ext2/3/4 Filesystems Safely
The resize2fs command is a powerful Linux utility designed to resize ext2, ext3, and ext4 filesystems. Whether you need to...


