
The lsblk command is an essential Linux utility that displays information about block devices in a tree-like format. Whether you’re a system administrator managing storage devices or a Linux user trying to understand your system’s storage configuration, mastering lsblk is crucial for effective storage management.
What is the lsblk Command?
lsblk stands for “list block devices” and is part of the util-linux package. It reads the sysfs filesystem and udev database to gather information about block devices, presenting them in an easy-to-understand hierarchical structure. Unlike other storage-related commands, lsblk shows the relationship between devices and their partitions clearly.
Basic Syntax and Usage
The basic syntax of the lsblk command is:
lsblk [options] [device...]When executed without any arguments, lsblk displays all available block devices:
$ lsblk
NAME   MAJ:MIN RM  SIZE RO TYPE MOUNTPOINT
sda      8:0    0   20G  0 disk
├─sda1   8:1    0  500M  0 part /boot
├─sda2   8:2    0    2G  0 part [SWAP]
└─sda3   8:3    0 17.5G  0 part /
sdb      8:16   0    5G  0 disk
└─sdb1   8:17   0    5G  0 part /home
sr0     11:0    1 1024M  0 rom
Understanding the Output Columns
The default lsblk output includes several important columns:
- NAME: Device name (e.g., sda, sdb1)
- MAJ:MIN: Major and minor device numbers
- RM: Whether the device is removable (1 = yes, 0 = no)
- SIZE: Size of the device
- RO: Whether the device is read-only (1 = yes, 0 = no)
- TYPE: Device type (disk, part, lvm, etc.)
- MOUNTPOINT: Where the device is mounted
Essential lsblk Command Options
Display All Devices (-a)
By default, lsblk hides empty devices. Use the -a option to show all devices:
$ lsblk -a
NAME   MAJ:MIN RM  SIZE RO TYPE MOUNTPOINT
sda      8:0    0   20G  0 disk
├─sda1   8:1    0  500M  0 part /boot
├─sda2   8:2    0    2G  0 part [SWAP]
└─sda3   8:3    0 17.5G  0 part /
sdb      8:16   0    5G  0 disk
└─sdb1   8:17   0    5G  0 part /home
sr0     11:0    1 1024M  0 rom
loop0    7:0    0     0B  0 loop
loop1    7:1    0     0B  0 loop
Show Filesystem Information (-f)
The -f option displays filesystem information:
$ lsblk -f
NAME   FSTYPE LABEL UUID                                 MOUNTPOINT
sda
├─sda1 ext4         a1b2c3d4-e5f6-7890-abcd-ef1234567890 /boot
├─sda2 swap         12345678-90ab-cdef-1234-567890abcdef [SWAP]
└─sda3 ext4         fedcba09-8765-4321-fedc-ba0987654321 /
sdb
└─sdb1 ext4   DATA  abcdef12-3456-7890-abcd-ef1234567890 /home
Output in JSON Format (-J)
For programmatic use, the -J option outputs information in JSON format:
$ lsblk -J
{
   "blockdevices": [
      {
         "name": "sda",
         "maj:min": "8:0",
         "rm": false,
         "size": "20G",
         "ro": false,
         "type": "disk",
         "mountpoint": null,
         "children": [
            {
               "name": "sda1",
               "maj:min": "8:1",
               "rm": false,
               "size": "500M",
               "ro": false,
               "type": "part",
               "mountpoint": "/boot"
            }
         ]
      }
   ]
}
Show Only Specific Columns (-o)
Use the -o option to display only specific columns:
$ lsblk -o NAME,SIZE,TYPE,MOUNTPOINT
NAME   SIZE TYPE MOUNTPOINT
sda     20G disk
├─sda1 500M part /boot
├─sda2   2G part [SWAP]
└─sda3 17.5G part /
sdb      5G disk
└─sdb1   5G part /home
No Tree Format (-l)
The -l option displays devices in list format instead of tree format:
$ lsblk -l
NAME MAJ:MIN RM  SIZE RO TYPE MOUNTPOINT
sda    8:0    0   20G  0 disk
sda1   8:1    0  500M  0 part /boot
sda2   8:2    0    2G  0 part [SWAP]
sda3   8:3    0 17.5G  0 part /
sdb    8:16   0    5G  0 disk
sdb1   8:17   0    5G  0 part /home
Advanced lsblk Usage Examples
Display Block Device Topology (-t)
Show information about block device topology:
$ lsblk -t
NAME   ALIGNMENT MIN-IO OPT-IO PHY-SEC LOG-SEC ROTA SCHED    RQ-SIZE
sda            0    512      0     512     512    1 deadline     128
├─sda1         0    512      0     512     512    1            128
├─sda2         0    512      0     512     512    1            128
└─sda3         0    512      0     512     512    1            128
Show Device Permissions (-m)
Display device ownership and permissions:
$ lsblk -m
NAME   SIZE OWNER GROUP MODE
sda     20G root  disk  brw-rw----
├─sda1 500M root  disk  brw-rw----
├─sda2   2G root  disk  brw-rw----
└─sda3 17.5G root  disk  brw-rw----
Filter by Device Type
You can specify particular devices to examine:
$ lsblk /dev/sda
NAME   MAJ:MIN RM  SIZE RO TYPE MOUNTPOINT
sda      8:0    0   20G  0 disk
├─sda1   8:1    0  500M  0 part /boot
├─sda2   8:2    0    2G  0 part [SWAP]
└─sda3   8:3    0 17.5G  0 part /
Working with Different Storage Types
LVM Logical Volumes
When working with LVM, lsblk shows the relationship between physical volumes, volume groups, and logical volumes:
$ lsblk
NAME               MAJ:MIN RM  SIZE RO TYPE MOUNTPOINT
sda                  8:0    0   20G  0 disk
├─sda1               8:1    0  500M  0 part /boot
└─sda2               8:2    0 19.5G  0 part
  ├─vg01-root      253:0    0   15G  0 lvm  /
  └─vg01-swap      253:1    0  4.5G  0 lvm  [SWAP]
RAID Devices
For software RAID arrays, lsblk displays the RAID structure:
$ lsblk
NAME    MAJ:MIN RM  SIZE RO TYPE  MOUNTPOINT
sda       8:0    0   10G  0 disk
└─sda1    8:1    0   10G  0 part
  └─md0   9:0    0   20G  0 raid1 /
sdb       8:16   0   10G  0 disk
└─sdb1    8:17   0   10G  0 part
  └─md0   9:0    0   20G  0 raid1 /
Practical Use Cases
System Administration Tasks
1. Quick Storage Overview:
$ lsblk -f -o NAME,SIZE,FSTYPE,MOUNTPOINT
NAME   SIZE FSTYPE MOUNTPOINT
sda     20G
├─sda1 500M ext4   /boot
├─sda2   2G swap   [SWAP]
└─sda3 17.5G ext4   /
2. Check Available Space:
$ lsblk -o NAME,SIZE,AVAIL,USE%,MOUNTPOINT
NAME   SIZE AVAIL USE% MOUNTPOINT
sda     20G
├─sda1 500M  350M  25% /boot
├─sda2   2G          [SWAP]
└─sda3 17.5G  8.2G  51% /
3. Find Unmounted Devices:
$ lsblk -o NAME,SIZE,FSTYPE,MOUNTPOINT | grep -E "(part|disk)" | grep -v "/"Troubleshooting Storage Issues
When troubleshooting storage problems, combine lsblk with other options:
# Check for read-only filesystems
$ lsblk -o NAME,RO,MOUNTPOINT

# Verify filesystem types
$ lsblk -f

# Check device topology for performance issues
$ lsblk -t
Combining lsblk with Other Commands
The lsblk command works well with other Linux utilities:
# Find devices with specific filesystem
$ lsblk -f | grep ext4

# Count total partitions
$ lsblk -l | grep part | wc -l

# Export device information to file
$ lsblk -J > devices.json
Common Options Summary
| Option | Description | Example |
|---|---|---|
| -a | Show all devices including empty ones | lsblk -a |
| -f | Show filesystem information | lsblk -f |
| -l | Use list format instead of tree | lsblk -l |
| -m | Show device permissions | lsblk -m |
| -o | Specify output columns | lsblk -o NAME,SIZE |
| -t | Show device topology | lsblk -t |
| -J | Output in JSON format | lsblk -J |
Best Practices and Tips
- Regular Monitoring: Use
lsblkregularly to monitor storage device changes and additions. - Script Integration: Incorporate
lsblk -Jin scripts for automated storage management. - Combine with Watch: Use
watch lsblkto monitor real-time changes during device operations. - Documentation: Save device configurations using
lsblk -f > storage-config.txtfor documentation purposes. - Security: Use
lsblk -mto verify device permissions in security audits.
Troubleshooting Common Issues
Device Not Showing: If a device doesn’t appear, check if it’s properly connected and recognized by the kernel using dmesg | tail.
Permission Denied: Some lsblk options may require root privileges. Use sudo lsblk when necessary.
Outdated Information: If the output seems outdated, try sudo partprobe to refresh the kernel’s partition table information.
Conclusion
The lsblk command is an invaluable tool for Linux system administrators and users alike. Its clear, hierarchical display of block devices makes it easy to understand storage configurations, troubleshoot issues, and manage devices effectively. By mastering the various options and combining lsblk with other Linux commands, you can efficiently manage storage systems and maintain optimal system performance.
Whether you’re setting up new storage devices, troubleshooting mounting issues, or documenting system configurations, lsblk provides the essential information you need in a format that’s both human-readable and script-friendly. Practice with these examples and explore the various options to become proficient with this essential Linux storage management tool.
Related Posts

blkid Command Linux: Complete Guide to Display Block Device Information
The blkid command is an essential Linux utility that displays information about block devices, including file system types, UUIDs, labels,...
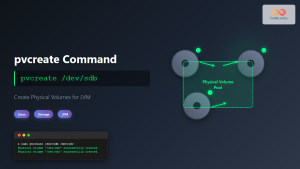
pvcreate Command Linux: Complete Guide to Creating Physical Volumes for LVM
The pvcreate command is a fundamental tool in Linux Logical Volume Management (LVM) that initializes storage devices as physical volumes....
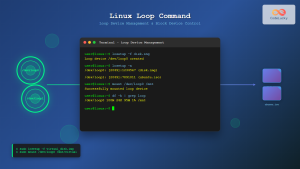
loop Command Linux: Complete Guide to Loop Device Management and Block Device Control
The loop command in Linux is a powerful utility for managing loop devices, which are virtual block devices that allow...

dumpe2fs Command Linux: Complete Guide to Display Ext2/3/4 Filesystem Information
The dumpe2fs command is a powerful Linux utility that displays detailed information about ext2, ext3, and ext4 filesystems. This essential...
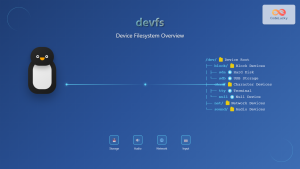
devfs Linux: Complete Guide to Device Filesystem Management
The Device Filesystem (devfs) represents a revolutionary approach to device management in Linux systems, providing dynamic creation and removal of...
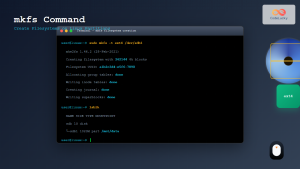
mkfs Command Linux: Complete Guide to Creating Filesystems on Partitions
The mkfs command in Linux is a fundamental tool for creating filesystems on disk partitions. Whether you're setting up a...
udev Command Linux: Complete Guide to Dynamic Device Management
The udev (userspace device manager) is a crucial component of modern Linux systems that handles dynamic device management. Unlike traditional...

kpartx Command Linux: Create and Manage Partition Maps with Complete Examples
The kpartx command is a powerful Linux utility that creates device maps from partition tables, enabling you to access partitions...
pvdisplay Command Linux: Complete Guide to Physical Volume Information Display
The pvdisplay command is an essential tool in Linux for displaying detailed information about Physical Volumes (PVs) in Logical Volume...
mount Command Linux: Complete Guide to Mount Filesystems and Drives
The mount command is one of the most fundamental tools in Linux system administration, allowing you to attach filesystems from...

mdev Command Linux: Complete Guide to Minimal Device Manager Configuration
The mdev command is a lightweight device manager for Linux systems, particularly popular in embedded environments and minimal distributions. As...

ls Command in Linux: Complete Guide to List Files and Directories with Examples
The ls command is one of the most fundamental and frequently used commands in Linux and Unix-like operating systems. It...


