
The losetup command is a powerful Linux utility that allows you to associate loop devices with regular files, enabling you to treat files as block devices. This functionality is essential for mounting disk images, creating virtual filesystems, and performing various storage-related operations without requiring physical hardware.
What are Loop Devices?
Loop devices are pseudo-devices that make files accessible as block devices. They create a mapping between a regular file and a virtual block device, allowing the Linux kernel to treat the file as if it were a physical storage device like a hard drive or USB stick.
Common use cases for loop devices include:
- Mounting ISO files without burning them to CD/DVD
- Creating virtual filesystems for testing
- Working with disk images and backups
- Setting up encrypted storage containers
- Developing and testing filesystem drivers
Basic Syntax and Options
The basic syntax of the losetup command is:
losetup [options] loop_device file
losetup [options] -f file
losetup [options] -d loop_device
Essential Options
| Option | Description |
|---|---|
-f, --find |
Find the first unused loop device |
-d, --detach |
Detach the file from the loop device |
-a, --all |
Show status of all loop devices |
-l, --list |
List all associated loop devices |
-o, --offset |
Start mapping at offset bytes into file |
--sizelimit |
Limit the size of the device |
-r, --read-only |
Set up read-only loop device |
-P, --partscan |
Force kernel to scan partition table |
Basic Examples
Viewing Available Loop Devices
To see all loop devices and their current status:
$ losetup -aIf no loop devices are currently in use, this command will return no output. To list all loop devices regardless of status:
$ losetup -l
NAME       SIZELIMIT OFFSET AUTOCLEAR RO BACK-FILE DIO LOG-SEC
/dev/loop0         0      0         0  0           0     512
/dev/loop1         0      0         0  0           0     512
/dev/loop2         0      0         0  0           0     512
Creating a Test File
Let’s create a sample file to work with:
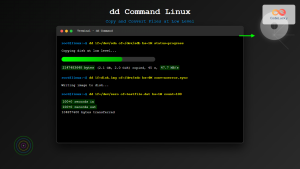
$ dd if=/dev/zero of=testfile.img bs=1M count=100
100+0 records in
100+0 records out
104857600 bytes (105 MB, 100 MiB) copied, 0.5 seconds, 210 MB/s
This creates a 100MB file filled with zeros.
Setting Up a Loop Device
To associate the file with a loop device:
$ sudo losetup -f testfile.imgThe -f option automatically finds the next available loop device. To see which device was assigned:
$ losetup -a
/dev/loop0: [2049]:1234567 (/home/user/testfile.img)
Manually Specifying a Loop Device
You can also specify a particular loop device:
$ sudo losetup /dev/loop1 testfile.imgVerify the setup:
$ losetup -l
NAME       SIZELIMIT OFFSET AUTOCLEAR RO BACK-FILE                    DIO LOG-SEC
/dev/loop0         0      0         1  0 /home/user/testfile.img        0     512
/dev/loop1         0      0         0  0 /home/user/testfile.img        0     512
Working with ISO Files
One of the most common uses of losetup is mounting ISO files:
# Set up the loop device
$ sudo losetup -f ubuntu-20.04.iso

# Find which device was used
$ losetup -a | grep ubuntu
/dev/loop2: [2049]:7891234 (/home/user/ubuntu-20.04.iso)

# Create a mount point and mount the ISO
$ sudo mkdir -p /mnt/iso
$ sudo mount /dev/loop2 /mnt/iso

# Verify the mount
$ ls /mnt/iso
boot  casper  dists  EFI  install  isolinux  md5sum.txt  pics  pool  preseed  README.diskdefines  ubuntu
Advanced Options and Techniques
Using Offset and Size Limits
You can map only a portion of a file using offset and size limit options:
# Create a larger test file
$ dd if=/dev/zero of=largefile.img bs=1M count=500

# Map only 100MB starting from 200MB offset
$ sudo losetup -f --offset=209715200 --sizelimit=104857600 largefile.img

# Verify the setup
$ losetup -l | grep largefile
/dev/loop3 104857600 209715200         1  0 /home/user/largefile.img       0     512
Read-Only Loop Devices
To set up a read-only loop device:
$ sudo losetup -r -f important-backup.imgThis prevents accidental modifications to the file through the loop device.
Partition Scanning
When working with disk images that contain partition tables, use the -P option:
$ sudo losetup -P -f disk-image.imgThis forces the kernel to scan for partitions, making individual partitions available as separate devices (e.g., /dev/loop0p1, /dev/loop0p2).
Detaching Loop Devices
To detach a file from a loop device:
$ sudo losetup -d /dev/loop0To detach all unused loop devices:
$ sudo losetup -DBefore detaching, ensure the device is not mounted:
$ sudo umount /dev/loop0
$ sudo losetup -d /dev/loop0
Creating and Working with Filesystems
Creating a Filesystem on a Loop Device
# Create a 200MB file
$ dd if=/dev/zero of=filesystem.img bs=1M count=200

# Set up loop device
$ sudo losetup -f filesystem.img

# Create ext4 filesystem
$ sudo mkfs.ext4 /dev/loop0
mke2fs 1.45.5 (07-Jan-2020)
Creating filesystem with 204800 1k blocks and 51200 inodes
Filesystem UUID: a1b2c3d4-e5f6-7890-abcd-ef1234567890
Superblock backups stored on blocks:
        8193, 24577, 40961, 57345, 73729

Allocating group tables: done
Writing inode tables: done
Creating journal (4096 blocks): done
Writing superblocks and filesystem accounting information: done

# Mount the filesystem
$ sudo mkdir -p /mnt/loopfs
$ sudo mount /dev/loop0 /mnt/loopfs

# Test the filesystem
$ sudo touch /mnt/loopfs/test.txt
$ ls -la /mnt/loopfs/
total 20
drwxr-xr-x  3 root root  1024 Aug 25 10:19 .
drwxr-xr-x  3 root root  4096 Aug 25 10:19 ..
drwx------  2 root root 12288 Aug 25 10:19 lost+found
-rw-r--r--  1 root root     0 Aug 25 10:19 test.txt
Troubleshooting Common Issues
Device or Resource Busy Error
If you encounter “device or resource busy” when trying to detach:
# Check what's using the device
$ lsof /dev/loop0
$ fuser -m /dev/loop0

# Force unmount if necessary
$ sudo umount -l /dev/loop0  # lazy unmount
$ sudo losetup -d /dev/loop0
Permission Denied Errors
Ensure you have proper permissions and use sudo when necessary:
# Check current user permissions
$ groups
$ ls -la /dev/loop*

# Use sudo for administrative operations
$ sudo losetup -f myfile.img
Finding Loop Device Information
To get detailed information about a specific loop device:
$ losetup -j /path/to/file.img
/dev/loop0: [2049]:1234567 (/path/to/file.img)

$ losetup --list --output NAME,BACK-FILE,SIZE,OFFSET
NAME       BACK-FILE               SIZE      OFFSET
/dev/loop0 /home/user/test.img 104857600           0
Scripting with losetup
Here’s a useful script for automating loop device operations:
#!/bin/bash

setup_loop_device() {
    local file="$1"
    local mount_point="$2"

    if [[ ! -f "$file" ]]; then
        echo "Error: File $file does not exist"
        return 1
    fi

    # Find and setup loop device
    local loop_device=$(sudo losetup -f --show "$file")

    if [[ $? -eq 0 ]]; then
        echo "Loop device $loop_device created for $file"

        # Create mount point if specified
        if [[ -n "$mount_point" ]]; then
            sudo mkdir -p "$mount_point"
            sudo mount "$loop_device" "$mount_point"
            echo "Mounted $loop_device at $mount_point"
        fi

        echo "$loop_device"
    else
        echo "Error: Failed to create loop device"
        return 1
    fi
}

cleanup_loop_device() {
    local loop_device="$1"

    # Unmount if mounted
    if mountpoint -q "$2" 2>/dev/null; then
        sudo umount "$2"
        echo "Unmounted $2"
    fi

    # Detach loop device
    sudo losetup -d "$loop_device"
    echo "Detached $loop_device"
}
Performance Considerations
When working with loop devices, consider these performance factors:
- File Location: Store files on fast storage (SSD) for better performance
- Memory Usage: Large files may consume significant memory for caching
- I/O Overhead: Loop devices add a layer of abstraction that can impact performance
- Concurrent Access: Multiple processes accessing the same loop device can cause contention
Security Implications
Be aware of security considerations when using loop devices:
- Loop devices require root privileges to create and manage
- Mounted loop devices are subject to standard filesystem permissions
- Sensitive data in files should be encrypted before creating loop devices
- Properly clean up loop devices to prevent resource leaks
Best Practices
- Always unmount before detaching: Ensure filesystems are properly unmounted
- Use descriptive file names: Make it easy to identify what each loop device contains
- Monitor resource usage: Keep track of active loop devices to prevent system resource exhaustion
- Automate cleanup: Use scripts to ensure proper cleanup in automated environments
- Document your setup: Keep records of loop device configurations for maintenance
Conclusion
The losetup command is an essential tool for Linux system administrators and developers working with virtual storage devices. Whether you’re mounting ISO files, creating test filesystems, or working with disk images, understanding how to effectively use loop devices will enhance your Linux administration skills.
Remember to always properly clean up loop devices after use and consider the security and performance implications of your implementations. With practice, losetup becomes an invaluable part of your Linux toolkit for storage management and virtualization tasks.
Related Posts
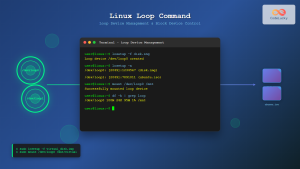
loop Command Linux: Complete Guide to Loop Device Management and Block Device Control
The loop command in Linux is a powerful utility for managing loop devices, which are virtual block devices that allow...
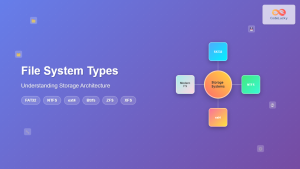
File System Types: FAT32, NTFS, ext4 and Modern Linux Filesystems Explained
Understanding File Systems: The Foundation of Data Storage A file system is the method and data structure that an operating...
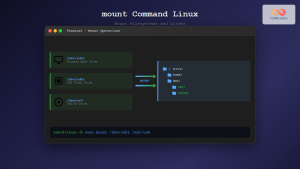
mount Command Linux: Complete Guide to Mount Filesystems and Drives
The mount command is one of the most fundamental tools in Linux system administration, allowing you to attach filesystems from...
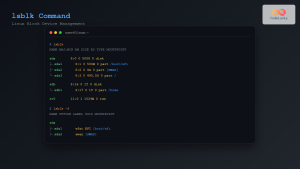
lsblk Command Linux: Complete Guide to List and Manage Block Devices
The lsblk command is an essential Linux utility that displays information about block devices in a tree-like format. Whether you're...
devfs Linux: Complete Guide to Device Filesystem Management
The Device Filesystem (devfs) represents a revolutionary approach to device management in Linux systems, providing dynamic creation and removal of...
devtmpfs Linux: Complete Guide to Device Temporary Filesystem Management
The devtmpfs (Device Temporary Filesystem) is a crucial component of modern Linux systems that revolutionizes how device nodes are managed...

dumpe2fs Command Linux: Complete Guide to Display Ext2/3/4 Filesystem Information
The dumpe2fs command is a powerful Linux utility that displays detailed information about ext2, ext3, and ext4 filesystems. This essential...
umount Command Linux: Complete Guide to Safely Unmounting Filesystems
The umount command is an essential Linux utility that allows you to safely disconnect filesystems from the directory tree. Whether...
dd Command Linux: Complete Guide to Low-Level File Operations and Disk Cloning
The dd command is one of the most powerful yet dangerous utilities in Linux, often referred to as "disk destroyer"...
mkfs Command Linux: Complete Guide to Creating Filesystems on Partitions
The mkfs command in Linux is a fundamental tool for creating filesystems on disk partitions. Whether you're setting up a...
udev Command Linux: Complete Guide to Dynamic Device Management
The udev (userspace device manager) is a crucial component of modern Linux systems that handles dynamic device management. Unlike traditional...
kpartx Command Linux: Create and Manage Partition Maps with Complete Examples
The kpartx command is a powerful Linux utility that creates device maps from partition tables, enabling you to access partitions...


