
LibreNMS is a powerful, open-source network monitoring platform that provides comprehensive visibility into network infrastructure. Built on PHP and MySQL, it offers automatic discovery, alerting, and detailed reporting capabilities for network administrators managing complex environments.
What is LibreNMS?
LibreNMS is a fully-featured network monitoring system that supports a wide range of network hardware and operating systems. It uses SNMP (Simple Network Management Protocol) to collect data from network devices and provides real-time monitoring, historical data analysis, and automated alerting capabilities.
Key Features of LibreNMS
- Automatic Discovery: Automatically discovers network devices and services
- Multi-Vendor Support: Compatible with devices from Cisco, Juniper, HP, Dell, and many others
- Real-time Monitoring: Live graphs and statistics
- Alerting System: Customizable alerts via email, Slack, and other channels
- API Integration: RESTful API for third-party integrations
- User Management: Role-based access control
- Mobile Support: Responsive web interface
System Requirements
Before installing LibreNMS, ensure your Linux system meets the following requirements:
Minimum Requirements:
- Ubuntu 20.04+ / CentOS 8+ / Debian 10+
- 2GB RAM (4GB+ recommended)
- 40GB disk space
- PHP 7.4+ with required extensions
- MySQL 5.7+ or MariaDB 10.2+
- Apache 2.4+ or Nginx
Installing LibreNMS on Ubuntu/Debian
Step 1: Update System Packages
sudo apt update && sudo apt upgrade -yStep 2: Install Required Dependencies
# Install LAMP stack and dependencies
sudo apt install apache2 mysql-server php php-mysql php-gd php-curl \
php-zip php-xml php-mbstring php-json php-cli php-fpm git unzip \
curl snmp snmp-mibs-downloader python3-pip composer -y

# Install additional PHP extensions
sudo apt install php-ldap php-bcmath php-gmp php-memcached -y
Step 3: Configure MySQL Database
# Secure MySQL installation
sudo mysql_secure_installation

# Create LibreNMS database and user
sudo mysql -u root -p
In the MySQL prompt, execute these commands:
CREATE DATABASE librenms CHARACTER SET utf8mb4 COLLATE utf8mb4_unicode_ci;
CREATE USER 'librenms'@'localhost' IDENTIFIED BY 'your_secure_password';
GRANT ALL PRIVILEGES ON librenms.* TO 'librenms'@'localhost';
FLUSH PRIVILEGES;
EXIT;
Step 4: Download and Configure LibreNMS
# Create librenms user
sudo useradd librenms -d /opt/librenms -M -r -s "$(which bash)"

# Clone LibreNMS repository
sudo git clone https://github.com/librenms/librenms.git /opt/librenms

# Set permissions
sudo chown -R librenms:librenms /opt/librenms
sudo chmod 771 /opt/librenms
sudo setfacl -d -m g::rwx /opt/librenms/rrd /opt/librenms/logs /opt/librenms/bootstrap/cache/ /opt/librenms/storage/
sudo setfacl -R -m g::rwx /opt/librenms/rrd /opt/librenms/logs /opt/librenms/bootstrap/cache/ /opt/librenms/storage/
Step 5: Install PHP Dependencies
# Switch to librenms user
sudo su - librenms

# Install Composer dependencies
cd /opt/librenms
./scripts/composer_wrapper.php install --no-dev

# Exit librenms user
exit
Configuring Apache Web Server
Create Apache Virtual Host
sudo nano /etc/apache2/sites-available/librenms.confAdd the following configuration:
<VirtualHost *:80>
  DocumentRoot /opt/librenms/html/
  ServerName librenms.example.com

  AllowEncodedSlashes NoDecode

  <Directory "/opt/librenms/html/">
    Require all granted
    AllowOverride All
    Options FollowSymLinks MultiViews
  </Directory>

  # Enable Apache modules
  LoadModule rewrite_module modules/mod_rewrite.so
</VirtualHost>
Enable Site and Modules
# Enable required Apache modules
sudo a2enmod rewrite
sudo a2enmod php7.4

# Enable LibreNMS site
sudo a2ensite librenms.conf
sudo a2dissite 000-default

# Restart Apache
sudo systemctl restart apache2
LibreNMS Configuration
Create Configuration File
sudo cp /opt/librenms/config.php.default /opt/librenms/config.php
sudo nano /opt/librenms/config.php
Edit the configuration file with your database details:
<?php
$config['db_host'] = 'localhost';
$config['db_user'] = 'librenms';
$config['db_pass'] = 'your_secure_password';
$config['db_name'] = 'librenms';

$config['snmp']['community'] = array('public');
$config['autodiscovery']['xdp'] = true;
$config['autodiscovery']['ospf'] = true;
$config['autodiscovery']['bgp'] = true;

$config['base_url'] = 'http://your-domain.com';

// Enable additional features
$config['enable_inventory'] = 1;
$config['enable_syslog'] = 1;
$config['enable_billing'] = 1;
Database Initialization
# Switch to librenms user and build database
sudo su - librenms
cd /opt/librenms
php build-base.php

# Create admin user
php adduser.php admin admin 10 [email protected]

# Exit librenms user
exit
Setting Up SNMP
Configure SNMP Daemon
sudo nano /etc/snmp/snmpd.confAdd basic SNMP configuration:
# Listen on all interfaces
agentAddress udp:161,udp6:[::1]:161

# Community string (change 'public' to something more secure)
rocommunity public default -V systemonly
rocommunity6 public default -V systemonly

# System information
syslocation "Server Room, Building A"
syscontact "[email protected]"

# Security settings
dontLogTCPWrappersConnects yes
Restart SNMP Service
sudo systemctl enable snmpd
sudo systemctl restart snmpd
Configuring Cron Jobs
# Add LibreNMS cron job
sudo crontab -u librenms -e
Add the following cron entries:
# LibreNMS polling every 5 minutes
*/5 * * * * /opt/librenms/cronic /opt/librenms/poller-wrapper.py 16

# Daily maintenance at 2 AM
0 2 * * * /opt/librenms/daily.sh >> /dev/null 2>&1

# Discovery every 6 hours
33 */6 * * * /opt/librenms/cronic /opt/librenms/discovery.php -h new >> /dev/null 2>&1
*/5 * * * * /opt/librenms/discovery.php -h all >> /dev/null 2>&1
Adding Devices to LibreNMS
Web Interface Method
- Access LibreNMS web interface at
http://your-server-ip - Login with admin credentials
- Navigate to “Devices” → “Add Device”
- Enter device details
Command Line Method
# Add device via CLI
sudo su - librenms
cd /opt/librenms

# Add network device
php addhost.php router.example.com public v2c

# Add server with custom community
php addhost.php server.example.com mycommunity v2c
Device Discovery and Monitoring
Manual Discovery
# Force discovery of specific device
sudo su - librenms
cd /opt/librenms
php discovery.php -h router.example.com

# Run discovery on all devices
php discovery.php -h all
Automatic Discovery Configuration
Enable automatic discovery in the web interface:
- Go to “Settings” → “Discovery”
- Enable desired discovery methods:
- SNMP Scan
- ARP Table Scan
- OSPF Discovery
- BGP Discovery
- Configure discovery networks
Configuring Alerts
Email Alert Setup
Configure email alerts in the web interface:
- Navigate to “Alerts” → “Alert Rules”
- Create new alert rule
- Set conditions and thresholds
- Configure notification channels
Example Alert Rule
-- High CPU usage alert
%macros.device_up = "1" && %sensors.sensor_current > "80" && %sensors.sensor_class = "processor"
Performance Optimization
Database Optimization
# Optimize MySQL for LibreNMS
sudo nano /etc/mysql/mysql.conf.d/mysqld.cnf
Add optimization settings:
[mysqld]
innodb_buffer_pool_size = 256M
tmp_table_size = 128M
max_heap_table_size = 128M
max_connections = 200
thread_cache_size = 8
query_cache_limit = 4M
query_cache_size = 64M
PHP Configuration
# Optimize PHP settings
sudo nano /etc/php/7.4/apache2/php.ini
Key settings to adjust:
memory_limit = 512M
max_execution_time = 300
max_input_vars = 3000
upload_max_filesize = 16M
post_max_size = 16M
Troubleshooting Common Issues
Permission Issues
# Fix file permissions
sudo chown -R librenms:librenms /opt/librenms
sudo setfacl -R -m g::rwx /opt/librenms/rrd /opt/librenms/logs
SNMP Connectivity Issues
# Test SNMP connectivity
snmpwalk -v2c -c public target_device 1.3.6.1.2.1.1.1.0

# Check SNMP service
sudo systemctl status snmpd

# Monitor LibreNMS logs
tail -f /opt/librenms/logs/librenms.log
Database Connection Issues
# Test database connection
sudo su - librenms
cd /opt/librenms
php validate.php
Advanced Configuration
Setting Up Oxidized for Configuration Backup
# Install Oxidized
sudo gem install oxidized
sudo gem install oxidized-script oxidized-web

# Create oxidized user
sudo useradd -d /home/oxidized -m oxidized -s /bin/bash

# Configure Oxidized
sudo mkdir /etc/oxidized
sudo chown oxidized:oxidized /etc/oxidized
Enabling Syslog Collection
# Configure rsyslog for LibreNMS
sudo nano /etc/rsyslog.d/30-librenms.conf
Add syslog configuration:
# LibreNMS syslog configuration
$ModLoad imudp
$UDPServerRun 514
$UDPServerAddress 0.0.0.0

# Forward to LibreNMS
*.* @@127.0.0.1:3514
Monitoring Best Practices
Network Segmentation
- Create device groups based on function or location
- Use custom device attributes for better organization
- Implement role-based access control
Alert Management
- Start with basic alerts and gradually add more specific rules
- Use alert acknowledgment to prevent spam
- Configure maintenance windows for planned downtime
- Test alert channels regularly
Performance Monitoring
- Monitor LibreNMS server performance
- Set up proper data retention policies
- Regular database maintenance
- Monitor poller performance
Integration with Other Tools
Grafana Integration
LibreNMS can be integrated with Grafana for advanced visualization:
- Install Grafana
- Configure LibreNMS as data source
- Import LibreNMS dashboards
- Create custom visualizations
API Usage Examples
# Get device list via API
curl -H "X-Auth-Token: your_api_token" \
  "http://librenms.example.com/api/v0/devices"

# Add device via API
curl -X POST -H "X-Auth-Token: your_api_token" \
  -H "Content-Type: application/json" \
  -d '{"hostname":"new-device.com","community":"public","version":"v2c"}' \
  "http://librenms.example.com/api/v0/devices"
Maintenance and Updates
Updating LibreNMS
# Update LibreNMS
sudo su - librenms
cd /opt/librenms
git pull
./scripts/composer_wrapper.php install --no-dev
php artisan migrate
exit
Database Maintenance
# Clean old data
sudo su - librenms
cd /opt/librenms
php artisan db:prune

# Optimize database tables
./daily.sh
LibreNMS provides enterprise-grade network monitoring capabilities with extensive device support and powerful alerting features. Regular maintenance and proper configuration ensure optimal performance and reliable network visibility for infrastructure management.
Related Posts
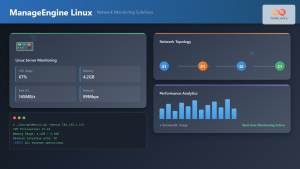
ManageEngine Linux: Complete Network Monitoring Solutions Guide
Network monitoring is crucial for maintaining optimal performance and security in Linux environments. ManageEngine provides powerful network monitoring solutions specifically...
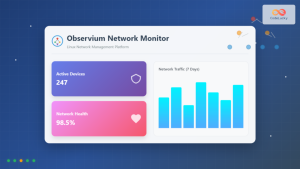
observium Linux: Complete Network Management and Monitoring Platform Guide
Observium is a powerful, auto-discovering network monitoring platform designed for Linux systems that provides comprehensive visibility into network infrastructure. This...
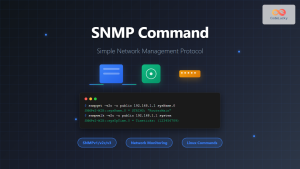
SNMP Command Linux: Complete Guide to Simple Network Management Protocol Configuration and Usage
Introduction to SNMP Command in Linux Simple Network Management Protocol (SNMP) is a fundamental protocol used for monitoring and managing...
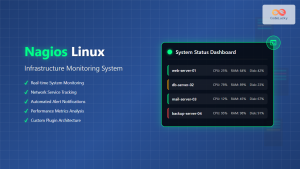
nagios Linux: Complete Infrastructure Monitoring System Setup Guide
Introduction to Nagios Nagios is one of the most popular open-source infrastructure monitoring systems available for Linux environments. Originally developed...
thruk Linux: Comprehensive Monitoring Web Interface for Network Infrastructure
Thruk is a powerful web-based monitoring interface designed primarily for Nagios and compatible monitoring systems. As a comprehensive frontend solution,...
Zenoss Linux: Complete Guide to IT Infrastructure Monitoring and Management
What is Zenoss and Why Use it on Linux? Zenoss is a powerful, open-source IT infrastructure monitoring platform that provides...
Spiceworks Linux: Complete Network Monitoring and Management Guide
Spiceworks is a powerful, free IT network monitoring and management platform that has revolutionized how system administrators handle their infrastructure....
SolarWinds Linux: Complete Network Performance Monitor Guide for System Administrators
SolarWinds Network Performance Monitor (NPM) is a powerful network monitoring solution that provides comprehensive visibility into network infrastructure performance. While...

whatsup Linux: Complete Network Monitoring and System Administration Guide
whatsup is a powerful network monitoring and system administration tool for Linux that provides real-time insights into network connectivity, system...
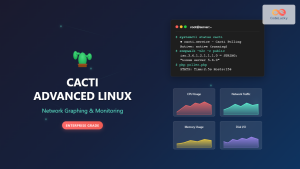
Cacti Advanced Linux: Complete Guide to Enterprise Network Graphing and Monitoring
Cacti stands as one of the most powerful open-source network graphing solutions available for Linux systems, providing comprehensive network monitoring...
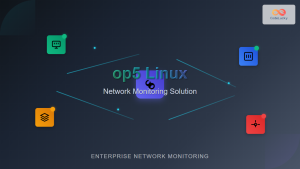
op5 Linux: Complete Network Monitoring Solution Guide
op5 Linux is a comprehensive network monitoring solution built on top of the proven Nagios monitoring engine. This enterprise-grade platform...
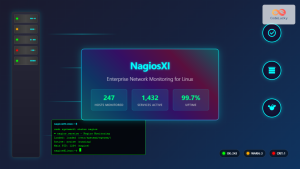
nagiosxi Linux: Complete Enterprise Network Monitoring Guide with Commands and Configuration
NagiosXI represents the pinnacle of enterprise network monitoring solutions on Linux systems, offering comprehensive infrastructure oversight with advanced alerting, reporting,...


