Kubernetes has revolutionized how we deploy, manage, and scale containerized applications on Linux systems. As the leading container orchestration platform, Kubernetes automates the deployment, scaling, and management of containerized applications across clusters of Linux nodes.
What is Kubernetes?
Kubernetes (often abbreviated as K8s) is an open-source container orchestration platform originally developed by Google. It provides a robust framework for running distributed systems resiliently, handling scaling, failover, deployment patterns, and more.
Key Benefits of Kubernetes on Linux:
- Automated deployment and scaling – Deploy applications seamlessly across multiple nodes
- Service discovery and load balancing – Automatic traffic distribution
- Storage orchestration – Mount storage systems automatically
- Self-healing – Restart failed containers and replace unhealthy nodes
- Secret and configuration management – Manage sensitive information securely
Kubernetes Architecture Overview
Understanding Kubernetes architecture is crucial for effective Linux container orchestration:
Master Node Components:
- kube-apiserver – The API gateway for all cluster operations
- etcd – Distributed key-value store for cluster state
- kube-scheduler – Assigns pods to nodes based on resource requirements
- kube-controller-manager – Runs controller processes
Worker Node Components:
- kubelet – Ensures containers are running in pods
- kube-proxy – Maintains network rules on nodes
- Container Runtime – Runs containers (Docker, containerd, CRI-O)
Installing Kubernetes on Linux
Prerequisites
Before installing Kubernetes, ensure your Linux system meets these requirements:
# Check system resources
free -h
df -h /

# Verify Linux distribution
cat /etc/os-release

# Ensure swap is disabled
sudo swapoff -a
sudo sed -i '/ swap / s/^\(.*\)$/#\1/g' /etc/fstab
Installing kubeadm, kubelet, and kubectl
For Ubuntu/Debian systems:
# Update package index
sudo apt-get update

# Install required packages
sudo apt-get install -y apt-transport-https ca-certificates curl

# Add Kubernetes signing key
curl -fsSL https://packages.cloud.google.com/apt/doc/apt-key.gpg | sudo apt-key add -

# Add Kubernetes repository
echo "deb https://apt.kubernetes.io/ kubernetes-xenial main" | sudo tee /etc/apt/sources.list.d/kubernetes.list

# Update and install Kubernetes tools
sudo apt-get update
sudo apt-get install -y kubelet kubeadm kubectl

# Hold packages to prevent automatic updates
sudo apt-mark hold kubelet kubeadm kubectl
For CentOS/RHEL systems:
# Create Kubernetes repository file
cat <<EOF | sudo tee /etc/yum.repos.d/kubernetes.repo
[kubernetes]
name=Kubernetes
baseurl=https://packages.cloud.google.com/yum/repos/kubernetes-el7-\$basearch
enabled=1
gpgcheck=1
repo_gpgcheck=1
gpgkey=https://packages.cloud.google.com/yum/doc/yum-key.gpg https://packages.cloud.google.com/yum/doc/rpm-package-key.gpg
exclude=kubelet kubeadm kubectl
EOF

# Install Kubernetes tools
sudo yum install -y kubelet kubeadm kubectl --disableexcludes=kubernetes

# Enable and start kubelet
sudo systemctl enable --now kubelet
Essential Kubernetes Commands
Cluster Management Commands
Initialize a new Kubernetes cluster:
# Initialize master node
sudo kubeadm init --pod-network-cidr=192.168.0.0/16

# Set up kubectl for regular user
mkdir -p $HOME/.kube
sudo cp -i /etc/kubernetes/admin.conf $HOME/.kube/config
sudo chown $(id -u):$(id -g) $HOME/.kube/config
Expected output:
Your Kubernetes control-plane has initialized successfully!

To start using your cluster, you need to run the following as a regular user:

  mkdir -p $HOME/.kube
  sudo cp -i /etc/kubernetes/admin.conf $HOME/.kube/config
  sudo chown $(id -u):$(id -g) $HOME/.kube/config

You should now deploy a pod network to the cluster.
Run "kubectl apply -f [podnetwork].yaml" with one of the options listed at:
  https://kubernetes.io/docs/concepts/cluster-administration/addons/

Then you can join any number of worker nodes by running the following on each as root:

kubeadm join 192.168.1.100:6443 --token abc123.xyz789 \
    --discovery-token-ca-cert-hash sha256:hash_value_here
Node Management
# View cluster nodes
kubectl get nodes

# Get detailed node information
kubectl describe node <node-name>

# Label a node
kubectl label nodes <node-name> disktype=ssd

# Cordon a node (mark as unschedulable)
kubectl cordon <node-name>

# Drain a node for maintenance
kubectl drain <node-name> --ignore-daemonsets
Sample output for kubectl get nodes:
NAME           STATUS   ROLES           AGE   VERSION
master-node    Ready    control-plane   2d    v1.28.0
worker-node1   Ready    <none>          2d    v1.28.0
worker-node2   Ready    <none>          2d    v1.28.0
Working with Pods
Creating and Managing Pods
Create a simple pod using imperative commands:
# Create a pod running nginx
kubectl run nginx-pod --image=nginx --port=80

# List all pods
kubectl get pods

# Get detailed pod information
kubectl describe pod nginx-pod

# Get pod logs
kubectl logs nginx-pod

# Execute commands inside a pod
kubectl exec -it nginx-pod -- /bin/bash
Declarative Pod Management
Create a pod using YAML manifests:
# Create pod-definition.yaml
apiVersion: v1
kind: Pod
metadata:
  name: webapp-pod
  labels:
    app: webapp
    tier: frontend
spec:
  containers:
  - name: webapp-container
    image: nginx:1.21
    ports:
    - containerPort: 80
    resources:
      requests:
        memory: "64Mi"
        cpu: "250m"
      limits:
        memory: "128Mi"
        cpu: "500m"
# Apply the pod configuration
kubectl apply -f pod-definition.yaml
# Verify pod creation
kubectl get pods -o wideExpected output:
NAME          READY   STATUS    RESTARTS   AGE   IP            NODE
webapp-pod    1/1     Running   0          30s   192.168.1.10  worker-node1
nginx-pod     1/1     Running   0          5m    192.168.1.11  worker-node2
Deployments and ReplicaSets
Creating Deployments
# Create a deployment
kubectl create deployment webapp-deployment --image=nginx:1.21 --replicas=3

# Scale a deployment
kubectl scale deployment webapp-deployment --replicas=5

# Update deployment image
kubectl set image deployment/webapp-deployment nginx=nginx:1.22

# Check rollout status
kubectl rollout status deployment/webapp-deployment

# View rollout history
kubectl rollout history deployment/webapp-deployment
Deployment YAML Example
apiVersion: apps/v1
kind: Deployment
metadata:
  name: webapp-deployment
  labels:
    app: webapp
spec:
  replicas: 3
  selector:
    matchLabels:
      app: webapp
  template:
    metadata:
      labels:
        app: webapp
    spec:
      containers:
      - name: webapp
        image: nginx:1.21
        ports:
        - containerPort: 80
        resources:
          requests:
            memory: "64Mi"
            cpu: "250m"
          limits:
            memory: "128Mi"
            cpu: "500m"
Services and Networking
Service Types
Kubernetes offers several service types for different networking needs:
- ClusterIP – Internal cluster communication only
- NodePort – Exposes service on each node’s IP at a static port
- LoadBalancer – Exposes service externally using cloud provider’s load balancer
- ExternalName – Maps service to external DNS name
Creating Services
# Create a ClusterIP service
kubectl expose deployment webapp-deployment --type=ClusterIP --port=80

# Create a NodePort service
kubectl expose deployment webapp-deployment --type=NodePort --port=80 --target-port=80

# View services
kubectl get services

# Get service details
kubectl describe service webapp-deployment
Sample service output:
NAME                TYPE        CLUSTER-IP      EXTERNAL-IP   PORT(S)        AGE
kubernetes          ClusterIP   10.96.0.1       <none>        443/TCP        3d
webapp-deployment   NodePort    10.96.234.123   <none>        80:32456/TCP   1m
Service YAML Configuration
apiVersion: v1
kind: Service
metadata:
  name: webapp-service
spec:
  type: LoadBalancer
  ports:
  - port: 80
    targetPort: 80
    protocol: TCP
  selector:
    app: webapp
ConfigMaps and Secrets
Managing Configuration Data
# Create ConfigMap from literal values
kubectl create configmap app-config \
  --from-literal=database_url=mysql://localhost:3306/mydb \
  --from-literal=debug_mode=true

# Create ConfigMap from file
kubectl create configmap nginx-config --from-file=nginx.conf

# View ConfigMaps
kubectl get configmaps

# Display ConfigMap details
kubectl describe configmap app-config
Managing Secrets
# Create secret for database credentials
kubectl create secret generic db-secret \
  --from-literal=username=admin \
  --from-literal=password=secretpassword

# Create secret from file
kubectl create secret generic ssl-certs --from-file=tls.crt --from-file=tls.key

# View secrets (encoded)
kubectl get secrets
kubectl describe secret db-secret
Volumes and Storage
Persistent Volumes
# PersistentVolume definition
apiVersion: v1
kind: PersistentVolume
metadata:
  name: webapp-pv
spec:
  capacity:
    storage: 10Gi
  accessModes:
    - ReadWriteOnce
  persistentVolumeReclaimPolicy: Retain
  storageClassName: manual
  hostPath:
    path: /mnt/data
Persistent Volume Claims
apiVersion: v1
kind: PersistentVolumeClaim
metadata:
  name: webapp-pvc
spec:
  accessModes:
    - ReadWriteOnce
  resources:
    requests:
      storage: 5Gi
  storageClassName: manual
Monitoring and Troubleshooting
Debugging Commands
# Check cluster status
kubectl cluster-info

# View events
kubectl get events --sort-by=.metadata.creationTimestamp

# Check resource usage
kubectl top nodes
kubectl top pods

# Describe resources for debugging
kubectl describe pod <pod-name>
kubectl describe node <node-name>

# Check logs
kubectl logs <pod-name> -f
kubectl logs <pod-name> --previous
Resource Monitoring
# Get resource usage summary
kubectl get pods --all-namespaces
kubectl get deployments --all-namespaces
kubectl get services --all-namespaces

# Check specific namespace resources
kubectl get all -n kube-system

# Monitor pod resource consumption
kubectl top pods --sort-by=cpu
kubectl top pods --sort-by=memory
Best Practices for Kubernetes on Linux
Security Best Practices
- RBAC Implementation – Use Role-Based Access Control for fine-grained permissions
- Network Policies – Implement network segmentation between pods
- Pod Security Standards – Apply security contexts to limit container privileges
- Image Security – Scan container images for vulnerabilities
Resource Management
# Set resource limits and requests
apiVersion: v1
kind: Pod
metadata:
  name: resource-demo
spec:
  containers:
  - name: app
    image: nginx
    resources:
      requests:
        memory: "64Mi"
        cpu: "250m"
      limits:
        memory: "128Mi"
        cpu: "500m"
Performance Optimization
- Node Affinity – Schedule pods on specific nodes based on requirements
- Pod Disruption Budgets – Ensure minimum availability during updates
- Horizontal Pod Autoscaling – Automatically scale based on metrics
- Cluster Autoscaling – Add or remove nodes based on demand
Advanced Kubernetes Operations
Rolling Updates and Rollbacks
# Perform rolling update
kubectl set image deployment/webapp-deployment nginx=nginx:1.22

# Check rollout status
kubectl rollout status deployment/webapp-deployment

# Rollback to previous version
kubectl rollout undo deployment/webapp-deployment

# Rollback to specific revision
kubectl rollout undo deployment/webapp-deployment --to-revision=2
Horizontal Pod Autoscaler
# Create HPA based on CPU utilization
kubectl autoscale deployment webapp-deployment --cpu-percent=50 --min=1 --max=10

# Check HPA status
kubectl get hpa

# View HPA details
kubectl describe hpa webapp-deployment
Troubleshooting Common Issues
Pod Issues
# Check pod status and events
kubectl get pods
kubectl describe pod <pod-name>

# Common pod troubleshooting commands
kubectl logs <pod-name> --previous
kubectl exec -it <pod-name> -- /bin/sh

# Debug networking issues
kubectl exec -it <pod-name> -- nslookup kubernetes.default
kubectl exec -it <pod-name> -- wget -qO- http://service-name
Node Issues
# Check node status
kubectl get nodes -o wide
kubectl describe node <node-name>

# Check node resources
kubectl top node <node-name>

# View system pods on problematic nodes
kubectl get pods -n kube-system -o wide
Conclusion
Kubernetes on Linux provides a powerful platform for container orchestration, enabling organizations to deploy, scale, and manage containerized applications efficiently. By mastering the essential commands and concepts covered in this guide, you’ll be well-equipped to leverage Kubernetes for your container orchestration needs.
Remember to start with simple deployments, gradually incorporating advanced features like autoscaling, persistent storage, and monitoring. Regular practice with these commands and concepts will help you become proficient in managing Kubernetes clusters on Linux systems.
As you continue your Kubernetes journey, focus on understanding the underlying principles, implementing security best practices, and monitoring your cluster’s performance to ensure reliable and efficient container orchestration.
Related Posts

OpenShift Linux: Complete Guide to Enterprise Kubernetes Platform Management
OpenShift represents Red Hat's enterprise-grade Kubernetes platform that revolutionizes how organizations deploy, manage, and scale containerized applications on Linux systems....

kind Linux: Complete Guide to Running Kubernetes in Docker Containers
What is kind (Kubernetes in Docker)? kind (Kubernetes in Docker) is a powerful tool designed for running local Kubernetes clusters...
Marathon Linux: Complete Guide to Container Orchestration Platform
Marathon is a powerful container orchestration platform built on top of Apache Mesos that enables you to deploy, manage, and...
MicroK8s Linux: Complete Guide to Canonical’s Lightweight Kubernetes Distribution
MicroK8s is Canonical's lightweight, single-package Kubernetes distribution designed for developers, IoT, and edge computing environments. Unlike traditional Kubernetes installations that...
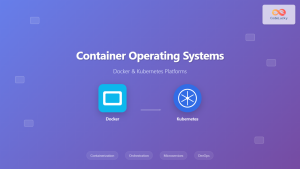
Container Operating Systems: Complete Guide to Docker and Kubernetes Platforms
Container operating systems have revolutionized how we deploy, manage, and scale applications in modern computing environments. Unlike traditional operating systems...

k3s Linux: Complete Guide to Lightweight Kubernetes for Edge Computing
k3s is a highly available, certified Kubernetes distribution designed for production workloads in unattended, resource-constrained, remote locations or inside IoT...
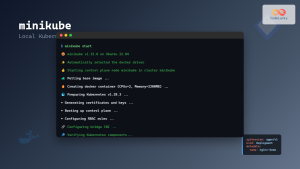
Minikube Linux: Complete Guide to Local Kubernetes Development
Minikube has revolutionized local Kubernetes development by providing developers with a lightweight, single-node Kubernetes cluster that runs directly on their...
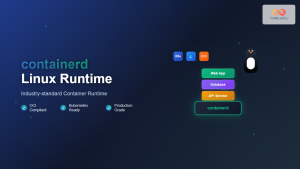
containerd Linux: Complete Guide to Industry-Standard Container Runtime
Containerd has emerged as the industry-standard container runtime, serving as the foundation for modern containerization platforms like Docker and Kubernetes....

kubectl Command Linux: Kubernetes Management Made Simple
The kubectl command is the primary command-line interface for interacting with Kubernetes clusters. This powerful tool allows administrators and developers...

nomad Linux: Complete Guide to HashiCorp’s Workload Orchestrator
What is HashiCorp Nomad? HashiCorp Nomad is a simple yet powerful workload orchestrator that enables organizations to deploy and manage...

CRI-O Linux: Complete Guide to Lightweight Container Runtime for Kubernetes
CRI-O (Container Runtime Interface - Open Container Initiative) is a lightweight, OCI-compliant container runtime specifically designed for Kubernetes. Unlike Docker,...
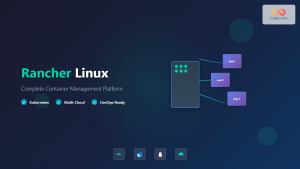
Rancher Linux: Complete Container Management Platform for DevOps Teams
Rancher Linux revolutionizes container management by providing a comprehensive platform that simplifies Kubernetes orchestration, multi-cloud deployments, and enterprise-grade container operations....
- What is Kubernetes?
- Kubernetes Architecture Overview
- Installing Kubernetes on Linux
- Essential Kubernetes Commands
- Working with Pods
- Deployments and ReplicaSets
- Services and Networking
- ConfigMaps and Secrets
- Volumes and Storage
- Monitoring and Troubleshooting
- Best Practices for Kubernetes on Linux
- Advanced Kubernetes Operations
- Troubleshooting Common Issues
- Conclusion