Java, one of the world's most popular programming languages, powers countless applications across various platforms. Whether you're a budding developer or a seasoned pro looking to refresh your setup, this guide will walk you through the process of installing and configuring your Java environment.
Understanding Java: JDK vs JRE
Before we dive into the installation process, let's clarify two important terms: JDK and JRE.
🔹 JDK (Java Development Kit): This is what you need if you plan to develop Java applications. It includes the Java Runtime Environment (JRE), an interpreter/loader (Java), a compiler (javac), an archiver (jar), a documentation generator (Javadoc), and other tools needed for Java development.
🔹 JRE (Java Runtime Environment): This is what you need to run Java applications on your computer. It includes the Java Virtual Machine (JVM), core classes, and supporting files.
As a developer, you'll want to install the JDK, which includes the JRE.
Step 1: Downloading the Java Development Kit (JDK)
-
Visit the official Oracle website: https://www.oracle.com/java/technologies/javase-jdk11-downloads.html
-
Scroll down to find the appropriate JDK for your operating system. For this guide, we'll use JDK 11, which is a long-term support (LTS) version.
-
Accept the license agreement and download the installer.
💡 Pro Tip: While Oracle JDK is popular, you might also consider OpenJDK, an open-source alternative that's fully compatible with Oracle's JDK.
Step 2: Installing the JDK
For Windows:
- Locate the downloaded installer file (e.g.,
jdk-11.0.12_windows-x64_bin.exe). - Double-click the installer to launch it.
- Follow the installation wizard, accepting the license agreement and choosing the installation directory.
- The wizard will install both the JDK and JRE.
For macOS:
- Locate the downloaded
.dmgfile. - Double-click to open it.
- Follow the installation instructions.
For Linux:
- Open a terminal window.
- Navigate to the directory where you downloaded the JDK file.
-
Run the following command (replace
<jdk-file>with your actual filename):sudo tar -xvzf <jdk-file>.tar.gz -C /opt/ -
This will extract the JDK to the
/opt/directory.
Step 3: Setting up Environment Variables
To use Java from any location on your system, you need to set up environment variables.
For Windows:
- Right-click on 'This PC' or 'My Computer' and select 'Properties'.
- Click on 'Advanced system settings'.
- Click on 'Environment Variables'.
- Under 'System variables', click 'New'.
- Enter
JAVA_HOMEas the variable name and the path to your JDK installation (e.g.,C:\Program Files\Java\jdk-11.0.12) as the variable value. - Find the 'Path' variable in the system variables list, select it and click 'Edit'.
- Click 'New' and add
%JAVA_HOME%\bin.
For macOS and Linux:
- Open your shell configuration file (e.g.,
~/.bash_profile,~/.zshrc, or~/.bashrc) in a text editor. -
Add the following lines:
export JAVA_HOME=/path/to/your/jdk export PATH=$JAVA_HOME/bin:$PATH -
Save the file and run
source ~/.bash_profile(or your respective config file) to apply changes.
Step 4: Verifying the Installation
To ensure Java is correctly installed and configured:
- Open a new command prompt or terminal window.
-
Type
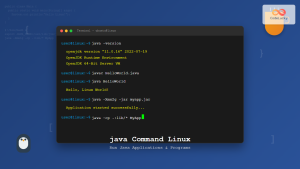
java -versionand press Enter. You should see output similar to:java version "11.0.12" 2021-07-20 LTS Java(TM) SE Runtime Environment 18.9 (build 11.0.12+8-LTS-237) Java HotSpot(TM) 64-Bit Server VM 18.9 (build 11.0.12+8-LTS-237, mixed mode) -
Type
javac -versionand press Enter. You should see output like:javac 11.0.12
If you see these version numbers, congratulations! Your Java environment is set up correctly.
Step 5: Installing an Integrated Development Environment (IDE)
While you can write Java code in any text editor, an IDE can significantly enhance your productivity. Here are some popular choices:
- IntelliJ IDEA: Offers a powerful, feature-rich environment for Java development.
- Eclipse: A versatile, open-source IDE with a large plugin ecosystem.
- NetBeans: Another feature-rich, open-source IDE that's particularly good for beginners.
To install an IDE:
- Visit the official website of your chosen IDE.
- Download the appropriate version for your operating system.
- Run the installer and follow the installation wizard.
💡 Pro Tip: Most modern IDEs will detect your installed JDK automatically. If not, you may need to point the IDE to your JDK installation directory in its settings.
Step 6: Creating Your First Java Program
Let's verify everything is working by creating a simple "Hello, World!" program:
- Open your IDE.
- Create a new Java project.
- Create a new Java class file named
HelloWorld.java. -
Enter the following code:
public class HelloWorld { public static void main(String[] args) { System.out.println("Hello, World!"); } } -
Save the file and run the program.
If you see "Hello, World!" printed in the console, your Java environment is fully functional!
Troubleshooting Common Issues
Even with careful setup, you might encounter some issues. Here are solutions to common problems:
-
"'java' is not recognized as an internal or external command": This usually means your PATH environment variable isn't set correctly. Double-check Step 3.
-
"Error: Could not find or load main class": Ensure your class name matches your file name exactly, including capitalization.
-
IDE can't find JDK: In your IDE settings, manually set the path to your JDK installation directory.
-
Compiler compliance level does not match the Java version: In your IDE, go to project settings and ensure the compiler compliance level matches your installed Java version.
Best Practices for Java Development
Now that your environment is set up, here are some best practices to keep in mind:
-
Keep your JDK updated: Regularly check for and install updates to benefit from performance improvements and security patches.
-
Use version control: Familiarize yourself with Git or another version control system to manage your code effectively.
-
Follow coding conventions: Adhere to Java coding conventions for clean, readable code. Many IDEs can help enforce these.
-
Utilize IDE features: Learn keyboard shortcuts and take advantage of code completion, refactoring tools, and debuggers in your IDE.
-
Practice regularly: The best way to improve your Java skills is through consistent practice. Try coding challenges or personal projects to hone your abilities.
Conclusion
Setting up your Java development environment is a crucial first step in your journey as a Java programmer. With the JDK installed, environment variables configured, and an IDE of your choice set up, you're well-equipped to start coding in Java.
Remember, the world of Java development is vast and ever-evolving. Stay curious, keep learning, and don't hesitate to explore the wealth of resources available online. Happy coding!
🚀 Next Steps: Now that your environment is set up, why not dive into some Java basics? Start with variables, data types, and basic control structures to build a solid foundation for your Java programming journey.
- Understanding Java: JDK vs JRE
- Step 1: Downloading the Java Development Kit (JDK)
- Step 2: Installing the JDK
- Step 3: Setting up Environment Variables
- Step 4: Verifying the Installation
- Step 5: Installing an Integrated Development Environment (IDE)
- Step 6: Creating Your First Java Program
- Troubleshooting Common Issues
- Best Practices for Java Development
- Conclusion


