
The iptables command is one of the most powerful and essential tools for managing firewall rules in Linux systems. As a packet filtering framework built into the Linux kernel, iptables allows administrators to control network traffic flow, enhance security, and manage connections with precise rule configurations.
What is iptables?
iptables is a user-space utility program that allows system administrators to configure the IP packet filter rules of the Linux kernel firewall. It’s part of the netfilter framework and provides a flexible way to:
- Filter incoming and outgoing network packets
- Forward packets between network interfaces
- Modify packet headers
- Perform Network Address Translation (NAT)
- Log network activity for monitoring purposes
iptables Architecture and Tables
iptables organizes rules into different tables, each serving specific purposes:
1. Filter Table (Default)
The filter table is the default table used for packet filtering. It contains three built-in chains:
- INPUT: Handles packets destined for the local system
- OUTPUT: Manages packets originating from the local system
- FORWARD: Processes packets routed through the system
2. NAT Table
Used for Network Address Translation with chains:
- PREROUTING: Alters packets before routing
- POSTROUTING: Modifies packets after routing
- OUTPUT: Changes locally-generated packets
3. Mangle Table
Used for specialized packet alteration beyond NAT.
4. Raw Table
Primarily used for configuring exemptions from connection tracking.
Basic iptables Syntax
The general syntax for iptables commands follows this pattern:
iptables [options] [chain] [matching criteria] [target/action]Common Options
| Option | Description |
|---|---|
-A |
Append rule to chain |
-I |
Insert rule at specific position |
-D |
Delete rule from chain |
-L |
List rules in chain |
-F |
Flush (delete all) rules |
-P |
Set default policy |
Viewing Current iptables Rules
Before making changes, it’s important to see the current firewall configuration:
# View all rules with line numbers
sudo iptables -L -n --line-numbers

# View rules for specific table
sudo iptables -t nat -L

# View rules with packet and byte counters
sudo iptables -L -v
Sample Output:
Chain INPUT (policy ACCEPT)
num  target     prot opt source               destination
1    ACCEPT     all  --  0.0.0.0/0            0.0.0.0/0            ctstate RELATED,ESTABLISHED
2    ACCEPT     all  --  0.0.0.0/0            0.0.0.0/0
3    DROP       all  --  0.0.0.0/0            0.0.0.0/0

Chain FORWARD (policy ACCEPT)
num  target     prot opt source               destination

Chain OUTPUT (policy ACCEPT)
num  target     prot opt source               destination
Basic iptables Commands and Examples
Setting Default Policies
Default policies determine what happens to packets that don’t match any rules:
# Set restrictive default policies
sudo iptables -P INPUT DROP
sudo iptables -P FORWARD DROP
sudo iptables -P OUTPUT ACCEPT
Allowing Loopback Traffic
Always allow loopback traffic for system functionality:
# Allow all loopback traffic
sudo iptables -A INPUT -i lo -j ACCEPT
sudo iptables -A OUTPUT -o lo -j ACCEPT
Allowing Established and Related Connections
Allow return traffic for established connections:
# Allow established and related connections
sudo iptables -A INPUT -m conntrack --ctstate ESTABLISHED,RELATED -j ACCEPT
Port-Specific Rules
Allowing Specific Ports
# Allow SSH (port 22)
sudo iptables -A INPUT -p tcp --dport 22 -j ACCEPT

# Allow HTTP (port 80)
sudo iptables -A INPUT -p tcp --dport 80 -j ACCEPT

# Allow HTTPS (port 443)
sudo iptables -A INPUT -p tcp --dport 443 -j ACCEPT

# Allow multiple ports at once
sudo iptables -A INPUT -p tcp -m multiport --dports 80,443 -j ACCEPT
Port Range Rules
# Allow port range (e.g., 8000-8010)
sudo iptables -A INPUT -p tcp --dport 8000:8010 -j ACCEPT
IP Address-Based Rules
Allow/Block Specific IP Addresses
# Allow specific IP address
sudo iptables -A INPUT -s 192.168.1.100 -j ACCEPT

# Block specific IP address
sudo iptables -A INPUT -s 203.0.113.50 -j DROP

# Allow subnet
sudo iptables -A INPUT -s 192.168.1.0/24 -j ACCEPT
Geographic Blocking (with ipset)
# Create ipset for country blocking
sudo ipset create country-cn hash:net

# Add IP ranges (example)
sudo ipset add country-cn 1.2.3.0/24

# Block using iptables
sudo iptables -A INPUT -m set --match-set country-cn src -j DROP
Advanced iptables Rules
Rate Limiting
Protect against brute force attacks with rate limiting:
# Limit SSH connections (3 attempts per minute)
sudo iptables -A INPUT -p tcp --dport 22 -m limit --limit 3/min --limit-burst 3 -j ACCEPT
sudo iptables -A INPUT -p tcp --dport 22 -j DROP
Connection Limiting
# Limit concurrent connections per IP
sudo iptables -A INPUT -p tcp --dport 80 -m connlimit --connlimit-above 10 -j DROP
Time-Based Rules
# Allow HTTP only during business hours
sudo iptables -A INPUT -p tcp --dport 80 -m time --timestart 09:00 --timestop 17:00 --weekdays 1,2,3,4,5 -j ACCEPT
NAT Configuration
Basic NAT Rules
# Enable IP forwarding (required for NAT)
echo 1 > /proc/sys/net/ipv4/ip_forward

# Basic MASQUERADE rule
sudo iptables -t nat -A POSTROUTING -o eth0 -j MASQUERADE

# Port forwarding
sudo iptables -t nat -A PREROUTING -p tcp --dport 8080 -j REDIRECT --to-port 80
DNAT (Destination NAT)
# Forward external port 8080 to internal server
sudo iptables -t nat -A PREROUTING -p tcp --dport 8080 -j DNAT --to-destination 192.168.1.100:80
Logging and Monitoring
Adding Logging Rules
# Log dropped packets
sudo iptables -A INPUT -j LOG --log-prefix "IPTABLES-DROPPED: " --log-level 4

# Log specific traffic
sudo iptables -A INPUT -p tcp --dport 22 -j LOG --log-prefix "SSH-ACCESS: "
Creating Custom Chains
# Create custom chain
sudo iptables -N CUSTOM-LOGGING

# Add rules to custom chain
sudo iptables -A CUSTOM-LOGGING -j LOG --log-prefix "CUSTOM: "
sudo iptables -A CUSTOM-LOGGING -j DROP

# Use custom chain
sudo iptables -A INPUT -s 203.0.113.0/24 -j CUSTOM-LOGGING
Managing iptables Rules
Inserting Rules at Specific Positions
# Insert rule at position 1
sudo iptables -I INPUT 1 -p tcp --dport 443 -j ACCEPT

# Insert rule at position 3
sudo iptables -I INPUT 3 -s 192.168.1.50 -j ACCEPT
Deleting Rules
# Delete by line number
sudo iptables -D INPUT 3

# Delete by specification
sudo iptables -D INPUT -p tcp --dport 80 -j ACCEPT

# Flush all rules
sudo iptables -F

# Flush specific chain
sudo iptables -F INPUT
Saving and Restoring iptables Rules
Ubuntu/Debian Systems
# Install iptables-persistent
sudo apt update
sudo apt install iptables-persistent

# Save current rules
sudo iptables-save > /etc/iptables/rules.v4

# Restore rules
sudo iptables-restore < /etc/iptables/rules.v4
RHEL/CentOS Systems
# Save rules
sudo service iptables save

# Start iptables service
sudo systemctl enable iptables
sudo systemctl start iptables
Common iptables Use Cases
Basic Web Server Protection
#!/bin/bash
# Basic web server firewall script

# Set default policies
iptables -P INPUT DROP
iptables -P FORWARD DROP
iptables -P OUTPUT ACCEPT

# Allow loopback
iptables -A INPUT -i lo -j ACCEPT

# Allow established connections
iptables -A INPUT -m conntrack --ctstate ESTABLISHED,RELATED -j ACCEPT

# Allow SSH (change port as needed)
iptables -A INPUT -p tcp --dport 22 -j ACCEPT

# Allow HTTP and HTTPS
iptables -A INPUT -p tcp --dport 80 -j ACCEPT
iptables -A INPUT -p tcp --dport 443 -j ACCEPT

# Allow ping
iptables -A INPUT -p icmp --icmp-type echo-request -j ACCEPT

# Log and drop everything else
iptables -A INPUT -j LOG --log-prefix "DROPPED: "
iptables -A INPUT -j DROP
Database Server Protection
# Allow MySQL only from web servers
sudo iptables -A INPUT -p tcp -s 192.168.1.10 --dport 3306 -j ACCEPT
sudo iptables -A INPUT -p tcp -s 192.168.1.11 --dport 3306 -j ACCEPT
sudo iptables -A INPUT -p tcp --dport 3306 -j DROP
Troubleshooting iptables
Testing Rules
# Test with netcat
nc -v target-ip port

# Check if rules are being hit
sudo iptables -L -v -n

# Monitor logs
sudo tail -f /var/log/kern.log | grep IPTABLES
Common Issues and Solutions
- Locked out via SSH: Always have console access when testing rules
- Rules not persistent: Save rules using iptables-persistent or system-specific methods
- Wrong rule order: Remember iptables processes rules sequentially
Security Best Practices
Essential Security Guidelines
- Default Deny Policy: Set INPUT and FORWARD policies to DROP
- Minimal Access: Only allow necessary ports and services
- Rate Limiting: Implement rate limiting for sensitive services
- Regular Updates: Keep iptables and system updated
- Logging: Enable logging for security monitoring
Example Security Script
#!/bin/bash
# Enhanced security iptables script

# Backup current rules
iptables-save > /tmp/iptables-backup-$(date +%Y%m%d_%H%M%S)

# Flush existing rules
iptables -F
iptables -X
iptables -t nat -F
iptables -t nat -X

# Set default policies
iptables -P INPUT DROP
iptables -P FORWARD DROP
iptables -P OUTPUT ACCEPT

# Allow loopback
iptables -A INPUT -i lo -j ACCEPT
iptables -A OUTPUT -o lo -j ACCEPT

# Allow established and related connections
iptables -A INPUT -m conntrack --ctstate ESTABLISHED,RELATED -j ACCEPT

# SSH with rate limiting
iptables -A INPUT -p tcp --dport 22 -m conntrack --ctstate NEW -m limit --limit 3/min --limit-burst 3 -j ACCEPT

# Web services
iptables -A INPUT -p tcp --dport 80 -j ACCEPT
iptables -A INPUT -p tcp --dport 443 -j ACCEPT

# ICMP (ping) with rate limiting
iptables -A INPUT -p icmp --icmp-type echo-request -m limit --limit 1/sec -j ACCEPT

# Log dropped packets
iptables -A INPUT -m limit --limit 5/min -j LOG --log-prefix "iptables-dropped: " --log-level 4

# Drop all other traffic
iptables -A INPUT -j DROP
Performance Optimization
Rule Optimization Tips
- Place frequently matched rules at the top
- Use specific matches rather than general ones
- Combine rules using multiport when possible
- Use connection tracking efficiently
# Efficient rule ordering example
iptables -A INPUT -m conntrack --ctstate ESTABLISHED,RELATED -j ACCEPT
iptables -A INPUT -i lo -j ACCEPT
iptables -A INPUT -p tcp -m multiport --dports 80,443 -j ACCEPT
iptables -A INPUT -p tcp --dport 22 -j ACCEPT
Integration with Modern Tools
iptables vs firewalld
While iptables remains powerful, modern distributions often use firewalld as a higher-level interface:
# Check if firewalld is active
sudo systemctl status firewalld

# If firewalld is active, use firewall-cmd instead
sudo firewall-cmd --list-all
Docker and iptables
Docker automatically creates iptables rules. To prevent conflicts:
# Add to /etc/docker/daemon.json
{
  "iptables": false
}
Conclusion
The iptables command is an indispensable tool for Linux system administrators, offering granular control over network traffic and system security. From basic port filtering to advanced NAT configurations, mastering iptables enables you to build robust firewall solutions tailored to your specific requirements.
Remember to always test rules carefully, maintain backups of working configurations, and follow security best practices. With the examples and concepts covered in this guide, you’re well-equipped to implement effective firewall policies using iptables in your Linux environment.
Whether you’re securing a simple web server or managing complex network infrastructure, iptables provides the flexibility and power needed to maintain strong network security while ensuring legitimate traffic flows smoothly through your systems.
Related Posts
iptables Advanced Linux: Complete Guide to Advanced Firewall Rules and Security Configuration
iptables is the most powerful and flexible firewall solution available for Linux systems, offering granular control over network traffic through...
ip6tables Command Linux: Complete Guide to IPv6 Firewall Management and Security
The ip6tables command is the IPv6 counterpart to the popular iptables firewall utility in Linux. As IPv6 adoption continues to...
UFW Advanced Linux: Complete Guide to Advanced Firewall Configuration and Security Management
UFW (Uncomplicated Firewall) serves as Ubuntu's default firewall configuration tool, providing a user-friendly interface to manage iptables rules. While UFW...
firewalld Linux: Complete Dynamic Firewall Management Guide
firewalld is a powerful, dynamic firewall management tool for Linux systems that provides a flexible and user-friendly interface for managing...
ufw Command Linux: Complete Guide to Uncomplicated Firewall Management
The Uncomplicated Firewall (ufw) is a user-friendly frontend for managing iptables firewall rules in Linux systems. Designed to simplify firewall...
nftables Command Linux: Complete Guide to Next Generation Firewall Framework
nftables is a modern Linux kernel subsystem that provides packet classification and filtering capabilities, serving as the next-generation replacement for...
ip Command Linux: Complete Guide to Advanced Network Configuration and Management
The ip command is one of the most powerful and versatile networking tools in Linux, serving as the modern replacement...
tcpdump Command Linux: Complete Guide to Network Packet Capture and Analysis
The tcpdump command is one of the most powerful network analysis tools available in Linux systems. It allows system administrators...
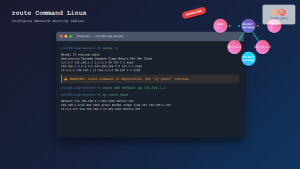
route Command Linux: Configure Network Routing Tables (Deprecated Guide)
The route command in Linux has been a fundamental tool for network administrators to view and manipulate the kernel's IP...
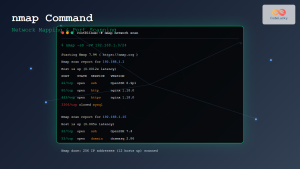
nmap Command Linux: Complete Guide to Network Mapping and Port Scanning
The nmap (Network Mapper) command is one of the most powerful and versatile network discovery and security auditing tools available...

fail2ban Linux: Complete Intrusion Prevention and Security Framework Guide
fail2ban is a powerful intrusion prevention framework designed to protect Linux servers from brute force attacks, dictionary attacks, and other...
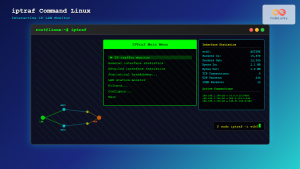
iptraf Command Linux: Complete Interactive Network Monitoring Guide
The iptraf command is a powerful console-based network monitoring utility for Linux systems that provides real-time IP LAN monitoring capabilities....


