
The ip command is one of the most powerful and versatile networking tools in Linux, serving as the modern replacement for legacy commands like ifconfig, route, and arp. This comprehensive guide will take you through every aspect of the ip command, from basic usage to advanced network configuration scenarios.
What is the ip Command?
The ip command is part of the iproute2 package and provides a unified interface for network configuration and monitoring in Linux systems. It allows administrators to configure network interfaces, manage routing tables, set up tunnels, and perform various network-related tasks with precision and flexibility.
Key Advantages Over Legacy Tools
- Unified Interface: Single command for multiple networking tasks
- More Features: Advanced capabilities not available in older tools
- Better Performance: More efficient communication with the kernel
- Future-Proof: Actively maintained and updated
- Scriptable: Better suited for automation and scripting
Basic Syntax and Structure
The ip command follows a consistent syntax pattern:
ip [OPTIONS] OBJECT { COMMAND | help }
Common Objects
link– Network interfacesaddr– IP addressesroute– Routing tableneigh– Neighbor/ARP tabletunnel– Tunnel interfacesrule– Routing policy database
Common Options
-c– Colorize output-s– Show statistics-d– Show detailed information-j– JSON output format-p– Pretty print (human-readable)
Managing Network Interfaces
Viewing Network Interfaces
To display all network interfaces:
ip link show
Example Output:
1: lo: <LOOPBACK,UP,LOWER_UP> mtu 65536 qdisc noqueue state UNKNOWN mode DEFAULT group default qlen 1000
    link/loopback 00:00:00:00:00:00 brd 00:00:00:00:00:00
2: eth0: <BROADCAST,MULTICAST,UP,LOWER_UP> mtu 1500 qdisc fq_codel state UP mode DEFAULT group default qlen 1000
    link/ether 52:54:00:12:34:56 brd ff:ff:ff:ff:ff:ff
3: wlan0: <BROADCAST,MULTICAST> mtu 1500 qdisc noop state DOWN mode DEFAULT group default qlen 1000
    link/ether 00:11:22:33:44:55 brd ff:ff:ff:ff:ff:ff
Viewing Specific Interface
ip link show eth0
Enabling and Disabling Interfaces
To bring an interface up:
sudo ip link set eth0 up
To bring an interface down:
sudo ip link set eth0 down
Changing Interface Properties
Modify MTU size:
sudo ip link set eth0 mtu 1400
Change MAC address:
sudo ip link set eth0 address 00:11:22:33:44:66
Rename interface:
sudo ip link set eth0 name ethernet0
IP Address Management
Viewing IP Addresses
Display all IP addresses:
ip addr show
Or use the shorthand:
ip a
Example Output:
1: lo: <LOOPBACK,UP,LOWER_UP> mtu 65536 qdisc noqueue state UNKNOWN group default qlen 1000
    link/loopback 00:00:00:00:00:00 brd 00:00:00:00:00:00
    inet 127.0.0.1/8 scope host lo
       valid_lft forever preferred_lft forever
    inet6 ::1/128 scope host
       valid_lft forever preferred_lft forever
2: eth0: <BROADCAST,MULTICAST,UP,LOWER_UP> mtu 1500 qdisc fq_codel state UP group default qlen 1000
    link/ether 52:54:00:12:34:56 brd ff:ff:ff:ff:ff:ff
    inet 192.168.1.100/24 brd 192.168.1.255 scope global dynamic eth0
       valid_lft 86359sec preferred_lft 86359sec
    inet6 fe80::5054:ff:fe12:3456/64 scope link
       valid_lft forever preferred_lft forever
Adding IP Addresses
Add a static IP address:
sudo ip addr add 192.168.1.150/24 dev eth0
Add multiple IP addresses to the same interface:
sudo ip addr add 10.0.0.10/24 dev eth0
sudo ip addr add 172.16.1.10/24 dev eth0
Removing IP Addresses
Remove a specific IP address:
sudo ip addr del 192.168.1.150/24 dev eth0
Remove all IP addresses from an interface:
sudo ip addr flush dev eth0
Routing Management
Viewing Routing Table
Display the main routing table:
ip route show
Or use shorthand:
ip r
Example Output:
default via 192.168.1.1 dev eth0 proto dhcp metric 100
169.254.0.0/16 dev eth0 scope link metric 1000
192.168.1.0/24 dev eth0 proto kernel scope link src 192.168.1.100 metric 100
Adding Routes
Add a default gateway:
sudo ip route add default via 192.168.1.1
Add a specific network route:
sudo ip route add 10.0.0.0/24 via 192.168.1.254 dev eth0
Add a host route:
sudo ip route add 203.0.113.10 via 192.168.1.1
Deleting Routes
Delete a specific route:
sudo ip route del 10.0.0.0/24
Delete default gateway:
sudo ip route del default
Advanced Routing Examples
Route with specific metric:
sudo ip route add 172.16.0.0/16 via 192.168.1.2 metric 200
Route through specific interface:
sudo ip route add 192.168.2.0/24 dev eth1
Neighbor (ARP) Table Management
Viewing ARP Table
Display neighbor table:
ip neigh show
Example Output:
192.168.1.1 dev eth0 lladdr aa:bb:cc:dd:ee:ff REACHABLE
192.168.1.50 dev eth0 lladdr 11:22:33:44:55:66 STALE
192.168.1.25 dev eth0 lladdr 77:88:99:aa:bb:cc DELAY
Adding ARP Entries
Add a static ARP entry:
sudo ip neigh add 192.168.1.200 lladdr 00:11:22:33:44:55 dev eth0
Deleting ARP Entries
Delete a specific ARP entry:
sudo ip neigh del 192.168.1.200 dev eth0
Flush ARP table for an interface:
sudo ip neigh flush dev eth0
Advanced Network Configuration
VLAN Configuration
Create a VLAN interface:
sudo ip link add link eth0 name eth0.100 type vlan id 100
sudo ip link set eth0.100 up
sudo ip addr add 192.168.100.10/24 dev eth0.100
Bridge Configuration
Create a bridge:
sudo ip link add name br0 type bridge
sudo ip link set br0 up
sudo ip link set eth0 master br0
sudo ip addr add 192.168.1.10/24 dev br0
Bonding/Teaming Configuration
Create a bonding interface:
sudo ip link add bond0 type bond mode 802.3ad
sudo ip link set eth0 master bond0
sudo ip link set eth1 master bond0
sudo ip link set bond0 up
Policy-Based Routing
Routing Rules
View routing rules:
ip rule show
Example Output:
0:	from all lookup local
32766:	from all lookup main
32767:	from all lookup default
Add a routing rule:
sudo ip rule add from 192.168.1.0/24 table 100
Custom Routing Tables
Create routes in custom table:
sudo ip route add 10.0.0.0/8 via 192.168.1.1 table 100
sudo ip route add default via 192.168.1.254 table 100
Tunnel Configuration
GRE Tunnel
Create a GRE tunnel:
sudo ip tunnel add gre1 mode gre remote 203.0.113.1 local 203.0.113.2
sudo ip link set gre1 up
sudo ip addr add 10.0.0.1/30 dev gre1
IPIP Tunnel
Create an IPIP tunnel:
sudo ip tunnel add ipip1 mode ipip remote 198.51.100.1 local 198.51.100.2
sudo ip link set ipip1 up
sudo ip addr add 172.16.0.1/30 dev ipip1
Network Statistics and Monitoring
Interface Statistics
Show detailed interface statistics:
ip -s link show eth0
Example Output:
2: eth0: <BROADCAST,MULTICAST,UP,LOWER_UP> mtu 1500 qdisc fq_codel state UP mode DEFAULT group default qlen 1000
    link/ether 52:54:00:12:34:56 brd ff:ff:ff:ff:ff:ff
    RX: bytes  packets  errors  dropped overrun mcast
    1234567    9876     0       0       0       123
    TX: bytes  packets  errors  dropped carrier collsns
    2345678    8765     0       0       0       0
Route Statistics
Show route cache statistics:
ip -s route show
Troubleshooting Network Issues
Common Diagnostic Commands
Check connectivity to default gateway:
ip route get 8.8.8.8
Example Output:
8.8.8.8 via 192.168.1.1 dev eth0 src 192.168.1.100 uid 1000
    cache
Monitoring Real-time Changes
Monitor network events in real-time:
ip monitor all
Monitor only route changes:
ip monitor route
Practical Examples and Use Cases
Network Interface Backup and Restore
Save current network configuration:
# Save interface configuration
ip addr show > /tmp/network-backup.txt

# Save routing table
ip route show > /tmp/routes-backup.txt

# Save ARP table
ip neigh show > /tmp/arp-backup.txt
Multi-homed Server Configuration
Configure a server with multiple network connections:
# Configure first interface (internal network)
sudo ip addr add 192.168.1.10/24 dev eth0
sudo ip route add 192.168.0.0/16 via 192.168.1.1 dev eth0

# Configure second interface (DMZ network)
sudo ip addr add 10.0.1.10/24 dev eth1
sudo ip route add 10.0.0.0/8 via 10.0.1.1 dev eth1

# Default route through external interface
sudo ip route add default via 203.0.113.1 dev eth2
Load Balancing Setup
Configure load balancing across multiple interfaces:
# Add multiple default routes with different metrics
sudo ip route add default via 192.168.1.1 dev eth0 metric 100
sudo ip route add default via 192.168.2.1 dev eth1 metric 200

# Or use equal-cost multi-path routing
sudo ip route add default nexthop via 192.168.1.1 dev eth0 weight 1 \
                           nexthop via 192.168.2.1 dev eth1 weight 1
Security Considerations
Best Practices
- Use sudo: Always use appropriate privileges for network changes
- Backup configurations: Save current settings before making changes
- Test changes: Verify connectivity after modifications
- Document changes: Keep records of network modifications
- Avoid conflicts: Check for conflicting routes and addresses
Securing Network Interfaces
Disable unused interfaces:
sudo ip link set wlan0 down
Remove unnecessary IP addresses:
sudo ip addr flush dev eth1
Automation and Scripting
JSON Output for Scripts
Get structured output for automation:
ip -j addr show | jq '.[] | select(.ifname=="eth0")'
Batch Configuration Script
#!/bin/bash
# Network configuration script

# Function to configure interface
configure_interface() {
    local interface=$1
    local ip_addr=$2
    local gateway=$3

    echo "Configuring $interface..."

    # Bring interface up
    ip link set $interface up

    # Add IP address
    ip addr add $ip_addr dev $interface

    # Add route if gateway provided
    if [ ! -z "$gateway" ]; then
        ip route add default via $gateway dev $interface
    fi

    echo "$interface configured successfully"
}

# Configure multiple interfaces
configure_interface eth0 "192.168.1.10/24" "192.168.1.1"
configure_interface eth1 "10.0.0.10/24"
Migration from Legacy Commands
Command Equivalents
| Legacy Command | ip Command Equivalent |
|---|---|
ifconfig |
ip addr show |
ifconfig eth0 up |
ip link set eth0 up |
route -n |
ip route show |
arp -a |
ip neigh show |
netstat -i |
ip -s link |
Performance Optimization
Interface Optimization
Optimize network interface settings:
# Increase interface queue length
sudo ip link set eth0 txqueuelen 2000

# Set interface to promiscuous mode
sudo ip link set eth0 promisc on

# Configure interface buffer sizes
sudo ip link set eth0 mtu 9000  # Jumbo frames for LAN
Routing Optimization
Optimize routing performance:
# Add specific routes to avoid table lookups
sudo ip route add 192.168.100.0/24 dev eth1

# Use different metrics for load balancing
sudo ip route add 0.0.0.0/0 via 192.168.1.1 metric 100
sudo ip route add 0.0.0.0/0 via 192.168.2.1 metric 200
Conclusion
The ip command is an essential tool for Linux system administrators and network engineers. Its comprehensive feature set allows for sophisticated network configurations, from simple interface management to complex routing scenarios and tunnel setups.
Key takeaways from this guide:
- The
ipcommand provides a unified interface for all network configuration tasks - It offers more features and better performance than legacy networking tools
- Understanding object-based syntax is crucial for effective usage
- Advanced features like policy routing and tunneling enable complex network architectures
- Proper documentation and testing are essential for network changes
By mastering the ip command, you’ll be equipped to handle virtually any network configuration challenge in Linux environments. Practice with these examples in a test environment to build confidence before applying changes to production systems.
Remember to always backup your current network configuration before making significant changes, and test connectivity thoroughly after any modifications. The ip command’s power comes with responsibility – use it wisely to maintain stable and secure network operations.
Related Posts
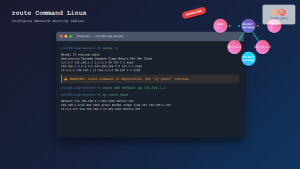
route Command Linux: Configure Network Routing Tables (Deprecated Guide)
The route command in Linux has been a fundamental tool for network administrators to view and manipulate the kernel's IP...
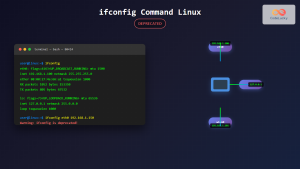
ifconfig Command Linux: Complete Guide to Network Interface Configuration (Deprecated)
The ifconfig (interface configuration) command has been a cornerstone of Linux network administration for decades. While officially deprecated in favor...
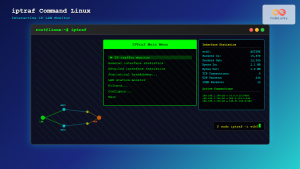
iptraf Command Linux: Complete Interactive Network Monitoring Guide
The iptraf command is a powerful console-based network monitoring utility for Linux systems that provides real-time IP LAN monitoring capabilities....

iptables Command Linux: Complete Guide to Configure Firewall Rules
The iptables command is one of the most powerful and essential tools for managing firewall rules in Linux systems. As...
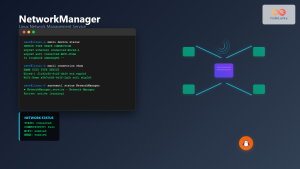
NetworkManager Linux: Complete Guide to Network Management Service
NetworkManager is a powerful network management service that provides automatic network detection and configuration for Linux systems. It simplifies network...
nmtui Command Linux: Complete Guide to NetworkManager Text User Interface
The nmtui (NetworkManager Text User Interface) command is a powerful, menu-driven tool that provides an intuitive way to configure network...
ip6tables Command Linux: Complete Guide to IPv6 Firewall Management and Security
The ip6tables command is the IPv6 counterpart to the popular iptables firewall utility in Linux. As IPv6 adoption continues to...
SNMP Command Linux: Complete Guide to Simple Network Management Protocol Configuration and Usage
Introduction to SNMP Command in Linux Simple Network Management Protocol (SNMP) is a fundamental protocol used for monitoring and managing...
nmcli Command Linux: Complete Guide to NetworkManager Command Line Tool
The nmcli (NetworkManager Command Line Interface) is a powerful command-line tool that allows you to control NetworkManager and configure network...
netstat Command Linux: Complete Guide to Network Connection Monitoring
The netstat command is one of the most essential network monitoring tools in Linux systems. It provides comprehensive information about...
net-snmp Linux: Complete Guide to SNMP Implementation and Management
Simple Network Management Protocol (SNMP) is a cornerstone of network management, and net-snmp is the most widely used open-source implementation...
ping Command Linux: Complete Guide to Test Network Connectivity
The ping command is one of the most fundamental network troubleshooting tools in Linux systems. It sends Internet Control Message...


