
The htop command is an enhanced, interactive version of the traditional top command that provides real-time monitoring of system processes in Linux. Unlike the basic top command, htop offers a colorful, user-friendly interface with mouse support, making it easier to navigate and manage running processes on your system.
What is htop?
htop is a cross-platform interactive process viewer that displays a frequently updated list of processes running on your computer. It shows a complete list of processes running, instead of the top resource-consuming processes, and uses color to give information about processor, swap, and memory status.
Key Advantages of htop over top
- Interactive Interface: Navigate using arrow keys and mouse
- Color-coded Display: Visual representation of system resource usage
- Tree View: Shows process hierarchy and relationships
- Horizontal Scrolling: View long command lines
- Multiple Selection: Perform actions on multiple processes
- Customizable: Modify display columns and sorting options
Installing htop
htop is not installed by default on most Linux distributions, but it’s available in the standard repositories.
Ubuntu/Debian
sudo apt update
sudo apt install htop
CentOS/RHEL/Fedora
# For CentOS/RHEL 7 and earlier
sudo yum install htop

# For CentOS/RHEL 8+ and Fedora
sudo dnf install htop
Arch Linux
sudo pacman -S htopmacOS (using Homebrew)
brew install htopBasic htop Usage
To start htop, simply type the command in your terminal:
htopUnderstanding the htop Interface
The htop interface is divided into several sections:
Header Section
The top section displays:
- CPU Usage: Color-coded bars showing CPU utilization per core
- Memory Usage: RAM and swap usage with visual bars
- Load Average: System load over 1, 5, and 15 minutes
- Tasks: Total number of tasks and their states
- Uptime: System uptime information
Process List
The main area shows running processes with columns for:
- PID: Process ID
- USER: Process owner
- PRI: Process priority
- NI: Nice value
- VIRT: Virtual memory usage
- RES: Physical memory usage
- SHR: Shared memory
- S: Process state
- CPU%: CPU usage percentage
- MEM%: Memory usage percentage
- TIME+: Total CPU time
- COMMAND: Command name or path
Footer Section
Function key shortcuts for quick actions:
- F1: Help
- F2: Setup
- F3: Search
- F4: Filter
- F5: Tree view
- F6: Sort by
- F9: Kill process
- F10: Quit
Navigation and Basic Operations
Moving Around
- Arrow Keys: Navigate up/down through processes
- Page Up/Down: Jump by page
- Home/End: Go to first/last process
- Left/Right: Scroll horizontally through long command lines
Process Selection
- Space: Tag/untag process for multiple selection
- U: Untag all processes
- Enter: View process details
Advanced htop Features
Sorting Processes
Press F6 or </> to sort processes by different criteria:
# Sort by CPU usage (default)
# Press F6, then select CPU%

# Sort by memory usage
# Press F6, then select MEM%

# Sort by process ID
# Press F6, then select PID
Searching and Filtering
Search for Processes
Press F3 or / to search for specific processes:
# Example: Search for "nginx"
# Press F3, type "nginx", press Enter
# Use F3 again to find next occurrence
Filter Processes
Press F4 or \ to filter processes by name:
# Example: Show only processes containing "python"
# Press F4, type "python", press Enter
# Press F4 again and clear to remove filter
Tree View Mode
Press F5 or t to toggle tree view, which shows parent-child relationships:
# Example tree view output:
  1 root     /sbin/init
├─ 145 root   /lib/systemd/systemd --user
│  ├─ 234 root   /usr/bin/dbus-daemon --session
│  └─ 256 root   /usr/bin/pulseaudio --start
└─ 167 user    /usr/bin/gnome-session
Process Management with htop
Killing Processes
Select a process and press F9 or k to send signals:
# Common signals:
TERM (15) - Terminate gracefully (default)
KILL (9)  - Force terminate (cannot be ignored)
HUP (1)   - Hang up (restart daemon)
STOP (19) - Pause process
CONT (18) - Resume paused process
Example: Killing a Specific Process
- Navigate to the process you want to terminate
- Press
F9ork - Select the signal (TERM is usually sufficient)
- Press Enter to confirm
Changing Process Priority
Select a process and use these keys to adjust priority:
- F7: Decrease priority (increase nice value)
- F8: Increase priority (decrease nice value)
# Priority levels:
# -20 to -1: High priority (requires root)
# 0: Default priority
# 1 to 19: Lower priority
Customizing htop
Setup Menu
Press F2 to access the setup menu with these options:
Meters
Customize the header display:
- Add/remove system information meters
- Rearrange meter positions
- Choose meter styles (bar, text, graph, LED)
Display Options
Options available:
□ Tree view
□ Shadow other users' processes
□ Hide kernel threads
□ Hide userland process threads
□ Display threads in a different color
□ Show custom thread names
□ Show program path
□ Highlight program "basename"
Colors
Choose from different color schemes:
- Default
- Monochromatic
- Black & White
- Light Terminal
- MC
- Black Night
Columns
Add or remove columns from the process list:
Available columns:
- PID, PPID, PGRP, SESSION, TTY
- USER, UID
- PRIORITY, NICE
- CPU%, MEM%, TIME+
- VIRT, RES, SHR
- STATE, NLWP
- And many more...
Command Line Options
htop supports various command-line options for customized startup:
User Filtering
# Show processes for specific user
htop -u username

# Show processes for current user only
htop -u $(whoami)

# Show processes for multiple users
htop -u user1,user2,user3
Process Filtering
# Show only processes matching pattern
htop -p PID1,PID2,PID3

# Example: Monitor specific PIDs
htop -p 1234,5678
Delay and Updates
# Set update delay (in tenths of seconds)
htop -d 50  # Update every 5 seconds (default is 1.5 seconds)

# Disable mouse support
htop --no-mouse
Startup Options
# Start in tree mode
htop -t

# Start with specific sorting
htop -s MEMORY  # Sort by memory usage
Practical Examples and Use Cases
Example 1: Monitoring System Performance
Launch htop to get an immediate overview of your system:
htopLook for:
- High CPU usage processes (red bars in CPU section)
- Memory consumption (check MEM% column)
- Load average (should be less than number of CPU cores)
Example 2: Finding Memory Leaks
- Start htop:
htop - Sort by memory usage: Press
F6, selectMEM% - Monitor processes over time for increasing memory usage
- Identify processes with unusually high or growing memory consumption
Example 3: Managing Web Server Processes
# Filter for Apache processes
# Press F4, type "apache" or "httpd"

# Or start with filter
htop -u www-data  # For Debian/Ubuntu
htop -u apache    # For CentOS/RHEL
Example 4: Monitoring Development Environment
# Monitor Python development processes
htop -u developer

# Then filter for Python processes
# Press F4, type "python"
Troubleshooting Common Issues
htop Not Found
If you get “command not found,” install htop using your distribution’s package manager as shown in the installation section.
Permission Issues
Some operations require elevated privileges:
# Run as root for full process management
sudo htop

# Or use sudo for specific operations when prompted
Display Issues
If htop doesn’t display properly:
- Check terminal compatibility
- Try different color schemes (F2 → Colors)
- Resize terminal window
- Use
htop --no-unicodefor terminals without Unicode support
htop vs Other Monitoring Tools
htop vs top
| Feature | htop | top |
|---|---|---|
| User Interface | Colorful, interactive | Text-based, basic |
| Mouse Support | Yes | No |
| Process Tree | Yes | Limited |
| Multiple Selection | Yes | No |
| Horizontal Scrolling | Yes | No |
htop vs System Monitor GUI
- htop advantages: Lightweight, SSH-friendly, scriptable
- GUI advantages: Graphs, historical data, easier for beginners
Best Practices and Tips
Regular Monitoring
- Check system performance regularly during peak usage
- Monitor resource usage trends over time
- Set up custom configurations for different monitoring scenarios
Process Management
- Always try TERM signal before KILL
- Be cautious when killing system processes
- Use tree view to understand process relationships
- Monitor child processes when terminating parents
Performance Optimization
- Use htop to identify resource bottlenecks
- Monitor during different system states (idle, busy, startup)
- Compare before/after system changes
- Document recurring performance issues
Integration with Scripts and Automation
Batch Mode
While htop is interactive, you can use it in scripts for monitoring:
#!/bin/bash
# Simple monitoring script
echo "System Status at $(date)"
htop -b -n 1 | head -20
Combining with Other Tools
# Monitor and log high CPU processes
htop -b -n 1 | grep -E "([0-9]{2,3}\.[0-9])" | head -10 >> cpu_usage.log

# Alert on high memory usage
htop -b -n 1 | awk '$9 > 80 { print $12 " is using " $9 "% memory" }'
Conclusion
The htop command is an indispensable tool for Linux system administrators and developers who need effective process monitoring and management capabilities. Its interactive interface, rich feature set, and customizable display make it superior to the traditional top command for most use cases.
Key takeaways:
- htop provides real-time, interactive system monitoring
- The colorful interface makes it easier to identify system issues quickly
- Advanced features like filtering, searching, and tree view enhance productivity
- Process management capabilities allow for efficient system administration
- Customization options adapt the tool to specific monitoring needs
Whether you’re troubleshooting performance issues, monitoring server resources, or managing development environments, mastering htop will significantly improve your Linux system administration skills. Start with the basic navigation and gradually explore the advanced features to become proficient in this powerful monitoring tool.
Related Posts

top Command Linux: Complete Guide to Real-Time Process Monitoring
The top command is one of the most essential tools in a Linux system administrator's arsenal. It provides real-time information...
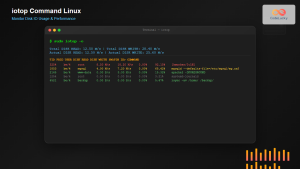
iotop Command Linux: Complete Guide to Monitor Disk IO Usage and Performance
The iotop command is an essential Linux utility that provides real-time monitoring of disk I/O usage by processes and threads....
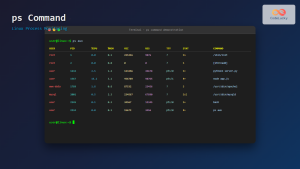
ps Command in Linux: Complete Guide to Process Monitoring and Management
The ps command is one of the most fundamental and powerful tools in Linux for displaying information about running processes....
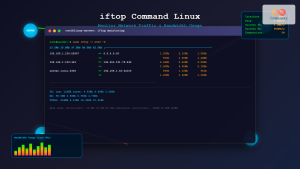
iftop Command Linux: Monitor Network Traffic and Display Bandwidth Usage by Connection
The iftop command is a powerful network monitoring tool in Linux that displays real-time bandwidth usage by network connections. Similar...
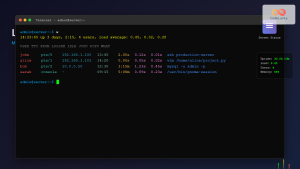
w Command Linux: Complete Guide to Monitor Active Users and System Activity
The w command is one of the most essential system monitoring tools in Linux, providing administrators and users with real-time...
vmstat Command Linux: Monitor Virtual Memory and System Performance Statistics
The vmstat command is one of the most powerful and essential tools for Linux system administrators and developers to monitor...
perf Command Linux: Complete Performance Analysis and Profiling Guide
The perf command is one of the most powerful performance analysis tools available in Linux, offering comprehensive insights into system...
watch Command Linux: Monitor and Execute Commands Repeatedly in Real-Time
The watch command is one of the most powerful utilities in Linux for executing commands repeatedly at regular intervals and...

Process in Operating System: Complete Guide to Definition, States and Lifecycle
What is a Process in Operating System? A process is a program in execution that consists of the program code...

ptrace Command Linux: Complete Guide to Process Tracing System Call
The ptrace system call is one of Linux's most powerful tools for process monitoring and debugging. It allows one process...

free Command in Linux: Monitor Memory Usage and Swap Space Efficiently
The free command is one of the most essential utilities in Linux for monitoring system memory usage and swap space....

strace Advanced Linux: Complete Guide to System Call Tracing and Debugging
strace is one of the most powerful debugging and diagnostic tools available in Linux systems. It allows you to trace...


