
The fsck (file system check) command is one of the most crucial system administration tools in Linux, designed to check and repair filesystem inconsistencies. Whether you’re dealing with unexpected shutdowns, hardware failures, or routine maintenance, understanding fsck is essential for maintaining system integrity and preventing data loss.
What is the fsck Command?
The fsck command is a filesystem checker that verifies the integrity of Linux filesystems and attempts to repair any detected errors. It’s typically run automatically during boot when the system detects potential filesystem issues, but can also be executed manually by system administrators.
The command works by examining the filesystem’s metadata structures, including inodes, directory entries, and block allocation tables, to ensure consistency and detect corruption.
Basic fsck Syntax
fsck [options] [filesystem]Where:
- [options]: Various flags to control fsck behavior
- [filesystem]: The device or mount point to check
Essential fsck Options
Common Options
| Option | Description |
|---|---|
-a |
Automatically repair without prompting |
-r |
Interactively repair (ask before fixing) |
-n |
Check only, no repairs (read-only mode) |
-v |
Verbose output |
-f |
Force check even if filesystem seems clean |
-p |
Preen mode (safe automatic repairs) |
Advanced Options
| Option | Description |
|---|---|
-A |
Check all filesystems in /etc/fstab |
-R |
Skip root filesystem when using -A |
-t fstype |
Specify filesystem type |
-C |
Show progress bar (for supported filesystems) |
Basic fsck Examples
1. Check Filesystem Without Repairs
sudo fsck -n /dev/sdb1Sample Output:
fsck from util-linux 2.37.2
e2fsck 1.46.2 (28-Feb-2021)
/dev/sdb1: clean, 15/65536 files, 12043/262144 blocks
2. Interactive Filesystem Check
sudo fsck -r /dev/sdb1Sample Output:
fsck from util-linux 2.37.2
e2fsck 1.46.2 (28-Feb-2021)
Pass 1: Checking inodes, blocks, and sizes
Pass 2: Checking directory structure
Pass 3: Checking directory connectivity
Pass 4: Checking reference counts
Pass 5: Checking group summary information
/dev/sdb1: 15/65536 files (0.0% non-contiguous), 12043/262144 blocks
3. Automatic Repair Mode
sudo fsck -a /dev/sdb1Sample Output:
fsck from util-linux 2.37.2
/dev/sdb1: recovering journal
/dev/sdb1: clean, 15/65536 files, 12043/262144 blocks
Advanced fsck Usage
Force Check on Clean Filesystem
Sometimes you need to check a filesystem even when it appears clean:
sudo fsck -f /dev/sdb1Sample Output:
fsck from util-linux 2.37.2
e2fsck 1.46.2 (28-Feb-2021)
Pass 1: Checking inodes, blocks, and sizes
Pass 2: Checking directory structure
Pass 3: Checking directory connectivity
Pass 4: Checking reference counts
Pass 5: Checking group summary information
/dev/sdb1: 15/65536 files (0.0% non-contiguous), 12043/262144 blocks
Check All Filesystems
To check all filesystems listed in /etc/fstab:
sudo fsck -A -RThe -R option skips the root filesystem, which should not be checked while mounted.
Verbose Mode with Progress
sudo fsck -v -C /dev/sdb1Sample Output:
fsck from util-linux 2.37.2
[/dev/sdb1 (1/5) -- /mnt/data] fsck.ext4 -C /dev/sdb1
e2fsck 1.46.2 (28-Feb-2021)
Pass 1: Checking inodes, blocks, and sizes
[====================] (100.0%)
Pass 2: Checking directory structure
[====================] (100.0%)
Pass 3: Checking directory connectivity
[====================] (100.0%)
Pass 4: Checking reference counts
[====================] (100.0%)
Pass 5: Checking group summary information
[====================] (100.0%)
/dev/sdb1: 15/65536 files (0.0% non-contiguous), 12043/262144 blocks
Filesystem-Specific fsck Commands
EXT2/EXT3/EXT4 Filesystems
sudo fsck.ext4 -f /dev/sdb1XFS Filesystems
sudo fsck.xfs -n /dev/sdb1Note: XFS has limited repair capabilities with fsck. Use xfs_repair for actual repairs.
FAT32 Filesystems
sudo fsck.fat -v /dev/sdb1Understanding fsck Exit Codes
fsck returns specific exit codes that indicate the result of the filesystem check:
| Exit Code | Meaning |
|---|---|
| 0 | No errors found |
| 1 | Filesystem errors corrected |
| 2 | System should be rebooted |
| 4 | Filesystem errors left uncorrected |
| 8 | Operational error |
| 16 | Usage or syntax error |
| 32 | fsck canceled by user request |
| 128 | Shared-library error |
Best Practices and Safety Guidelines
1. Unmount Before Checking
Always unmount the filesystem before running fsck:
sudo umount /dev/sdb1
sudo fsck /dev/sdb1
2. Use Read-Only Mode First
Before making any repairs, check what issues exist:
sudo fsck -n /dev/sdb13. Backup Important Data
Before running fsck with repair options, ensure you have current backups of important data.
4. Check Root Filesystem in Single-User Mode
To check the root filesystem:
# Boot into single-user mode first
sudo init 1
sudo fsck -f /
Practical fsck Scenarios
Scenario 1: System Won’t Boot Due to Filesystem Errors
- Boot from a live USB/CD
- Identify the problematic partition
- Run fsck with automatic repair
sudo fsck -y /dev/sda1Scenario 2: Scheduled Maintenance Check
For routine maintenance on an unmounted data partition:
sudo umount /mnt/data
sudo fsck -v -f /dev/sdb1
sudo mount /dev/sdb1 /mnt/data
Scenario 3: Checking Multiple Filesystems
To check all ext4 filesystems:
sudo fsck -t ext4 -A -RTroubleshooting Common Issues
Issue: “Filesystem is mounted”
Error:
fsck: /dev/sdb1 is mounted.
fsck: Cannot continue, aborting.
Solution: Unmount the filesystem first:
sudo umount /dev/sdb1Issue: “Bad magic number in superblock”
Solution: Try using backup superblocks:
sudo fsck.ext4 -b 8193 /dev/sdb1Issue: fsck Hangs or Takes Too Long
Solution: Use the progress option:
sudo fsck -C /dev/sdb1Automation and Scripts
Simple fsck Script
#!/bin/bash
# Simple fsck automation script

DEVICE="/dev/sdb1"
MOUNT_POINT="/mnt/data"

echo "Unmounting $DEVICE..."
umount $MOUNT_POINT

echo "Running filesystem check..."
fsck -p $DEVICE

if [ $? -eq 0 ]; then
    echo "Filesystem check completed successfully"
    mount $DEVICE $MOUNT_POINT
    echo "Filesystem remounted"
else
    echo "Filesystem check failed - manual intervention required"
fi
Integration with System Boot
Linux systems automatically run fsck during boot under certain conditions:
- After a specified number of mounts
- After a certain time period
- When filesystem errors are detected
- After an unclean shutdown
You can configure these parameters using tune2fs:
sudo tune2fs -c 30 /dev/sdb1  # Check after 30 mounts
sudo tune2fs -i 30d /dev/sdb1  # Check every 30 days
Performance Considerations
fsck performance depends on several factors:
- Filesystem size: Larger filesystems take longer to check
- Number of files: More inodes mean longer check times
- Storage type: SSDs are generally faster than HDDs
- Filesystem fragmentation: Heavily fragmented filesystems take longer
Security Considerations
When using fsck:
- Always run with appropriate privileges (sudo)
- Be cautious with automatic repair modes on critical systems
- Verify backups before performing repairs
- Consider the security implications of filesystem modifications
Conclusion
The fsck command is an indispensable tool for Linux system administrators, providing essential filesystem maintenance and repair capabilities. By understanding its various options, best practices, and potential pitfalls, you can effectively maintain filesystem integrity and prevent data loss.
Remember to always unmount filesystems before checking them, use read-only mode first to assess problems, and maintain current backups before performing any repairs. Regular filesystem maintenance using fsck helps ensure system stability and data integrity in your Linux environment.
Related Posts

xfs_repair Command Linux: Complete Guide to Fix and Repair XFS Filesystems
The xfs_repair command is a powerful utility in Linux designed specifically for checking and repairing XFS filesystems. As XFS is...

e2fsck Command Linux: Complete Guide to Check and Repair Ext2/3/4 Filesystems
The e2fsck command is a critical system administration tool in Linux designed to check and repair Ext2, Ext3, and Ext4...
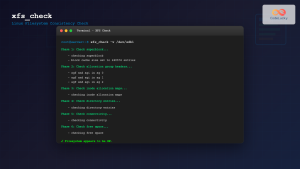
xfs_check Command Linux: Complete Guide to XFS Filesystem Consistency Verification
The xfs_check command is a crucial system administration tool in Linux for verifying the consistency and integrity of XFS filesystems....
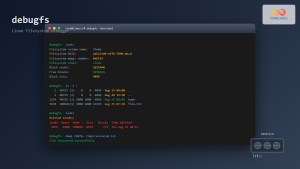
debugfs Command Linux: Complete Guide to Debug Ext2/3/4 Filesystems
The debugfs command is a powerful interactive filesystem debugger for ext2, ext3, and ext4 filesystems in Linux. It provides low-level...

tune2fs Command Linux: Complete Guide to Ext2/3/4 Filesystem Tuning
The tune2fs command is a powerful Linux utility that allows system administrators to modify and tune various parameters of ext2,...

dumpe2fs Command Linux: Complete Guide to Display Ext2/3/4 Filesystem Information
The dumpe2fs command is a powerful Linux utility that displays detailed information about ext2, ext3, and ext4 filesystems. This essential...
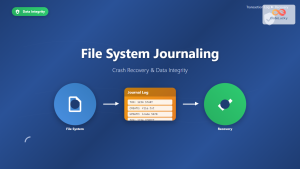
File System Journaling: Complete Guide to Crash Recovery and Data Integrity
Understanding File System Journaling File system journaling is a critical mechanism that ensures data integrity and enables rapid crash recovery...

File System Types: FAT32, NTFS, ext4 and Modern Linux Filesystems Explained
Understanding File Systems: The Foundation of Data Storage A file system is the method and data structure that an operating...

C Error Handling: Using errno and perror()
Error handling is a crucial aspect of writing robust and reliable C programs. When things go wrong, it's essential to...

xfs_info Command Linux: Complete Guide to Display XFS Filesystem Information
The xfs_info command is a powerful utility in Linux systems that provides comprehensive information about XFS filesystems. This command is...
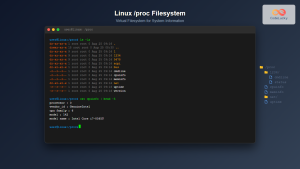
proc filesystem Linux: Complete Guide to Understanding /proc Directory Structure and Commands
What is the Linux /proc Filesystem? The /proc filesystem is a virtual filesystem in Linux that provides a window into...
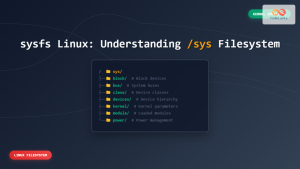
sysfs Linux: Complete Guide to Understanding and Using /sys Filesystem
The sysfs filesystem is one of Linux's most powerful yet underutilized features, providing a window into the kernel's internal operations...


