
The edquota command is a powerful Linux system administration tool that allows you to edit user and group disk quotas interactively. This essential command helps system administrators control disk space usage and prevent users from consuming excessive storage resources on shared systems.
What is the edquota Command?
The edquota command stands for “edit quota” and provides an interactive interface for modifying disk quotas for users and groups. It launches a text editor (typically vi or nano) that displays the current quota settings, allowing administrators to make changes directly within the editor interface.
Prerequisites
Before using the edquota command, ensure that:
- Quota support is enabled on your filesystem
- You have root or sudo privileges
- The
quotapackage is installed - Quotas are mounted and initialized on the target filesystem
Basic Syntax
edquota [options] username
edquota [options] -g groupname
Common Options
| Option | Description |
|---|---|
-u |
Edit user quotas (default behavior) |
-g |
Edit group quotas |
-t |
Edit grace time periods |
-p |
Duplicate quota settings from one user to another |
-f |
Specify filesystem to edit quotas on |
Understanding Quota Fields
When you run edquota, you’ll see several fields:
- Filesystem: The mounted filesystem where quotas are applied
- blocks: Current disk usage in 1KB blocks
- soft: Soft limit for disk space (warning threshold)
- hard: Hard limit for disk space (absolute maximum)
- inodes: Current number of files/directories used
- soft (inodes): Soft limit for number of files
- hard (inodes): Hard limit for number of files
Practical Examples
Example 1: Editing User Quota
sudo edquota johnThis command opens an editor showing John’s current quota settings:
Disk quotas for user john (uid 1001):
  Filesystem    blocks   soft   hard  inodes   soft   hard
  /dev/sda1      1024   5000  10000      25    100    200
In this example:
- John is currently using 1024 KB of disk space
- Soft limit is set to 5000 KB (5 MB)
- Hard limit is set to 10000 KB (10 MB)
- He has 25 files with limits of 100 (soft) and 200 (hard)
Example 2: Setting Group Quotas
sudo edquota -g developersOutput:
Disk quotas for group developers (gid 1010):
  Filesystem    blocks   soft   hard  inodes   soft   hard
  /dev/sda1      5120  50000 100000     150   1000   2000
Example 3: Copying Quota Settings
sudo edquota -p john maryThis command copies John’s quota settings to Mary’s account, maintaining the same limits without opening an editor.
Example 4: Editing Grace Periods
sudo edquota -tOutput:
Grace period before enforcing soft limits for users:
Time units may be: days, hours, minutes, or seconds
  Filesystem    Block grace period   Inode grace period
  /dev/sda1            7days              7days
Step-by-Step Quota Setup Process
Step 1: Enable Quota Support
First, ensure your filesystem supports quotas by adding quota options to /etc/fstab:
/dev/sda1 /home ext4 defaults,usrquota,grpquota 0 2Step 2: Remount Filesystem
sudo mount -o remount /homeStep 3: Initialize Quota Database
sudo quotacheck -cug /home
sudo quotaon /home
Step 4: Set User Quotas
sudo edquota usernameAdvanced Usage Scenarios
Setting Quotas for Multiple Users
To set the same quota for multiple users efficiently:
# Set quota for template user
sudo edquota templateuser

# Copy to multiple users
sudo edquota -p templateuser user1 user2 user3
Filesystem-Specific Quotas
When working with multiple filesystems:
sudo edquota -f /var johnThis edits quotas for user ‘john’ specifically on the /var filesystem.
Best Practices
1. Set Realistic Limits
Configure quotas based on actual usage patterns and business requirements:
- Monitor current usage before setting limits
- Set soft limits at 80-90% of hard limits
- Consider growth requirements
2. Use Grace Periods Effectively
Configure appropriate grace periods to give users time to clean up:
sudo edquota -t
# Set grace period to 3 days for blocks and 1 day for inodes
3. Regular Monitoring
Implement regular quota monitoring:
# Check quota usage
sudo repquota -a

# Generate quota reports
sudo quota -u username
Troubleshooting Common Issues
Issue 1: “Quotas not enabled”
Solution: Ensure quota options are added to /etc/fstab and filesystem is remounted.
Issue 2: “Permission denied”
Solution: Run edquota with sudo privileges as it requires root access.
Issue 3: Editor not opening
Solution: Set your preferred editor:
export EDITOR=nano
sudo edquota username
Security Considerations
When using edquota, keep these security aspects in mind:
- Only grant quota management privileges to trusted administrators
- Regularly audit quota settings and usage
- Monitor for quota bypass attempts
- Log quota modifications for security compliance
Integration with System Monitoring
Integrate quota management with system monitoring tools:
# Create monitoring script
#!/bin/bash
repquota -a | awk '$4 > $5 * 0.9 { print $1 " approaching quota limit" }'
Conclusion
The edquota command is an indispensable tool for Linux system administrators managing multi-user environments. By understanding its syntax, options, and best practices, you can effectively control disk usage, prevent system abuse, and maintain optimal server performance. Regular monitoring and proper configuration ensure your quota system remains effective and user-friendly.
Remember to always test quota changes in a non-production environment first and maintain regular backups of your quota configuration files for disaster recovery purposes.
Related Posts
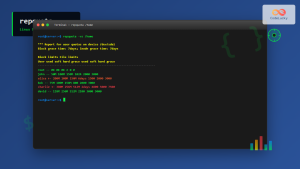
repquota Command Linux: Complete Guide to Disk Quota Reporting and Management
The repquota command is an essential Linux system administration tool used to report disk quota usage for users and groups...
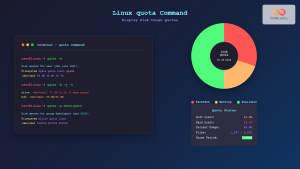
quota Command Linux: Complete Guide to Display and Manage Disk Usage Quotas
The quota command is an essential Linux system administration tool that displays disk usage and quota information for users and...
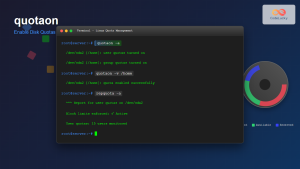
quotaon Command Linux: Enable and Manage Disk Quotas Effectively
The quotaon command is a powerful Linux utility that enables disk quota enforcement on file systems. It allows system administrators...
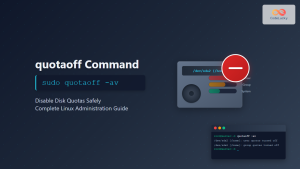
quotaoff Command Linux: Complete Guide to Disable Disk Quotas Safely
The quotaoff command is a crucial Linux system administration tool used to disable disk quotas on file systems. When you...
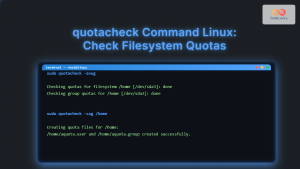
quotacheck Command Linux: Check Filesystem Quotas Explained with Examples
In Linux system administration, maintaining and monitoring disk usage is critical. Without proper checks, uncontrolled disk consumption can lead to...
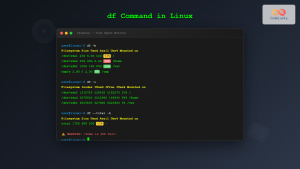
df Command in Linux: Complete Guide to Check Disk Space Usage
The df command is one of the most essential tools in a Linux system administrator's toolkit. Standing for "disk free,"...

du Command Linux: Display Directory Size and Disk Usage Explained with Examples
The du (disk usage) command in Linux is a powerful tool that allows users to measure directory size, analyze disk...
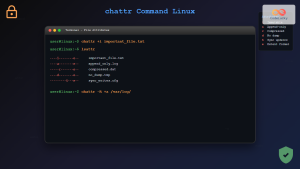
chattr Command Linux: Complete Guide to Change File Attributes with Examples
The chattr command in Linux is a powerful utility that allows system administrators and users to change file attributes on...
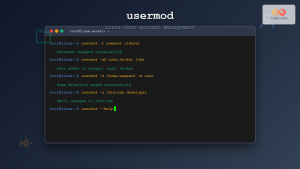
usermod Command Linux: Complete Guide to Modify User Account Properties
The usermod command is a powerful Linux utility that allows system administrators to modify existing user account properties without deleting...

ulimit Command Linux: Complete Guide to Setting User Resource Limits
The ulimit command is a powerful built-in shell utility in Linux that allows users and system administrators to control the...
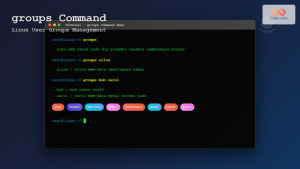
groups Command Linux: Complete Guide to Display User Group Memberships
The groups command is a fundamental Linux utility that displays the group memberships of users on your system. Understanding how...

stat Command Linux: Complete Guide to Display File and Filesystem Status Information
The stat command is a powerful Linux utility that displays detailed information about files and filesystems. Unlike basic commands like...


