
The e2fsck command is a critical system administration tool in Linux designed to check and repair Ext2, Ext3, and Ext4 filesystems. This powerful utility helps maintain filesystem integrity, detect corruption, and fix various filesystem issues that can occur due to unexpected shutdowns, hardware failures, or software bugs.
What is e2fsck Command?
The e2fsck (second extended filesystem check) command is the primary filesystem checker for the ext2, ext3, and ext4 filesystem families. It performs comprehensive checks on filesystem structures, including:
- Superblock integrity
- Inode table consistency
- Directory structure validation
- Block allocation verification
- Journal consistency (for ext3/ext4)
Basic Syntax
e2fsck [OPTIONS] deviceWhere device is the filesystem device (e.g., /dev/sda1, /dev/hdb2).
Important Prerequisites
Common e2fsck Options
| Option | Description |
|---|---|
-a |
Automatically fix errors without prompting |
-c |
Check for bad blocks |
-f |
Force checking even if filesystem appears clean |
-n |
Open filesystem read-only, answer “no” to all questions |
-p |
Preen mode – automatically fix minor problems |
-v |
Verbose output |
-y |
Answer “yes” to all questions |
Basic Usage Examples
1. Basic Filesystem Check
To perform a basic check on an unmounted filesystem:
sudo e2fsck /dev/sda1Sample Output:
e2fsck 1.46.2 (28-Feb-2021)
/dev/sda1: clean, 125843/655360 files, 1456789/2621440 blocks
2. Force Check on Clean Filesystem
sudo e2fsck -f /dev/sda1Sample Output:
e2fsck 1.46.2 (28-Feb-2021)
Pass 1: Checking inodes, blocks, and sizes
Pass 2: Checking directory structure
Pass 3: Checking directory connectivity
Pass 4: Checking reference counts
Pass 5: Checking group summary information
/dev/sda1: 125843/655360 files (0.1% non-contiguous), 1456789/2621440 blocks
3. Verbose Check with Detailed Output
sudo e2fsck -v /dev/sda1Sample Output:
e2fsck 1.46.2 (28-Feb-2021)
/dev/sda1: clean, 125843/655360 files, 1456789/2621440 blocks

         125843 inodes used (19.21%, out of 655360)
            234 non-contiguous files (0.2%)
             45 non-contiguous directories (0.0%)
             # of inodes with ind/dind/tind blocks: 0/0/0
             Extent depth histogram: 118934/6742/167
        1456789 blocks used (55.54%, out of 2621440)
              0 bad blocks
              1 large file

         118934 regular files
           6742 directories
            167 character device files
             45 block device files
              0 fifos
              0 links
              0 symbolic links (0 fast symbolic links)
              0 sockets
Advanced Usage Examples
4. Automatic Repair Mode
To automatically fix errors without user intervention:
sudo e2fsck -a /dev/sda1If errors are found and fixed:
e2fsck 1.46.2 (28-Feb-2021)
/dev/sda1 was not cleanly unmounted, check forced.
Pass 1: Checking inodes, blocks, and sizes
Pass 2: Checking directory structure
Pass 3: Checking directory connectivity
Pass 4: Checking reference counts
Pass 5: Checking group summary information

/dev/sda1: ***** FILE SYSTEM WAS MODIFIED *****
/dev/sda1: 125843/655360 files (0.1% non-contiguous), 1456789/2621440 blocks
5. Check for Bad Blocks
sudo e2fsck -c /dev/sda1Sample Output:
e2fsck 1.46.2 (28-Feb-2021)
Checking for bad blocks (read-only test): done
Pass 1: Checking inodes, blocks, and sizes
Pass 2: Checking directory structure
Pass 3: Checking directory connectivity
Pass 4: Checking reference counts
Pass 5: Checking group summary information
/dev/sda1: 125843/655360 files (0.1% non-contiguous), 1456789/2621440 blocks
6. Read-Only Check (Safe Mode)
sudo e2fsck -n /dev/sda1This performs a check without making any changes:
e2fsck 1.46.2 (28-Feb-2021)
/dev/sda1: clean, 125843/655360 files, 1456789/2621440 blocks
Understanding e2fsck Phases
When e2fsck runs, it performs checks in five distinct passes:
Pass 1: Checking inodes, blocks, and sizes
- Validates inode structure
- Checks block allocation
- Verifies file sizes
Pass 2: Checking directory structure
- Validates directory entries
- Checks filename consistency
- Verifies directory block allocation
Pass 3: Checking directory connectivity
- Ensures all directories are reachable
- Checks for orphaned directories
- Validates directory hierarchy
Pass 4: Checking reference counts
- Verifies inode link counts
- Checks for unreferenced inodes
- Validates hard link consistency
Pass 5: Checking group summary information
- Validates block group descriptors
- Checks free block/inode counts
- Ensures metadata consistency
Common Error Types and Solutions
Inode Errors
Inode 12345 has illegal block(s). Clear? (y/n)Solution: Usually safe to clear corrupted inodes by answering ‘y’.
Directory Errors
Entry 'filename' in /path/to/dir (inode #12345) has deleted/unused inode 67890. Clear? (y/n)Solution: Clear the invalid directory entry.
Bad Block Errors
Block #12345 (12345) has illegal/duplicate block(s) in inode 67890. Remove? (y/n)Solution: Remove the bad block reference and let e2fsck reallocate.
Best Practices
1. Regular Filesystem Checks
Schedule regular filesystem checks using cron:
# Check filesystem weekly
0 2 * * 0 /sbin/e2fsck -p /dev/sda1 > /var/log/fsck.log 2>&1
2. Before System Maintenance
Always run e2fsck before major system updates:
sudo e2fsck -f -v /dev/sda13. After Unexpected Shutdowns
Check filesystems after system crashes:
sudo e2fsck -a /dev/sda1Troubleshooting Common Issues
Filesystem is Mounted Error
If you see:
e2fsck: Cannot continue, aborting.
/dev/sda1 is mounted.
Solution:
sudo umount /dev/sda1
sudo e2fsck /dev/sda1
sudo mount /dev/sda1 /mount/point
Root Filesystem Check
For root filesystem, use read-only mode or boot from rescue media:
sudo e2fsck -n /Interactive Example: Step-by-Step Filesystem Check
Let’s walk through a complete filesystem check scenario:
Step 1: Identify the Filesystem
lsblk -fOutput:
NAME   FSTYPE LABEL UUID                                 MOUNTPOINT
sda1   ext4         550e8400-e29b-41d4-a716-446655440000 /home
sda2   ext4         550e8400-e29b-41d4-a716-446655440001 /
Step 2: Unmount the Filesystem
sudo umount /dev/sda1Step 3: Run Comprehensive Check
sudo e2fsck -f -v /dev/sda1Step 4: Remount the Filesystem
sudo mount /dev/sda1 /homePerformance Considerations
Large Filesystem Optimization
For large filesystems, use these options to improve performance:
sudo e2fsck -D -f /dev/sda1The -D option optimizes directory structures.
Progress Monitoring
For long-running checks, enable progress indication:
sudo e2fsck -C 0 -f /dev/sda1Security Considerations
- Root Privileges: e2fsck requires root access, so use sudo carefully
- Data Backup: Always backup critical data before running repair operations
- System Stability: Ensure stable power supply during filesystem checks
- Log Monitoring: Review e2fsck logs for recurring issues
Alternative Tools
fsck Command
The generic fsck command automatically detects filesystem type:
sudo fsck /dev/sda1tune2fs Command
Configure automatic filesystem checks:
sudo tune2fs -c 30 /dev/sda1  # Check every 30 mounts
sudo tune2fs -i 180d /dev/sda1 # Check every 180 days
Conclusion
The e2fsck command is an essential tool for maintaining Linux filesystem health. Regular use of e2fsck helps prevent data loss, ensures system stability, and maintains optimal filesystem performance. Remember to always unmount filesystems before checking, keep regular backups, and monitor system logs for recurring issues.
By mastering e2fsck and its various options, you can effectively troubleshoot filesystem problems, perform preventive maintenance, and ensure the long-term reliability of your Linux systems. Whether you’re performing routine maintenance or recovering from system failures, e2fsck provides the comprehensive tools needed for professional filesystem management.
Related Posts

dumpe2fs Command Linux: Complete Guide to Display Ext2/3/4 Filesystem Information
The dumpe2fs command is a powerful Linux utility that displays detailed information about ext2, ext3, and ext4 filesystems. This essential...

tune2fs Command Linux: Complete Guide to Ext2/3/4 Filesystem Tuning
The tune2fs command is a powerful Linux utility that allows system administrators to modify and tune various parameters of ext2,...

fsck Command Linux: Complete Guide to Filesystem Check and Repair
The fsck (file system check) command is one of the most crucial system administration tools in Linux, designed to check...

xfs_repair Command Linux: Complete Guide to Fix and Repair XFS Filesystems
The xfs_repair command is a powerful utility in Linux designed specifically for checking and repairing XFS filesystems. As XFS is...
xfs_check Command Linux: Complete Guide to XFS Filesystem Consistency Verification
The xfs_check command is a crucial system administration tool in Linux for verifying the consistency and integrity of XFS filesystems....
resize2fs Command Linux: Complete Guide to Resize Ext2/3/4 Filesystems Safely
The resize2fs command is a powerful Linux utility designed to resize ext2, ext3, and ext4 filesystems. Whether you need to...
debugfs Command Linux: Complete Guide to Debug Ext2/3/4 Filesystems
The debugfs command is a powerful interactive filesystem debugger for ext2, ext3, and ext4 filesystems in Linux. It provides low-level...

File System Types: FAT32, NTFS, ext4 and Modern Linux Filesystems Explained
Understanding File Systems: The Foundation of Data Storage A file system is the method and data structure that an operating...
proc filesystem Linux: Complete Guide to Understanding /proc Directory Structure and Commands
What is the Linux /proc Filesystem? The /proc filesystem is a virtual filesystem in Linux that provides a window into...
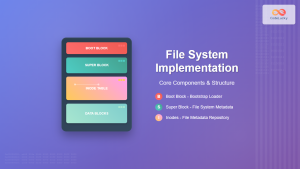
File System Implementation: Boot Block, Super Block and Inodes Explained
Understanding File System Implementation File system implementation is a critical component of operating systems that manages how data is stored,...

xfs_info Command Linux: Complete Guide to Display XFS Filesystem Information
The xfs_info command is a powerful utility in Linux systems that provides comprehensive information about XFS filesystems. This command is...
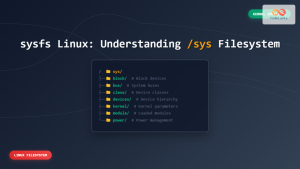
sysfs Linux: Complete Guide to Understanding and Using /sys Filesystem
The sysfs filesystem is one of Linux's most powerful yet underutilized features, providing a window into the kernel's internal operations...


