
The debugfs command is a powerful interactive filesystem debugger for ext2, ext3, and ext4 filesystems in Linux. It provides low-level access to filesystem structures, making it an essential tool for system administrators, forensic analysts, and anyone needing to diagnose or recover data from damaged filesystems.
What is debugfs?
debugfs is an interactive filesystem debugger that allows you to examine and modify ext2/3/4 filesystems at the block and inode level. Unlike standard filesystem tools, debugfs provides direct access to the underlying filesystem structures, making it invaluable for:
- Debugging filesystem corruption
- Data recovery operations
- Forensic analysis
- Understanding filesystem internals
- Emergency repairs when other tools fail
Basic Syntax and Installation
The basic syntax of debugfs is:
debugfs [options] devicedebugfs is typically included with the e2fsprogs package, which is installed by default on most Linux distributions. If not available, install it using:
# Ubuntu/Debian
sudo apt-get install e2fsprogs

# RHEL/CentOS/Fedora
sudo yum install e2fsprogs
# or
sudo dnf install e2fsprogs
Common debugfs Options
| Option | Description |
|---|---|
-w |
Open filesystem in read-write mode (dangerous) |
-c |
Open using catastrophic mode |
-i |
Specify device as an image file |
-s superblock |
Use specified superblock |
-b blocksize |
Use specified blocksize |
Starting debugfs
To start debugfs on a filesystem (always ensure it’s unmounted first):
# Basic read-only access
sudo debugfs /dev/sda1

# Output:
debugfs 1.46.2 (28-Feb-2021)
debugfs:
For write access (use with extreme caution):
sudo debugfs -w /dev/sda1Essential debugfs Commands
1. Filesystem Information Commands
show_super_stats
Displays detailed superblock information:
debugfs: show_super_stats

Filesystem volume name:   /
Last mounted on:          /
Filesystem UUID:          a1b2c3d4-e5f6-7890-abcd-ef1234567890
Filesystem magic number:  0xEF53
Filesystem revision #:    1 (dynamic)
Filesystem features:      has_journal ext_attr resize_inode dir_index
                          filetype needs_recovery extent 64bit flex_bg
                          sparse_super large_file huge_file dir_nlink
                          extra_isize metadata_csum
Filesystem flags:         signed_directory_hash
Default mount options:    user_xattr acl
Filesystem state:         clean
Errors behavior:          Continue
Filesystem OS type:       Linux
Inode count:              655360
Block count:              2621440
Reserved block count:     131072
Free blocks:              1858234
Free inodes:              589263
First block:              0
Block size:               4096
Fragment size:            4096
Group descriptor size:    64
Reserved GDT blocks:      1279
Blocks per group:         32768
Fragments per group:      32768
Inodes per group:         8192
stats
Shows basic filesystem statistics:
debugfs: stats

Filesystem volume name:   /
Last mounted on:          /
Filesystem UUID:          a1b2c3d4-e5f6-7890-abcd-ef1234567890
Filesystem magic number:  0xEF53
Filesystem revision #:    1 (dynamic)
Filesystem state:         clean
Block count:              2621440
Free blocks:              1858234
Free inodes:              589263
Block size:               4096
2. Navigation Commands
pwd and cd
Navigate through directories:
debugfs: pwd
[pwd]   INODE: 2  PATH: /

debugfs: cd /home
debugfs: pwd
[pwd]   INODE: 1234  PATH: /home
ls
List directory contents with inode numbers:
debugfs: ls /home
 1234  (12) .    2  (12) ..    5678  (20) user1    9012  (16) user2

debugfs: ls -l /home
      1234   40755 (2)      0      0    4096 25-Aug-2025 09:00 .
         2   40755 (2)      0      0    4096 24-Aug-2025 15:30 ..
      5678   40755 (2)   1000   1000    4096 25-Aug-2025 08:45 user1
      9012   40755 (2)   1001   1001    4096 24-Aug-2025 20:15 user2
3. Inode Operations
stat
Display detailed inode information:
debugfs: stat <1234>
Inode: 1234   Type: directory    Mode:  0755   Flags: 0x80000
Generation: 1234567890    Version: 0x00000000:00000001
User:     0   Group:     0   Project:     0   Size: 4096
File ACL: 0
Links: 2   Blockcount: 8
Fragment:  Address: 0    Number: 0    Size: 0
 ctime: 0x611f4567:12345678 -- Thu Aug 25 09:15:35 2025
 atime: 0x611f4567:12345678 -- Thu Aug 25 09:15:35 2025
 mtime: 0x611f4567:12345678 -- Thu Aug 25 09:15:35 2025
crtime: 0x611f4567:12345678 -- Thu Aug 25 09:15:35 2025
Size of extra inode fields: 32
Inode checksum: 0x12345678
EXTENTS:
(0):8192
icheck
Find which inode uses a specific block:
debugfs: icheck 8192
Block   Inode number
8192    1234
ncheck
Find the pathname of an inode:
debugfs: ncheck 1234
Inode   Pathname
1234    /home
4. Block Operations
dump
Extract file contents to external file:
debugfs: dump /home/user1/document.txt /tmp/recovered_document.txtblock_dump
Display raw block contents:
debugfs: block_dump 8192
0000  2e 00 00 00 0c 00 01 02  2e 2e 00 00 34 12 00 00  |........4...|
0010  0c 00 02 02 75 73 65 72  31 00 00 00 89 34 00 00  |....user1...4|
0020  10 00 02 02 75 73 65 72  32 00 00 00 00 00 00 00  |....user2...|
0030  00 00 00 00 00 00 00 00  00 00 00 00 00 00 00 00  |................|
Advanced debugfs Techniques
File Recovery Example
Here’s a practical example of recovering a deleted file:
# 1. Start debugfs
sudo debugfs /dev/sda1

# 2. Find recently deleted inodes
debugfs: lsdel
 Inode  Owner  Mode    Size    Blocks   Time deleted
  5678      0 100644   12345      3/   3 Thu Aug 25 08:30:25 2025
  9012   1000 100644    4567      1/   1 Thu Aug 25 08:45:15 2025

# 3. Examine the deleted file
debugfs: stat <5678>
Inode: 5678   Type: regular    Mode:  0644   Flags: 0x80000
Generation: 987654321    Version: 0x00000000:00000001
User:     0   Group:     0   Project:     0   Size: 12345
[Truncated for brevity...]

# 4. Recover the file
debugfs: dump <5678> /tmp/recovered_file.txt
Filesystem Corruption Analysis
When dealing with filesystem corruption:
# Check for orphaned inodes
debugfs: lsdel

# Examine superblock for corruption
debugfs: show_super_stats

# Check group descriptors
debugfs: show_debugfs_params
Interactive Debugging Session
Here’s a complete debugging session example:
$ sudo debugfs /dev/sdb1
debugfs 1.46.2 (28-Feb-2021)
debugfs: stats
Filesystem volume name:   backup_disk
Block count:              524288
Free blocks:              401234
Free inodes:              65234
Block size:               4096

debugfs: cd /lost+found
debugfs: ls -l
     11   40700 (2)      0      0    4096 25-Aug-2025 09:00 .
      2   40755 (2)      0      0    4096 24-Aug-2025 15:30 ..
   1024  100644 (1)      0      0   65536 25-Aug-2025 08:15 #1024

debugfs: stat <1024>
Inode: 1024   Type: regular    Mode:  0644   Flags: 0x80000
Size: 65536
Links: 1   Blockcount: 128
EXTENTS:
(0-15):16384-16399

debugfs: dump <1024> /tmp/recovered.dat
debugfs: quit
Safety Considerations and Best Practices
Important Safety Guidelines
- Always unmount the filesystem before using debugfs
- Use read-only mode unless absolutely necessary
- Create backups before making any changes
- Test on non-critical systems first
- Document your actions for future reference
When NOT to Use debugfs
- On mounted, active filesystems
- Without proper backups
- When simpler tools like fsck can resolve the issue
- On production systems without extensive testing
Troubleshooting Common Issues
Permission Denied Errors
# Ensure you're running as root
sudo debugfs /dev/sda1

# Check device permissions
ls -l /dev/sda1
Filesystem Busy Errors
# Unmount the filesystem first
sudo umount /dev/sda1

# Check for processes using the filesystem
sudo fuser -v /dev/sda1
sudo lsof /dev/sda1
Corrupted Superblock
# Use backup superblock
sudo debugfs -s 8193 /dev/sda1

# List available backup superblocks
sudo dumpe2fs /dev/sda1 | grep superblock
Integration with Other Tools
debugfs works well with other filesystem tools:
# Check filesystem before debugging
sudo fsck -n /dev/sda1

# Create filesystem image for safe testing
sudo dd if=/dev/sda1 of=/tmp/fs_image.img
sudo debugfs -i /tmp/fs_image.img

# Use with e2image for metadata extraction
sudo e2image -r /dev/sda1 - | debugfs -i -
Scripting with debugfs
Automate debugfs operations using command files:
# Create command file
cat > debug_commands.txt << EOF
stats
ls /
lsdel
quit
EOF

# Execute commands
sudo debugfs -f debug_commands.txt /dev/sda1
Conclusion
The debugfs command is an indispensable tool for anyone working with ext2/3/4 filesystems. While powerful, it requires careful handling and thorough understanding of filesystem structures. Use it responsibly, always maintain backups, and prefer read-only operations whenever possible.
Master debugfs to become proficient in filesystem debugging, data recovery, and low-level filesystem analysis. With practice and proper precautions, it becomes an essential part of your Linux system administration toolkit.
Remember that debugfs is a low-level tool that directly manipulates filesystem structures. Always test procedures on non-critical systems and maintain current backups before performing any write operations.
Related Posts

dumpe2fs Command Linux: Complete Guide to Display Ext2/3/4 Filesystem Information
The dumpe2fs command is a powerful Linux utility that displays detailed information about ext2, ext3, and ext4 filesystems. This essential...

e2fsck Command Linux: Complete Guide to Check and Repair Ext2/3/4 Filesystems
The e2fsck command is a critical system administration tool in Linux designed to check and repair Ext2, Ext3, and Ext4...

stat Command Linux: Complete Guide to Display File and Filesystem Status Information
The stat command is a powerful Linux utility that displays detailed information about files and filesystems. Unlike basic commands like...

strace Advanced Linux: Complete Guide to System Call Tracing and Debugging
strace is one of the most powerful debugging and diagnostic tools available in Linux systems. It allows you to trace...
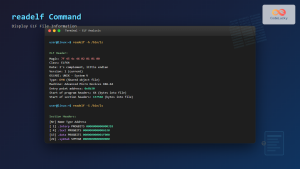
readelf Command Linux: Complete Guide to ELF File Analysis and Debugging
The readelf command is an essential tool for Linux developers, system administrators, and security analysts who need to examine Executable...

tune2fs Command Linux: Complete Guide to Ext2/3/4 Filesystem Tuning
The tune2fs command is a powerful Linux utility that allows system administrators to modify and tune various parameters of ext2,...

fsck Command Linux: Complete Guide to Filesystem Check and Repair
The fsck (file system check) command is one of the most crucial system administration tools in Linux, designed to check...
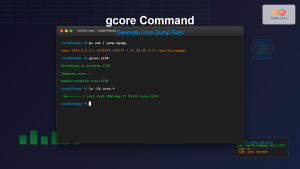
gcore Command Linux: Complete Guide to Generate Core Dump Files for Debugging
The gcore command in Linux is a powerful debugging tool that generates core dump files from running processes without terminating...
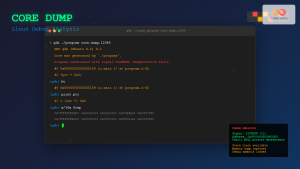
Core Dump Linux: Complete Guide to Debug Program Crashes and Memory Issues
A core dump is a crucial debugging tool in Linux that captures the complete memory state of a program at...
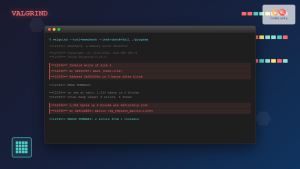
valgrind Command Linux: Complete Memory Debugging and Profiling Guide
Valgrind is one of the most powerful and essential tools for Linux developers and system administrators who need to debug...

xfs_repair Command Linux: Complete Guide to Fix and Repair XFS Filesystems
The xfs_repair command is a powerful utility in Linux designed specifically for checking and repairing XFS filesystems. As XFS is...
gdb Command Linux: Complete GNU Debugger Tutorial for Developers
The GNU Debugger (GDB) is one of the most powerful and essential tools for developers working on Linux systems. As...


