
The dd command is one of the most powerful yet dangerous utilities in Linux, often referred to as “disk destroyer” due to its potential for irreversible data loss when used incorrectly. Despite its reputation, dd is an invaluable tool for system administrators and power users who need to perform low-level file operations, create disk images, or clone entire storage devices.
What is the dd Command?
The dd command (short for “data duplicator” or “convert and copy”) is a command-line utility that copies and converts files at the byte level. Unlike regular copy commands like cp, dd operates at the lowest level, making it ideal for tasks such as:
- Creating exact disk images
- Cloning entire hard drives or partitions
- Creating bootable USB drives
- Backing up and restoring boot sectors
- Converting file formats and character encodings
- Generating files with specific sizes
- Wiping disks securely
Basic dd Command Syntax
The basic syntax of the dd command follows this pattern:
dd if=INPUT_FILE of=OUTPUT_FILE [OPTIONS]Key parameters include:
- if= (input file) – Source file or device
- of= (output file) – Destination file or device
- bs= (block size) – Number of bytes to read/write at once
- count= – Number of blocks to copy
- skip= – Number of blocks to skip from input
- seek= – Number of blocks to skip in output
- conv= – Conversion options
Understanding Block Sizes
Block size is crucial for dd performance. Common block sizes include:
- 512 bytes – Default, matches traditional hard drive sectors
- 1024 bytes (1K) – Good balance for most operations
- 4096 bytes (4K) – Modern disk sector size, optimal for SSDs
- 1M (1 megabyte) – Faster for large file operations
Basic dd Command Examples
1. Creating a Simple File Copy
dd if=source.txt of=destination.txtThis creates an exact copy of source.txt as destination.txt.
2. Copying with Specific Block Size
dd if=input.file of=output.file bs=1MUsing a 1MB block size typically improves performance for large files.
3. Creating a File of Specific Size
dd if=/dev/zero of=testfile.dat bs=1M count=100This creates a 100MB file filled with zeros. The output would show:
100+0 records in
100+0 records out
104857600 bytes (105 MB, 100 MiB) copied, 0.123456 s, 850 MB/s
Advanced dd Operations
Disk and Partition Cloning
Warning: Always double-check device names before running these commands. Incorrect usage can destroy data permanently.
Clone Entire Disk
dd if=/dev/sda of=/dev/sdb bs=1M status=progressThis clones the entire /dev/sda disk to /dev/sdb. The status=progress option shows real-time progress.
Clone Specific Partition
dd if=/dev/sda1 of=/dev/sdb1 bs=4M conv=noerror,syncThe conv=noerror,sync options ensure the operation continues even if errors occur, padding with zeros.
Creating Disk Images
Create Complete Disk Image
dd if=/dev/sda of=disk_backup.img bs=1M status=progressThis creates a complete image of /dev/sda in the file disk_backup.img.
Compress Image During Creation
dd if=/dev/sda bs=1M | gzip > disk_backup.img.gzThis pipes the output through gzip to create a compressed image, saving storage space.
Creating Bootable USB Drives
dd if=ubuntu-20.04-desktop-amd64.iso of=/dev/sdx bs=4M status=progress oflag=syncReplace /dev/sdx with your USB device. Always verify the correct device using lsblk or fdisk -l first.
File Conversion and Manipulation
Converting Text Case
dd if=input.txt of=output.txt conv=ucaseConverts all lowercase letters to uppercase. Other conversion options include:
lcase– Convert to lowercaseascii– Convert EBCDIC to ASCIIebcdic– Convert ASCII to EBCDICswab– Swap byte order
Extracting Specific Parts of Files
dd if=large_file.dat of=extracted_part.dat bs=1024 skip=100 count=50This extracts 50 blocks (starting from block 100) of 1024 bytes each from the source file.
Performance Monitoring and Optimization
Monitoring Progress
For long-running operations, monitoring progress is essential:
dd if=/dev/sda of=backup.img bs=1M status=progressSample output:
2147483648 bytes (2.1 GB, 2.0 GiB) copied, 45 s, 47.7 MB/s
4294967296 bytes (4.3 GB, 4.0 GiB) copied, 90 s, 47.7 MB/s
Sending Progress Signals
For versions without status=progress, send SIGUSR1 to display progress:
# In another terminal
kill -USR1 $(pgrep dd)
Optimizing Block Size
Test different block sizes to find optimal performance:
# Test with different block sizes
time dd if=/dev/zero of=test1.dat bs=512 count=2097152
time dd if=/dev/zero of=test2.dat bs=1024 count=1048576
time dd if=/dev/zero of=test3.dat bs=1M count=1024
Security and Data Destruction
Secure Disk Wiping
Single Pass with Zeros:
dd if=/dev/zero of=/dev/sdx bs=1M status=progressSingle Pass with Random Data:
dd if=/dev/urandom of=/dev/sdx bs=1M status=progressMultiple Pass Wipe (DOD 5220.22-M Standard):
# Pass 1: All zeros
dd if=/dev/zero of=/dev/sdx bs=1M status=progress

# Pass 2: All ones
dd if=/dev/zero of=/dev/sdx bs=1M status=progress | tr '\000' '\377'

# Pass 3: Random data
dd if=/dev/urandom of=/dev/sdx bs=1M status=progress
Error Handling and Recovery
Handling Bad Sectors
dd if=/dev/sda of=recovery.img bs=512 conv=noerror,syncThe noerror option continues operation despite read errors, while sync pads error blocks with zeros.
Using ddrescue for Better Recovery
For damaged disks, consider using ddrescue instead:
ddrescue /dev/sda recovery.img recovery.logBackup and Restore Operations
Master Boot Record (MBR) Operations
Backup MBR:
dd if=/dev/sda of=mbr_backup.img bs=512 count=1Restore MBR:
dd if=mbr_backup.img of=/dev/sda bs=512 count=1Partition Table Backup
# Backup first 63 sectors (includes MBR and partition table)
dd if=/dev/sda of=partition_table_backup.img bs=512 count=63
Network Operations with dd
Remote Disk Cloning via SSH
# Clone local disk to remote system
dd if=/dev/sda bs=1M | ssh user@remote_host "dd of=/dev/sdb bs=1M"

# Clone remote disk to local system
ssh user@remote_host "dd if=/dev/sda bs=1M" | dd of=remote_disk.img bs=1M
Creating Compressed Network Backup
dd if=/dev/sda bs=1M | gzip | ssh user@backup_server "cat > disk_backup_$(date +%Y%m%d).img.gz"Common dd Command Options
| Option | Description | Example |
|---|---|---|
| bs=SIZE | Block size | bs=1M, bs=4096 |
| count=N | Copy N blocks | count=100 |
| skip=N | Skip N blocks from input | skip=10 |
| seek=N | Skip N blocks in output | seek=5 |
| conv=CONV | Convert data format | conv=ucase,noerror |
| iflag=FLAG | Input flags | iflag=direct |
| oflag=FLAG | Output flags | oflag=sync |
| status=LEVEL | Progress display | status=progress |
Safety Best Practices
Always Verify Before Executing
- Check device names:
lsblk fdisk -l - Use read-only test first:
dd if=/dev/sda of=/dev/null bs=1M count=1 - Double-check syntax: Verify
if=andof=parameters - Backup critical data: Always have backups before destructive operations
Common Mistakes to Avoid
- Swapping if and of parameters – This destroys source data
- Wrong device identification – Always verify with
lsblk - Insufficient destination space – Check available space first
- Running as wrong user – Some operations require root privileges
- Not using status=progress – Makes monitoring impossible
Troubleshooting Common Issues
Permission Denied Errors
# Solution: Run with sudo
sudo dd if=/dev/sda of=backup.img bs=1M status=progress
No Space Left on Device
# Check available space
df -h /destination/path

# Use compression to save space
dd if=/dev/sda bs=1M | gzip > backup.img.gz
Operation Too Slow
# Increase block size
dd if=/dev/sda of=/dev/sdb bs=1M status=progress

# Use direct I/O flags
dd if=/dev/sda of=/dev/sdb bs=1M oflag=direct iflag=direct status=progress
Alternative Tools and When to Use Them
While dd is powerful, consider these alternatives for specific use cases:
- cp – For simple file copying without low-level access
- rsync – For network copying with resume capability
- ddrescue – For recovering data from damaged disks
- partclone – For filesystem-aware partition cloning
- clonezilla – For GUI-based disk cloning
Conclusion
The dd command is an incredibly powerful tool for low-level file operations, disk cloning, and system administration tasks. While its potential for data destruction demands respect and caution, mastering dd opens up possibilities for advanced system management, forensics, and backup operations that aren’t possible with higher-level tools.
Remember to always verify your commands, test on non-critical systems first, and maintain proper backups. With proper usage, dd becomes an invaluable tool in your Linux toolkit for handling complex data operations that require byte-level precision.
Whether you’re creating disk images, cloning systems, or performing forensic analysis, the dd command provides the low-level control necessary for professional system administration and data management tasks.
Related Posts
cp Command Linux: Copy Files and Directories with Examples and Best Practices
The cp command is one of the most fundamental and frequently used commands in Linux systems. It allows you to...
mv Command in Linux: Complete Guide to Moving and Renaming Files
The mv command is one of the most fundamental and frequently used commands in Linux systems. Whether you're a system...
lsblk Command Linux: Complete Guide to List and Manage Block Devices
The lsblk command is an essential Linux utility that displays information about block devices in a tree-like format. Whether you're...
wipe Command Linux: Complete Guide to Secure File Deletion and Data Wiping
The wipe command in Linux is a powerful utility designed for secure file deletion that goes far beyond the standard...

SQL Clone Tables: Duplicating Table Structures and Data
In the world of database management, there often arises a need to create exact copies of existing tables. Whether you're...
parted Command Linux: Complete Guide to Disk Partition Management
The parted command is a powerful disk partition manipulation program in Linux that allows you to create, resize, move, and...
rm Command in Linux: Complete Guide to Delete Files and Directories Safely
The rm command is one of the most powerful and potentially dangerous commands in Linux. It stands for "remove" and...
losetup Command Linux: Complete Guide to Setup and Manage Loop Devices
The losetup command is a powerful Linux utility that allows you to associate loop devices with regular files, enabling you...
shred Command Linux: Complete Guide to Securely Delete Files and Protect Data
When you delete files in Linux using the standard rm command, the data isn't actually removed from your storage device....
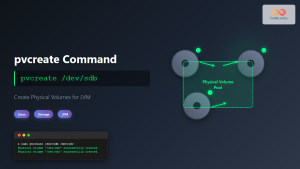
pvcreate Command Linux: Complete Guide to Creating Physical Volumes for LVM
The pvcreate command is a fundamental tool in Linux Logical Volume Management (LVM) that initializes storage devices as physical volumes....
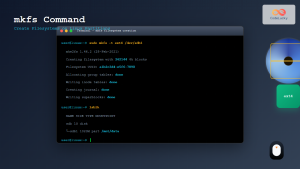
mkfs Command Linux: Complete Guide to Creating Filesystems on Partitions
The mkfs command in Linux is a fundamental tool for creating filesystems on disk partitions. Whether you're setting up a...

du Command Linux: Display Directory Size and Disk Usage Explained with Examples
The du (disk usage) command in Linux is a powerful tool that allows users to measure directory size, analyze disk...


