
The curl command is one of the most powerful and versatile tools in the Linux command-line arsenal for transferring data from or to servers. Whether you’re downloading files, testing APIs, or automating web requests, curl provides a comprehensive solution for network data transfer operations.
What is curl Command?
curl (Client URL) is a command-line tool that supports various protocols including HTTP, HTTPS, FTP, FTPS, SCP, SFTP, and many others. It’s designed to transfer data to or from servers without user interaction, making it perfect for scripts, automation, and testing purposes.
Key Features of curl:
- Supports multiple protocols (HTTP/HTTPS, FTP, SMTP, etc.)
- Handles cookies, authentication, and SSL certificates
- Supports file uploads and downloads
- Provides detailed request/response information
- Works with REST APIs and web services
- Cross-platform compatibility
Installing curl on Linux
Most Linux distributions come with curl pre-installed. If it’s not available, you can install it using your distribution’s package manager:
# Ubuntu/Debian
sudo apt update && sudo apt install curl

# CentOS/RHEL/Fedora
sudo yum install curl
# or
sudo dnf install curl

# Arch Linux
sudo pacman -S curl
Basic curl Syntax
The basic syntax of curl command is:
curl [options] [URL]Essential curl Examples
1. Simple GET Request
The most basic use of curl is to fetch content from a URL:
curl https://httpbin.org/getOutput:
{
  "args": {},
  "headers": {
    "Accept": "*/*",
    "Host": "httpbin.org",
    "User-Agent": "curl/7.68.0"
  },
  "origin": "192.168.1.100",
  "url": "https://httpbin.org/get"
}
2. Save Output to File
Use the -o option to save the response to a file:
curl -o response.json https://httpbin.org/getOr use -O to save with the original filename:
curl -O https://example.com/file.txt3. Follow Redirects
Many URLs redirect to other locations. Use -L to follow redirects:
curl -L https://bit.ly/shortened-url4. Display Headers
View response headers using -I (HEAD request) or -i (include headers with body):
curl -I https://httpbin.org/getOutput:
HTTP/2 200
date: Mon, 25 Aug 2025 21:43:15 GMT
content-type: application/json
content-length: 294
server: gunicorn/19.9.0
access-control-allow-origin: *
Working with HTTP Methods
POST Requests
Send data using POST method with -X POST and -d for data:
curl -X POST -d "name=John&[email protected]" https://httpbin.org/postJSON POST Request
Send JSON data with proper content-type header:
curl -X POST \
  -H "Content-Type: application/json" \
  -d '{"name":"John","email":"[email protected]"}' \
  https://httpbin.org/post
PUT and DELETE Requests
# PUT request
curl -X PUT -d "data=updated" https://httpbin.org/put

# DELETE request
curl -X DELETE https://httpbin.org/delete
Authentication Methods
Basic Authentication
curl -u username:password https://httpbin.org/basic-auth/username/passwordBearer Token Authentication
curl -H "Authorization: Bearer your_token_here" https://api.example.com/protectedFile Upload and Download
Download Files
Download files with progress bar and resume capability:
# Download with progress bar
curl -# -o ubuntu.iso https://releases.ubuntu.com/20.04/ubuntu-20.04.3-desktop-amd64.iso

# Resume interrupted download
curl -C - -o ubuntu.iso https://releases.ubuntu.com/20.04/ubuntu-20.04.3-desktop-amd64.iso
Upload Files
Upload files using -F for form data or --upload-file:
# Form upload
curl -F "[email protected]" https://httpbin.org/post

# Direct file upload
curl --upload-file local-file.txt https://example.com/upload
Advanced curl Options
Custom Headers
Add custom headers to your requests:
curl -H "User-Agent: MyApp/1.0" \
     -H "Accept: application/json" \
     -H "X-API-Key: secret123" \
     https://api.example.com/data
Cookies Management
Handle cookies for session management:
# Save cookies to file
curl -c cookies.txt https://httpbin.org/cookies/set/session/abc123

# Send cookies from file
curl -b cookies.txt https://httpbin.org/cookies
Timeout and Retry Options
# Set connection and max time limits
curl --connect-timeout 10 --max-time 30 https://example.com

# Retry on failure
curl --retry 3 --retry-delay 2 https://unreliable-server.com
SSL/TLS Options
Certificate Verification
# Ignore SSL certificate errors (not recommended for production)
curl -k https://self-signed.badssl.com/

# Use specific CA certificate
curl --cacert /path/to/ca-cert.pem https://secure-site.com

# Client certificate authentication
curl --cert client.pem --key client.key https://mutual-tls-site.com
Debugging and Verbose Output
Verbose Mode
Use -v for detailed connection information:
curl -v https://httpbin.org/getSample Output:
* Trying 34.205.153.105:443...
* TCP_NODELAY set
* Connected to httpbin.org (34.205.153.105) port 443 (#0)
* ALPN, offering h2
* ALPN, offering http/1.1
* successfully set certificate verify locations:
* TLSv1.3 (OUT), TLS handshake, Client hello (1):
* TLSv1.3 (IN), TLS handshake, Server hello (2):
> GET /get HTTP/2
> Host: httpbin.org
> user-agent: curl/7.68.0
> accept: */*
Trace and Debug
# Trace ASCII
curl --trace-ascii debug.txt https://httpbin.org/get

# Show only response time
curl -w "%{time_total}\n" -o /dev/null -s https://example.com
Working with APIs
REST API Example
Here’s a complete example of working with a REST API:
# Create a resource
curl -X POST \
  -H "Content-Type: application/json" \
  -H "Authorization: Bearer TOKEN" \
  -d '{
    "title": "New Post",
    "body": "This is the content",
    "userId": 1
  }' \
  https://jsonplaceholder.typicode.com/posts

# Get all resources
curl -H "Accept: application/json" \
     https://jsonplaceholder.typicode.com/posts

# Update a resource
curl -X PUT \
  -H "Content-Type: application/json" \
  -d '{
    "id": 1,
    "title": "Updated Post",
    "body": "Updated content",
    "userId": 1
  }' \
  https://jsonplaceholder.typicode.com/posts/1

# Delete a resource
curl -X DELETE https://jsonplaceholder.typicode.com/posts/1
curl Configuration File
Create a .curlrc file in your home directory for default options:
# ~/.curlrc
user-agent = "MyApp/2.0"
referer = ";auto"
connect-timeout = 60
max-time = 120
show-error
location
Practical curl Scripts
Website Health Check Script
#!/bin/bash
# health_check.sh

websites=(
    "https://google.com"
    "https://github.com"
    "https://stackoverflow.com"
)

for site in "${websites[@]}"; do
    response=$(curl -o /dev/null -s -w "%{http_code}" "$site")
    if [ "$response" -eq 200 ]; then
        echo "✅ $site is UP (HTTP $response)"
    else
        echo "❌ $site is DOWN (HTTP $response)"
    fi
done
API Response Time Monitor
#!/bin/bash
# api_monitor.sh

API_URL="https://api.example.com/health"

while true; do
    response_time=$(curl -o /dev/null -s -w "%{time_total}" "$API_URL")
    timestamp=$(date '+%Y-%m-%d %H:%M:%S')
    echo "$timestamp - Response time: ${response_time}s"
    sleep 30
done
curl vs wget: When to Use Which?
| Feature | curl | wget |
|---|---|---|
| Protocol Support | HTTP, HTTPS, FTP, FTPS, SCP, SFTP, LDAP, etc. | HTTP, HTTPS, FTP |
| Library Support | libcurl available | Command-line only |
| Recursive Download | No | Yes |
| API Testing | Excellent | Basic |
| Upload Capabilities | Excellent | Limited |
Common curl Error Codes and Solutions
Error Code 6: Couldn’t resolve host
curl: (6) Could not resolve host: nonexistent.comSolution: Check the URL spelling and internet connectivity.
Error Code 7: Failed to connect
curl: (7) Failed to connect to example.com port 80: Connection refusedSolution: Verify the server is running and the port is correct.
Error Code 35: SSL connect error
curl: (35) SSL connect errorSolution: Use -k to ignore SSL errors or update certificates.
Performance Optimization Tips
Connection Reuse
For multiple requests to the same server, reuse connections:
# Use connection pooling
curl --keepalive-time 60 https://api.example.com/endpoint1
curl --keepalive-time 60 https://api.example.com/endpoint2
Parallel Requests
Use GNU parallel or xargs for concurrent requests:
# Using GNU parallel
echo -e "url1\nurl2\nurl3" | parallel -j 3 curl

# Using xargs
echo -e "url1\nurl2\nurl3" | xargs -n 1 -P 3 curl
Security Best Practices
- Never ignore SSL certificates in production: Avoid using
-kflag - Protect sensitive data: Use environment variables for API keys
- Validate certificates: Use
--cacertfor custom CA certificates - Limit redirects: Use
--max-redirsto prevent redirect loops - Set timeouts: Always use
--connect-timeoutand--max-time
Troubleshooting Common Issues
Debugging Network Issues
# Test connectivity step by step
curl -v --trace-ascii trace.txt https://problematic-site.com

# Check DNS resolution
nslookup problematic-site.com

# Test with different user agent
curl -A "Mozilla/5.0" https://site-blocking-curl.com
Handling Special Characters
# URL encode special characters
curl "https://example.com/search?q=hello%20world"

# Use --data-urlencode for automatic encoding
curl --data-urlencode "search=hello world" https://example.com/search
Conclusion
The curl command is an indispensable tool for Linux users, developers, and system administrators. Its versatility in handling various protocols, authentication methods, and data formats makes it perfect for everything from simple file downloads to complex API integrations.
Key takeaways:
- Master basic GET/POST operations for everyday use
- Utilize authentication and header options for API work
- Implement proper error handling and timeouts in scripts
- Follow security best practices, especially with SSL/TLS
- Use verbose mode and debugging options for troubleshooting
With the examples and techniques covered in this guide, you’re now equipped to leverage curl’s full potential for efficient data transfer and web service interaction in your Linux environment.
Related Posts
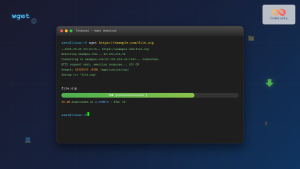
wget Command Linux: Complete Guide to Download Files from Internet
The wget command is one of the most powerful and versatile tools in Linux for downloading files from the internet....

ftp Command Linux: Complete Guide to File Transfer Protocol Client Operations
The ftp command in Linux is a powerful client utility for transferring files between local and remote systems using the...
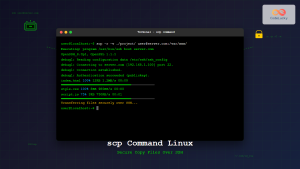
scp Command Linux: Complete Guide to Secure File Transfer Over SSH
The scp (Secure Copy Protocol) command is one of the most essential tools in Linux for securely transferring files between...
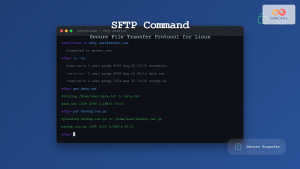
sftp Command Linux: Complete Guide to Secure File Transfer Protocol
The sftp command (Secure File Transfer Protocol) is a powerful Linux utility that provides secure file transfer capabilities over an...

PHP File Download: Serving Files to Users
In the world of web development, providing users with the ability to download files is a common requirement. Whether it's...

PHP SMTP: Sending Emails via SMTP Servers
📧 In today's interconnected world, email communication remains a cornerstone of both personal and business interactions. As a PHP developer,...

rsync Command Linux: Complete Guide to Sync Files and Directories Efficiently
The rsync command is one of the most powerful and versatile file synchronization utilities available in Linux systems. Whether you're...

PHP RESTful APIs: Creating Web Services
In today's interconnected digital landscape, RESTful APIs have become the backbone of modern web applications. As a PHP developer, mastering...
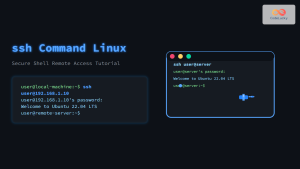
ssh Command Linux: Secure Shell Remote Access Tutorial with Examples
The ssh command in Linux, short for Secure Shell, is one of the most essential tools for system administrators, developers,...
tcpdump Command Linux: Complete Guide to Network Packet Capture and Analysis
The tcpdump command is one of the most powerful network analysis tools available in Linux systems. It allows system administrators...
openssl Command Linux: Complete Guide to Cryptography and SSL Certificate Management
The openssl command is one of the most powerful and versatile cryptographic tools available in Linux systems. This comprehensive toolkit...
pipe Command Linux: Complete Guide to Connecting Commands with Pipes
The pipe command in Linux is one of the most powerful and fundamental concepts that allows you to connect multiple...


