Setting up a robust C++ development environment is crucial for any aspiring or seasoned programmer. This comprehensive guide will walk you through the process of installing and configuring a C++ environment on various operating systems. We'll cover everything from choosing the right compiler to setting up an Integrated Development Environment (IDE) for optimal productivity.
Choosing the Right Compiler
Before diving into the installation process, it's essential to understand the role of a compiler in C++ development. A compiler translates your human-readable C++ code into machine-executable instructions.
🔧 Popular C++ compilers include:
- GCC (GNU Compiler Collection)
- Clang
- Microsoft Visual C++ Compiler
Each compiler has its strengths, and the choice often depends on your operating system and specific project requirements.
Installing a C++ Compiler
Windows
For Windows users, we'll focus on setting up the Microsoft Visual C++ compiler, which comes bundled with Visual Studio.
- Visit the official Visual Studio website (https://visualstudio.microsoft.com/).
- Download the Visual Studio Community edition (free for individual developers).
- Run the installer and select the "Desktop development with C++" workload.
- Click "Install" and wait for the process to complete.
// Test your installation with this simple C++ program
#include <iostream>

int main() {
    std::cout << "Hello, C++ World!" << std::endl;
    return 0;
}
Save this as hello.cpp and compile it using the Developer Command Prompt:
cl /EHsc hello.cpp
Run the resulting hello.exe to see the output.
macOS
On macOS, we'll use the Clang compiler that comes with Xcode.
- Open the Terminal app.
- Install Xcode Command Line Tools by running:
xcode-select --install
- Follow the on-screen instructions to complete the installation.
Test your installation:
// Save this as hello.cpp
#include <iostream>

int main() {
    std::cout << "Hello, C++ World!" << std::endl;
    return 0;
}
Compile and run:
g++ hello.cpp -o hello
./hello
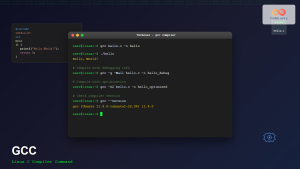
Linux
Most Linux distributions come with GCC pre-installed. If not, you can easily install it.
For Ubuntu or Debian-based systems:
sudo apt-get update
sudo apt-get install build-essential
For Fedora or Red Hat-based systems:
sudo dnf groupinstall "Development Tools"
Test your installation with the same hello.cpp program used in the macOS example.
Setting Up an Integrated Development Environment (IDE)
While you can write C++ code in any text editor, an IDE can significantly boost your productivity with features like code completion, debugging, and project management.
Visual Studio Code
Visual Studio Code is a lightweight, cross-platform IDE that's highly customizable.
- Download and install VS Code from https://code.visualstudio.com/
- Open VS Code and go to the Extensions view (Ctrl+Shift+X)
- Search for and install the "C/C++" extension by Microsoft
To configure VS Code for C++ development:
- Create a new folder for your C++ project
- Open this folder in VS Code
- Create a new file called
tasks.jsonin the.vscodedirectory:
{
    "version": "2.0.0",
    "tasks": [
        {
            "type": "shell",
            "label": "g++ build active file",
            "command": "/usr/bin/g++",
            "args": [
                "-g",
                "${file}",
                "-o",
                "${fileDirname}/${fileBasenameNoExtension}"
            ],
            "options": {
                "cwd": "/usr/bin"
            },
            "problemMatcher": [
                "$gcc"
            ],
            "group": {
                "kind": "build",
                "isDefault": true
            }
        }
    ]
}
This configuration allows you to build C++ files with a simple keyboard shortcut (Ctrl+Shift+B).
CLion
For those looking for a more robust, C++-specific IDE, JetBrains' CLion is an excellent choice.
- Download CLion from https://www.jetbrains.com/clion/
- Follow the installation wizard
- When you first open CLion, it will detect your compiler and set up the environment automatically
CLion comes with built-in support for CMake, a popular build system for C++ projects. Here's a simple CMakeLists.txt file to get you started:
cmake_minimum_required(VERSION 3.10)
project(MyProject)

set(CMAKE_CXX_STANDARD 17)

add_executable(MyProject main.cpp)
Advanced Configuration
Setting Up a Build System
For larger projects, a build system can help manage dependencies and streamline the compilation process. CMake is a popular choice due to its cross-platform compatibility.
Here's a more advanced CMakeLists.txt example:
cmake_minimum_required(VERSION 3.10)
project(AdvancedProject)

set(CMAKE_CXX_STANDARD 17)
set(CMAKE_CXX_STANDARD_REQUIRED ON)

# Add source files
file(GLOB SOURCES "src/*.cpp")

# Create executable
add_executable(${PROJECT_NAME} ${SOURCES})

# Include directories
target_include_directories(${PROJECT_NAME} PRIVATE include)

# Link libraries (example with OpenSSL)
find_package(OpenSSL REQUIRED)
target_link_libraries(${PROJECT_NAME} OpenSSL::SSL OpenSSL::Crypto)
This setup assumes a project structure like:
AdvancedProject/
├── CMakeLists.txt
├── include/
│   └── header_files.h
└── src/
    └── source_files.cpp
Configuring Compiler Flags
Compiler flags can help catch potential errors and optimize your code. Here's how to set them up in CMake:
if(MSVC)
    target_compile_options(${PROJECT_NAME} PRIVATE /W4 /WX)
else()
    target_compile_options(${PROJECT_NAME} PRIVATE -Wall -Wextra -Wpedantic -Werror)
endif()
These flags enable warnings and treat them as errors, encouraging you to write cleaner, more robust code.
Debugging Your C++ Programs
Effective debugging is crucial for C++ development. Most IDEs provide built-in debugging capabilities, but let's look at how to use GDB (GNU Debugger) from the command line:
- Compile your program with debugging symbols:
g++ -g myprogram.cpp -o myprogram
- Start GDB:
gdb ./myprogram
- Set a breakpoint at line 10:
(gdb) break 10
- Run the program:
(gdb) run
- Once the program hits the breakpoint, you can:
- Print variable values:
print variable_name - Step through the code:
nextorstep - Continue execution:
continue
- Print variable values:
Managing Dependencies
As your C++ projects grow, you'll likely need to incorporate external libraries. Here are two popular methods for managing dependencies:
vcpkg
vcpkg is a C++ package manager for Windows, Linux, and macOS.
- Clone the vcpkg repository:
git clone https://github.com/Microsoft/vcpkg.git
- Run the bootstrap script:
./vcpkg/bootstrap-vcpkg.sh
- Install a package:
./vcpkg/vcpkg install boost
- Integrate with your build system:
./vcpkg/vcpkg integrate install
Conan
Conan is another popular C++ package manager.
- Install Conan:
pip install conan
- Create a
conanfile.txtin your project directory:
[requires]
boost/1.75.0

[generators]
cmake
- Install dependencies:
conan install .
- In your
CMakeLists.txt, add:
include(${CMAKE_BINARY_DIR}/conanbuildinfo.cmake)
conan_basic_setup()
Optimizing Your C++ Environment
To get the most out of your C++ development environment, consider these tips:
- Use precompiled headers: For large projects, precompiled headers can significantly reduce compilation times.
// stdafx.h
#pragma once

#include <vector>
#include <string>
#include <iostream>
// Add other frequently used headers
In your CMakeLists.txt:
target_precompile_headers(${PROJECT_NAME} PRIVATE include/stdafx.h)
- Enable compiler optimizations: For release builds, enable optimizations:
target_compile_options(${PROJECT_NAME} PRIVATE
    $<$<CONFIG:Release>:-O3>
    $<$<CONFIG:Debug>:-O0 -g>
)
- Use ccache: ccache can speed up recompilation by caching previous compilations.
Install ccache and add to your CMakeLists.txt:
find_program(CCACHE_PROGRAM ccache)
if(CCACHE_PROGRAM)
    set_property(GLOBAL PROPERTY RULE_LAUNCH_COMPILE "${CCACHE_PROGRAM}")
endif()
Conclusion
Setting up a robust C++ development environment is a crucial step in your journey as a C++ programmer. By carefully choosing and configuring your compiler, IDE, and build tools, you can create a powerful and efficient workspace for your C++ projects.
Remember, the perfect setup may vary depending on your specific needs and preferences. Don't be afraid to experiment with different tools and configurations to find what works best for you.
Happy coding! 🚀💻
Related Posts
g++ Command Linux: Complete Guide to Compile C++ Programs Efficiently
The g++ command is one of the most essential tools for C++ developers working on Linux systems. As part of...

C Compilers: Choosing and Using Different C Compilers
C programming is a powerful and versatile language that has stood the test of time. One of the key components...

C++ Best Practices: Writing Clean and Efficient C++ Code
C++ is a powerful and versatile programming language, but with great power comes great responsibility. Writing clean and efficient C++...
C++ Hello World: Your First C++ Program
Welcome to the exciting world of C++ programming! 🚀 In this comprehensive guide, we'll walk you through creating your very...

C Environment Setup: Installation and Configuration
Welcome to the world of C programming! 🖥️ Whether you're a beginner taking your first steps into coding or an...

C++ Syntax: Basic Rules and Structure
C++ is a powerful and versatile programming language that has stood the test of time. Its syntax, while initially intimidating...

C++ Variables: Declaring and Initializing
In the world of C++ programming, variables are the building blocks that allow us to store and manipulate data. Understanding...
gcc Command Linux: Complete Guide to Compiling C Programs with Examples
The gcc (GNU Compiler Collection) is one of the most essential tools for C programmers working on Linux systems. This...
C++ Modules: Improved Code Organization (C++20)
C++ has long been a powerhouse in the world of programming, but it's not without its challenges. One of the...
C vs C++: Key Differences and When to Use Each
In the world of programming languages, C and C++ stand as two titans, each with its own strengths and use...

C++ Attributes: [[noreturn]], [[deprecated]], and More
C++ attributes provide a standardized way to specify additional information about various elements in your code. These powerful features allow...

C++ Introduction: Language Overview and History
C++ stands as a titan in the world of programming languages, renowned for its power, flexibility, and efficiency. This article...